Support our educational content for free when you purchase through links on our site. Learn more
Pi Power! 8 New Projects & Pi 5 Deep Dive (2026) ✨
Welcome, fellow innovators and curious minds, to Why Pi™! Ever wondered how a credit-card-sized computer could revolutionize everything from your home network to cutting-edge AI? You’re in the right place! We’re diving headfirst into the vibrant world of Raspberry Pi, exploring not just what it is, but the incredible things you can build with it. From boosting your digital privacy with a custom ad-blocker to transforming your living room into a smart home hub, we’ve curated 8 new, exciting projects that showcase the Pi’s unparalleled versatility. Plus, we’re giving you our expert, no-holds-barred review of the game-changing Raspberry Pi 5, a tiny titan that’s redefining what’s possible. Get ready to unlock a universe of possibilities – because with over 30 million units sold worldwide, the Raspberry Pi isn’t just a computer; it’s a movement.
Key Takeaways
- The Raspberry Pi 5 is a significant leap forward, offering 2-3x CPU/GPU performance and crucial PCIe SSD support, making it ideal for demanding projects and even light desktop use.
- Power and storage are paramount: Always invest in a high-quality, official power supply and a fast, reliable microSD card (or an NVMe SSD for the Pi 5) to ensure stability and performance.
- The Raspberry Pi is incredibly versatile, capable of powering projects from privacy-enhancing Pi-hole servers and smart home automation hubs to AI/ML edge computing and retro gaming consoles.
- Community and resources are abundant: Don’t hesitate to leverage the vast online community and official documentation for troubleshooting and inspiration.
- Security is crucial: Always change default passwords, keep your software updated, and consider implementing a firewall for any internet-connected Pi projects.
👉 Shop Raspberry Pi Essentials & Accessories:
- Raspberry Pi 5 (8GB Model): Amazon | Pimoroni | Adafruit | Raspberry Pi Official Website
- Official Raspberry Pi 5 Power Supply: Amazon | Pimoroni | Adafruit | Raspberry Pi Official Website
- SanDisk Extreme PRO microSD Cards: Amazon | Walmart
- Argon ONE V3 Case for Raspberry Pi 5: Amazon | Argon40 Official Website
- Raspberry Pi Camera Module 3: Amazon | Pimoroni | Adafruit | Raspberry Pi Official Website
Table of Contents
- ⚡️ Quick Tips and Facts: Your Raspberry Pi Essentials
- 🕰️ The Raspberry Pi Journey: A Brief History of Innovation
- 🤔 What is a Raspberry Pi, Really? Unpacking the Tiny Powerhouse
- 🚀 Getting Started with Raspberry Pi: Your First Steps to Creation
- 💡 Top Raspberry Pi Projects: Unleash Your Inner Innovator
- 1. 🛡️ Boost Your Digital Privacy: The Ultimate Pi-hole & VPN Guide
- WTF is a Pi-hole? Ad Blocking & DNS Filtering Explained
- Setting Up Your Pi-hole: A Step-by-Step Walkthrough
- Pre-Installation Checklist: What You’ll Need
- Installing Raspberry Pi OS & Initial Setup
- SSH into Your Pi: Remote Access Made Easy
- Update Raspberry Pi OS: Keeping Things Fresh
- Setting a Static IP Address: Pi-hole’s Foundation
- Installing Pi-hole: The Magic Command!
- Changing the Pi-hole Web GUI Admin Password
- Configuring Devices to Use the Pi-hole: Network-Wide Ad Blocking
- Testing Ad Blocking: See It In Action!
- Updating Your Pi-hole: Staying Secure & Effective
- Firewall Considerations for Pi-hole: Keeping It Safe
- Advanced Pi-hole: Unbound DNS for Ultimate Privacy
- Beyond Pi-hole: Raspberry Pi as a Personal VPN Server
- 2. 🏠 Smart Home Automation Hub: Your Pi, Your Rules
- 3. 🧠 AI & Machine Learning on the Edge: Raspberry Pi’s Brain Power
- 4. 🎮 Retro Gaming & Media Centers: Your Entertainment Hub
- 5. 🌐 Network Attached Storage (NAS) & File Servers: Your Personal Cloud
- 6. ☁️ Cloud Alternatives: Self-Hosting with Nextcloud & More
- 7. 🤖 Robotics & Automation: Bringing Your Ideas to Life
- 8. 🧪 Experimentation & Learning: The Ultimate STEM Tool
- 1. 🛡️ Boost Your Digital Privacy: The Ultimate Pi-hole & VPN Guide
- 🛠️ Troubleshooting Common Raspberry Pi Issues: Don’t Panic!
- 🔋 Powering Your Pi: Efficiency, Batteries, and UPS Solutions
- 🆚 Raspberry Pi Alternatives: When a Pi Isn’t Quite Right
- 🌟 Top Rated Products for Your Raspberry Pi Journey
- 🎬 Video Version of this Tutorial: Watch and Learn!
- 🤝 Need Help? Join the Why Pi™ Community!
- 🎉 Conclusion: Your Raspberry Pi Adventure Awaits!
- 🔗 Recommended Links: Dive Deeper
- ❓ FAQ: Your Burning Raspberry Pi Questions Answered
- 📚 Reference Links: Our Sources & Further Reading
⚡️ Quick Tips and Facts: Your Raspberry Pi Essentials
Welcome, fellow digital adventurers, to Why Pi™! We’re thrilled you’re diving into the incredible world of Raspberry Pi with us. Before we embark on our journey, let’s arm you with some rapid-fire facts and expert tips to get your gears turning. Think of this as your pre-flight checklist for maximum Pi-powered fun! 🚀
- Tiny but Mighty: The Raspberry Pi is a credit-card-sized computer that packs a surprising punch. Don’t let its diminutive stature fool you; it’s capable of everything from basic desktop tasks to complex automation and AI projects.
- Affordable Innovation: One of the Pi’s greatest strengths is its accessibility. With models ranging from budget-friendly options to more powerful iterations like the Raspberry Pi 5, there’s a Pi for every project and every pocket.
- OS Flexibility: While Raspberry Pi OS (formerly Raspbian) is the official and most popular choice, you’re not limited! You can run various Linux distributions, media centers like LibreELEC, or even specialized operating systems for retro gaming.
- GPIO Pins are Your Friends: Those rows of pins on your Pi? They’re General Purpose Input/Output (GPIO) pins, and they’re the gateway to connecting external hardware like LEDs, sensors, motors, and cameras. This is where the real DIY magic happens! ✨
- Power is Paramount: A stable and sufficient power supply is crucial. As our engineers often lament, “Underpowering your Pi is like trying to run a marathon on a single sip of water – it just won’t end well!” Always opt for the official power supply or a high-quality alternative that meets the Pi’s specific requirements. More on this later!
- SD Card Savvy: Your Pi’s operating system lives on a microSD card. Invest in a high-quality, reputable brand to avoid frustrating data corruption and ensure smooth performance.
- Community Power: The Raspberry Pi community is vast, vibrant, and incredibly helpful. Stuck on a project? Chances are someone else has faced the same challenge and shared a solution online. Don’t be shy to search forums or join communities!
- The Pi 5 is a Game Changer: The latest iteration, the Raspberry Pi 5, boasts significant performance upgrades, including faster CPU/GPU, PCIe SSD support, and enhanced display capabilities. It’s pushing the boundaries of what a single-board computer can do, as we’ll explore in depth.
🕰️ The Raspberry Pi Journey: A Brief History of Innovation

Every great story has an origin, and the Raspberry Pi’s tale is one of passion, education, and a desire to put computing power into everyone’s hands. Here at Why Pi™, we’ve witnessed its evolution firsthand, from a niche educational tool to a global phenomenon.
The seed for the Raspberry Pi was planted way back in 2006 by a group of academics at the University of Cambridge’s Computer Laboratory. They noticed a worrying decline in the number of students applying for computer science courses, often attributing it to a lack of accessible, programmable hardware in schools. Their vision? A low-cost, credit-card-sized computer that could inspire a new generation of coders and makers.
Fast forward to February 2012, and the first commercial unit, the Raspberry Pi Model B, was launched. It was an instant hit, selling out within minutes! The name “Raspberry” was a playful nod to the tradition of naming computer companies after fruits (think Apple, Apricot, Acorn), while “Pi” was a tribute to the Python programming language, which was intended to be the primary language for teaching on the device.
Since then, the Raspberry Pi Foundation has sold over 30 million units, making it one of the best-selling computers globally. This incredible success isn’t just about sales figures; it’s about the millions of projects, innovations, and learning experiences it has enabled worldwide. From humble beginnings, the Pi has grown into a versatile platform, constantly evolving with new models and capabilities.
This journey, as highlighted in the first YouTube video embedded in this article, truly showcases how a simple idea can blossom into a powerful movement, proving that “the possibilities are limited only by your imagination.”
🤔 What is a Raspberry Pi, Really? Unpacking the Tiny Powerhouse
So, you’ve heard the buzz, seen the tiny boards, and now you’re wondering: what is this Raspberry Pi thing, really? At its core, a Raspberry Pi is a single-board computer (SBC). Imagine a full-fledged desktop computer, shrunk down to the size of a credit card, with all its essential components integrated onto a single circuit board. It’s designed to be affordable, versatile, and easy to use, making it perfect for learning, prototyping, and deploying a vast array of projects.
For a deeper dive into all things Raspberry Pi, check out our dedicated resource: WhyPi – Dive into Raspberry Pi.
Let’s break down what you’ll typically find on a Raspberry Pi board, as explained in the video:
- CPU (Central Processing Unit): The brain of the operation, handling all the calculations and instructions. Modern Pis, like the Pi 4 and Pi 5, feature powerful quad-core ARM processors.
- RAM (Random Access Memory): Where the Pi temporarily stores data it’s actively using. Models vary from 1GB to a hefty 8GB on the Pi 4 and Pi 5.
- Wi-Fi/Bluetooth Module: For wireless connectivity, letting your Pi connect to networks and other devices without extra dongles.
- GPIO Pins: We mentioned these! These General Purpose Input/Output pins are the magic interface for connecting and controlling external electronic components. This is where your Pi truly becomes a physical computing tool.
- Ethernet Port: For a stable, wired network connection, often preferred for server-like applications such as a Pi-hole.
- USB Ports: For connecting peripherals like keyboards, mice, external hard drives, and webcams.
- Micro HDMI Ports: For connecting to monitors or TVs, allowing your Pi to function as a desktop computer or media center. The Pi 4 and Pi 5 can even drive two 4K displays at 60Hz!
- CSI Camera Connector: A dedicated port for connecting the official Raspberry Pi Camera Module.
- DSI Display Connector: For connecting official Raspberry Pi touchscreens.
- MicroSD Card Slot: This is where your operating system and all your data live. It’s essentially the Pi’s hard drive.
When connected to a monitor, keyboard, and mouse, your Raspberry Pi can function just like a traditional desktop computer, allowing you to browse the web, write documents, and even code. But its true power lies in its ability to be embedded into projects, automate tasks, and interact with the physical world.
Why Pi™ Loves the Raspberry Pi: Our Expert Take
As educators and engineers at Why Pi™, we’ve seen countless technologies come and go, but the Raspberry Pi holds a special place in our hearts. Why? Because it embodies everything we believe in: accessibility, innovation, and empowerment.
“I remember my first Pi project,” recounts Sarah, one of our lead educators. “It was a simple weather station. I hooked up a temperature sensor to the GPIO pins, wrote a few lines of Python, and suddenly, I had real-time data! It wasn’t just about the code; it was about seeing the digital world interact with the physical, right there on my desk. That’s the ‘aha!’ moment the Pi consistently delivers.”
From an engineering perspective, the Pi’s versatility is unmatched for its price point. “We’ve used Pis for everything from industrial sensor data logging to prototyping complex IoT solutions,” explains Mark, our senior engineer. “The sheer volume of community support, readily available libraries, and compatible hardware makes it an ideal platform for rapid development. Plus, the low power consumption makes it perfect for always-on server applications or battery-powered projects.”
We also appreciate its role in bridging the gap between theoretical computer science and practical application. It’s a fantastic tool for DIY Electronics enthusiasts and a cornerstone for IoT Development. Whether you’re a student, a hobbyist, or a seasoned professional, the Raspberry Pi offers a playground for creativity and learning.
Choosing Your Pi: A Guide to Raspberry Pi Models (Including the Mighty Pi 5!)
With several Raspberry Pi models available, choosing the right one can feel a bit like picking your starter Pokémon – each has its strengths! While older models like the Pi 3B+ are still fantastic for many projects, the Raspberry Pi 4 and the brand-new Raspberry Pi 5 are the current powerhouses.
Let’s talk about the Raspberry Pi 5, because it’s truly a leap forward. As the team at Ars Technica discovered, using it as a main computer for two weeks revealed its impressive capabilities. It boasts “two to three times” the CPU and GPU power of the Pi 4, making it significantly snappier for desktop use and more demanding applications.
Here’s a quick comparison to help you decide:
| Feature / Model | Raspberry Pi 3B+ | Raspberry Pi 4 Model B | Raspberry Pi 5 | CPU Clock Speed (Max) | RAM (Max) | Max RAM Speed (MHz) | Storage Interface | Power Input (Min) | Cooling Recommended? | Ideal Use Case Pi-hole is a network-wide ad blocker designed to be run on a Raspberry Pi. It blocks ads, malware, and trackers by acting as a DNS server, preventing your devices from resolving known malicious domains. This enhances security and privacy across your entire network.
Setting Up Your Pi-hole: A Step-by-Step Walkthrough
Ready to banish those pesky ads and take control of your network’s privacy? Excellent! Setting up Pi-hole on your Raspberry Pi is a rewarding project that’s surprisingly straightforward. We’ll walk you through it, step by step, drawing on the fantastic insights from Crosstalk Solutions’ “The World’s Greatest Pi-hole and Unbound Tutorial 2023.”
Pre-Installation Checklist: What You’ll Need
Before we dive into the commands, let’s gather our tools. Think of this as preparing your digital workbench.
- A Raspberry Pi:
- Recommendation: A Raspberry Pi 3B+ or Raspberry Pi 4 with at least 2GB of RAM is ideal. While older models can work, the Pi Zero is generally not recommended due to performance limitations, especially if you plan on adding Unbound or other services. Our engineers typically use a Pi 4 4GB or 8GB for robust performance.
- 👉 Shop Raspberry Pi 4 on: Amazon | Walmart | Raspberry Pi Official Website
- MicroSD Card:
- Recommendation: An 8GB card is sufficient, as Pi-hole uses about 1.6GB after setup. However, we always recommend a 16GB or 32GB high-quality Class 10 (U1 or U3) microSD card from a reputable brand like SanDisk or Samsung. This provides extra space for logs, blocklists, and future projects, and generally offers better longevity.
- 👉 Shop SanDisk MicroSD Card on: Amazon | Walmart
- Power Supply:
- Recommendation: The official Raspberry Pi Power Supply for your specific Pi model. This is critical! As Ars Technica points out for the Pi 5, “Power supply is critical; official Pi 5 power supply recommended to avoid low voltage issues.” The same applies to earlier models.
- 👉 Shop Raspberry Pi Power Supply on: Amazon | Raspberry Pi Official Website
- Ethernet Cable:
- Recommendation: A wired Ethernet connection is highly preferred for stability and reliability, especially for a network-critical service like Pi-hole. While Wi-Fi works, a wired connection minimizes potential headaches.
- Computer with SD Card Reader: To flash the operating system onto your microSD card.
Installing Raspberry Pi OS & Initial Setup
Our journey begins with installing the operating system. For a headless (no monitor, keyboard, or mouse attached) Pi-hole setup, we follow Crosstalk Solutions’ advice: Raspberry Pi OS Lite (64-bit) is the way to go. “Raspberry Pi OS Lite is perfect as it has no GUI, saving resources,” they wisely state. This minimal OS uses fewer resources, leaving more for Pi-hole to do its job efficiently.
- Download Raspberry Pi Imager: This is the official and easiest tool for flashing your SD card.
- Download from: Raspberry Pi Imager Official Website
- Launch Raspberry Pi Imager:
- Click “CHOOSE OS” and select
Raspberry Pi OS (other)->Raspberry Pi OS Lite (64-bit). - Click “CHOOSE STORAGE” and select your microSD card. Double-check this step! Selecting the wrong drive can erase important data.
- Click “CHOOSE OS” and select
- Configure OS Settings (Crucial for Headless Setup!):
- Before writing, click the gear icon (⚙️) or press
Ctrl+Shift+Xto access advanced options. - ✅ Set hostname: Choose something memorable, like
pihole-dns. - ✅ Enable SSH: Select “Password authentication” or “Public-key authentication” (more secure for advanced users). This allows you to remotely control your Pi.
- ✅ Set username and password: Create a strong, unique password. The default username is
pi. - ✅ Configure wireless LAN: (Optional, but good for initial setup if you don’t have Ethernet immediately). Enter your Wi-Fi SSID and password.
- ✅ Set locale settings: Choose your timezone and keyboard layout.
- Click “SAVE.”
- Before writing, click the gear icon (⚙️) or press
- Write the OS: Click “WRITE” and confirm. This process will take a few minutes.
- Insert SD Card & Boot: Once the writing is complete, safely eject the microSD card, insert it into your Raspberry Pi, and connect the power supply. Your Pi will now boot up.
SSH into Your Pi: Remote Access Made Easy
Since we’re using Raspberry Pi OS Lite, there’s no graphical interface. We’ll connect to the Pi remotely using SSH (Secure Shell).
- Find Your Pi’s IP Address:
- Method 1 (Recommended): Check your router’s DHCP lease table. Log into your home router’s administration page and look for connected devices. You should see your Pi’s hostname (e.g.,
pihole-dns) and its assigned IP address. - Method 2: Use a network scanner tool like Angry IP Scanner or Fing on your computer or phone.
- Method 3: If you connected a monitor during initial boot, the IP address would be displayed on the console.
- Method 1 (Recommended): Check your router’s DHCP lease table. Log into your home router’s administration page and look for connected devices. You should see your Pi’s hostname (e.g.,
- Open a Terminal/Command Prompt:
- On Linux/macOS: Open the Terminal app.
- On Windows: Use PowerShell or download an SSH client like PuTTY.
- Connect via SSH: Type the following command, replacing
<IP_ADDRESS>with your Pi’s actual IP.ssh pi@<IP_ADDRESS>- If it’s your first time connecting, you might see a security warning about the host’s authenticity. Type
yesto continue. - Enter the password you set during the Raspberry Pi Imager configuration.
- Success! You should now see the command prompt for your Raspberry Pi.
- If it’s your first time connecting, you might see a security warning about the host’s authenticity. Type
Update Raspberry Pi OS: Keeping Things Fresh
Before installing Pi-hole, it’s always good practice to ensure your operating system is up to date. This fetches the latest package lists and upgrades any installed software to their newest versions, ensuring compatibility and security.
sudo apt update && sudo apt upgrade -y This command will take a few minutes, depending on your internet speed and how many updates are available. The -y flag automatically confirms any prompts, so you don’t have to keep typing ‘yes’.
Setting a Static IP Address: Pi-hole’s Foundation
For Pi-hole to reliably serve DNS requests, it needs a static IP address. This means its IP address won’t change, preventing your network from losing its ad-blocking capabilities if the Pi reboots and gets a new IP. There are two main ways to do this:
- DHCP Reservation (Recommended for most home users):
- This is generally the easiest and most robust method. You tell your router to always assign the same IP address to your Pi’s MAC address.
- Steps:
- Log into your router’s administration page.
- Look for sections like “DHCP Reservation,” “Static Lease,” or “Address Reservation.”
- You’ll need your Pi’s MAC address. You can find this by typing
ip ain your Pi’s SSH terminal and looking for theether(Ethernet) orwlan(Wi-Fi) entry. It will look something likeb8:27:eb:xx:xx:xx. - Enter the MAC address and the desired static IP address (e.g.,
192.168.1.100) into your router’s settings. Choose an IP outside your router’s normal DHCP range to avoid conflicts, but within your subnet. - Save the settings and reboot your router (optional, but ensures changes take effect).
- Reboot your Pi:
sudo reboot.
- Manual Static IP Configuration (Advanced):
- You can manually set the static IP directly on the Pi. This is less common for home users but useful in specific network configurations.
- Steps:
- Edit the
dhcpcd.conffile:sudo nano /etc/dhcpcd.conf - Scroll to the bottom of the file and add the following lines, adjusting for your network interface (e.g.,
eth0for Ethernet,wlan0for Wi-Fi) and your network’s specific details:interface eth0 static ip_address=192.168.1.100/24 # Your desired static IP and subnet mask static routers=192.168.1.1 # Your router's IP address (gateway) static domain_name_servers=1.1.1.1 1.0.0.1 # Upstream DNS servers (e.g., Cloudflare) - Press
Ctrl+X, thenY, thenEnterto save and exit. - Reboot your Pi:
sudo reboot.
- Edit the
Installing Pi-hole: The Magic Command!
This is it! The moment you’ve been waiting for. Installing Pi-hole is incredibly simple thanks to its automated script.
- Run the Installation Command:
curl -sSL https://install.pi-hole.net | bashThis command downloads the installation script from the official Pi-hole website and pipes it directly to
bashfor execution. - Follow the Pi-hole Wizard Prompts:
- Welcome Screen: Press
Enter. - Static IP Confirmation: Confirm the static IP address you set earlier. If it’s incorrect, you’ll have a chance to fix it.
- Upstream DNS Provider: Choose your preferred upstream DNS server. Crosstalk Solutions recommends Cloudflare (1.1.1.1) for speed and privacy, but Google, OpenDNS, or others are options. If you plan to use Unbound later, this choice is temporary.
- Block Lists: The default block lists are a great start. You can add more later.
- Install Web Admin Interface: ✅ Select “On” to install the convenient web interface.
- Enable Query Logging: ✅ Select “On” to see what your Pi-hole is blocking.
- Privacy Mode: Choose your preferred level of query logging privacy.
- Installation Complete! You’ll see a summary screen with your Pi-hole’s IP address and the URL for the web interface. Make a note of the admin password shown on this screen – you’ll need it!
- Welcome Screen: Press
Changing the Pi-hole Web GUI Admin Password
For security, it’s a good idea to change the default password to something you can remember (but is still strong!).
pihole -a -p You’ll be prompted to enter a new password twice.
Accessing the Pi-hole Web GUI
Now for the fun part: seeing your Pi-hole in action!
- Open a Web Browser: On any device connected to your network.
- Navigate to the Admin Page: Type
http://<YOUR_PI_HOLE_IP_ADDRESS>/admin(e.g.,http://192.168.1.100/admin). - Log In: Use the password you set or changed.
You’ll be greeted by the Pi-hole Dashboard, a beautiful interface showing your total queries, blocked queries, percentage blocked, and the number of domains currently on your block lists (Crosstalk notes around 158,000 initially). This is your command center for network-wide ad blocking!
Configuring Block Lists
Want to block even more? Pi-hole is highly customizable with additional block lists.
- Find More Block Lists: Resources like firebog.net offer curated lists for various types of blocking (ads, malware, tracking, etc.).
- Add Lists to Pi-hole:
- In the Pi-hole Web GUI, navigate to
Settings->Blocklists. - Paste the URLs of the new block lists (one per line).
- Click
Save and Update.
- In the Pi-hole Web GUI, navigate to
- Update Gravity: Go to
Tools->Update Gravityand clickUpdate. This command downloads and compiles all your block lists into Pi-hole’s blocking database. You’ll see your “Domains on Blocklist” count increase significantly (Crosstalk saw it jump from 158k to over 221k!).
Configuring Devices to Use the Pi-hole: Network-Wide Ad Blocking
Your Pi-hole is installed and running, but your devices aren’t using it yet! This is the final, crucial step to enable network-wide ad blocking.
- Router Configuration (Recommended for network-wide blocking):
- This is the most effective method, as it forces all devices on your network to use Pi-hole for DNS.
- Steps:
- Log into your router’s administration page.
- Look for “DNS Settings,” “WAN Settings,” or “Internet Settings.”
- Change the Primary DNS Server to your Pi-hole’s static IP address (e.g.,
192.168.1.100). - (Optional but recommended) Set the Secondary DNS Server to your Pi-hole’s IP as well, or leave it blank. Do NOT use a public DNS server here (like 1.1.1.1 or 8.8.8.8) if you want all traffic to go through Pi-hole. If your router allows, you can set the secondary DNS to
127.0.0.1(localhost) if you’re running Unbound on the same Pi, or just leave it blank. - Save the settings and reboot your router. This ensures all devices get the new DNS settings.
- Manual Device Configuration (For specific devices):
- You can manually set the DNS server on individual devices (computers, phones, smart TVs). This is useful if you only want certain devices to use Pi-hole, or if your router doesn’t allow custom DNS settings.
- Steps:
- On your device, go to network settings (Wi-Fi or Ethernet).
- Change the DNS server to your Pi-hole’s static IP address.
- Consult your device’s manual for specific instructions.
Testing Ad Blocking: See It In Action!
The proof is in the (ad-free) pudding!
- Visit a Test Site: Open a web browser on a device configured to use Pi-hole.
- Recommended Tool: Crosstalk Solutions suggests using d3ward.github.io/toolz/adblock.html. This tool will show you how many ads and trackers are being blocked by your DNS resolver.
- Browse Your Favorite Sites: Visit websites you know are usually heavy with ads. You should notice a significant reduction or complete absence of advertisements. ✅
- Check Pi-hole Dashboard: Watch the “Queries Blocked” count on your Pi-hole Web GUI dashboard increase as you browse.
Updating Your Pi-hole: Staying Secure & Effective
Just like any software, Pi-hole needs to be updated regularly to get the latest features, bug fixes, and security patches.
sudo pihole -up This command will update the Pi-hole core components, web interface, and FTL (DNS resolver) engine. It’s a good idea to run this command periodically, perhaps once a month, to keep your ad blocker in top shape.
Firewall Considerations for Pi-hole: Keeping It Safe
Security is paramount, especially for a network service. Crosstalk Solutions emphasizes the importance of firewall rules.
- Restrict DNS Port 53: Your Pi-hole listens on port 53 for DNS requests. You generally want to restrict access to this port only from your local network. This prevents external entities from using your Pi-hole as an open DNS resolver, which could lead to abuse.
- Router Firewall: Most home routers have a built-in firewall. Ensure that port 53 (UDP and TCP) is not forwarded from your WAN (internet) to your Pi-hole’s IP address.
- Pi-hole’s Built-in Firewall (UFW): For more granular control, you can install and configure
ufw(Uncomplicated Firewall) on your Raspberry Pi itself.sudo apt install ufw -y sudo ufw enable sudo ufw allow ssh # Allow SSH access sudo ufw allow 53/udp # Allow DNS (UDP) from local network sudo ufw allow 53/tcp # Allow DNS (TCP) from local network sudo ufw allow 80/tcp # Allow HTTP for the web interface sudo ufw allow 443/tcp # Allow HTTPS if you configure it later sudo ufw default deny incoming # Deny all other incoming trafficRemember to adjust
ufw allow 53/udp from 192.168.1.0/24if you want to restrict it to a specific subnet.
Advanced Pi-hole: Unbound DNS for Ultimate Privacy
You’ve got a fantastic ad blocker, but what if you want to take your network privacy to the next level? Enter Unbound DNS Resolver. This is where your Pi-hole stops relying on third-party DNS providers (like Cloudflare or Google) and starts resolving DNS queries directly with the root servers of the internet.
Why is this a big deal? As Crosstalk Solutions explains, “Unbound queries root servers directly, enhancing privacy.” It means no single entity (not even Cloudflare!) sees all your DNS queries. You become your own recursive DNS resolver, significantly reducing your digital footprint and increasing your network’s resilience.
Unbound Setup: Becoming Your Own DNS Resolver
Installing Unbound is straightforward.
- Install Unbound:
sudo apt install unbound -y - Configure Unbound for Pi-hole:
- Create a new configuration file for Unbound:
sudo nano /etc/unbound/unbound.conf.d/pi-hole.conf - Paste the following configuration into the file. This setup ensures Unbound listens on a specific port (5335) on the localhost interface, uses root hints, and enables DNSSEC for enhanced security.
server: # If no logfile is specified, syslog is used # logfile: "/var/log/unbound/unbound.log" verbosity: 0 interface: 127.0.0.1 port: 5335 do-ip4: yes do-udp: yes do-tcp: yes # May be set to "no" if you have IPv6 connectivity do-ip6: no # Use this only when you trust the upstream DNS server to handle DNSSEC. # In this case, we are the upstream DNS server, so we do the validation. # If you are using Unbound as a *forwarder* to another DNS server, # you might set this to "no" and trust the upstream. do-daemonize: yes access-control: 127.0.0.1 allow # The following lines should be in the main unbound.conf, but if you're # creating a separate file, they're good to include for clarity. # private-address: 192.168.0.0/16 # Add your local network ranges here # private-address: 10.0.0.0/8 # private-address: 172.16.0.0/12 # Unbound can fetch root hints automatically, but it's good practice # to ensure they are up-to-date. root-hints: "/var/lib/unbound/root.hints" # Trust anchor for DNSSEC validation auto-trust-anchor-file: "/var/lib/unbound/root.key" # Enable DNSSEC validation harden-dnssec-stripped: yes harden-below-nxdomain: yes harden-referral-path: yes use-caps-for-id: yes # Reduce EDNS reassembly buffer size. # Suggested to reduce fragmentation and improve performance. edns-buffer-size: 1472 # Perform prefetching of close to expired DNS cache entries prefetch: yes # Send minimum amount of information to upstream servers to enhance privacy qname-minimisation: yes # Do not ever give out private addresses from the DNS cache. # This is important if you're using Unbound as a public resolver. # For a local resolver, it's less critical but good practice. # private-domain: "local.lan" # Example: if your local domain is local.lan # Only allow queries from local network # access-control: 192.168.1.0/24 allow # Replace with your local network range - Press
Ctrl+X, thenY, thenEnterto save and exit.
- Create a new configuration file for Unbound:
- Fetch Root Hints: Unbound needs a list of the internet’s root DNS servers.
sudo wget -O /var/lib/unbound/root.hints https://www.internic.net/domain/named.cache - Restart Unbound:
sudo service unbound restart - Test Unbound: You can test if Unbound is working by querying it directly.
dig @127.0.0.1 -p 5335 google.comYou should see a successful response from
google.com.
Using Unbound with Pi-hole: A Match Made in Privacy Heaven
Now that Unbound is running, we tell Pi-hole to use it as its upstream DNS server.
- Open Pi-hole Web GUI: Navigate to
Settings->DNS. - Custom DNS:
- Uncheck all existing upstream DNS servers.
- Under “Custom 1 (IPv4),” enter
127.0.0.1#5335. This tells Pi-hole to send its DNS queries to the Unbound instance running on the same Raspberry Pi, on port 5335. - Click
Save.
- Verify: Your Pi-hole is now using Unbound as its upstream DNS resolver, providing you with enhanced privacy and control over your DNS queries!
Beyond Pi-hole: Raspberry Pi as a Personal VPN Server
While Pi-hole is fantastic for ad blocking, the Raspberry Pi’s capabilities extend far beyond. One of our favorite advanced projects, especially for those concerned about privacy and security, is turning your Pi into a personal VPN server.
Imagine this: you’re at a coffee shop, connected to public Wi-Fi. Normally, your data could be vulnerable. But with a VPN server on your Pi at home, you can securely tunnel all your internet traffic through your home network. This encrypts your data and makes it appear as if you’re browsing from home, protecting you from snooping and bypassing geo-restrictions.
Popular VPN solutions for Raspberry Pi include WireGuard and OpenVPN. We’ve found WireGuard to be particularly efficient and easy to set up. This project, combined with your Pi-hole, creates a formidable privacy and security fortress for your digital life. It’s a fantastic example of how the Pi empowers you to reclaim control over your data.
2. 🏠 Smart Home Automation Hub: Your Pi, Your Rules
Tired of being locked into proprietary smart home ecosystems? Want to automate your lights, thermostats, and sensors without sending all your data to the cloud? The Raspberry Pi is your answer! It’s an ideal, open-source hub for Smart Home Automation, giving you unparalleled control and privacy. This is a prime example of IoT Development at its best.
Home Assistant on Raspberry Pi: The Ultimate Control Center
Our top recommendation for a smart home hub on the Pi is Home Assistant. This powerful, open-source platform allows you to integrate devices from virtually any manufacturer – Philips Hue, IKEA TRÅDFRI, Shelly, TP-Link Kasa, Zigbee, Z-Wave, and countless others – into a single, unified interface.
- Features:
- Vendor Agnostic: Connects to thousands of devices and services.
- Local Control: Prioritizes local communication, meaning your automations often run even without an internet connection, and your data stays on your network.
- Powerful Automations: Create complex rules based on time, sensor readings, presence detection, and more.
- Customizable Dashboard: Design your own interface to monitor and control your home.
- Community Driven: A massive, active community provides extensive documentation and support.
- Benefits:
- Privacy: Keep your smart home data private, away from corporate servers.
- Flexibility: Mix and match devices from different brands without compatibility issues.
- Cost-Effective: Leverage affordable hardware like the Raspberry Pi.
- Learning Opportunity: Dive into YAML configuration and Python scripting.
- Drawbacks:
- Steep Learning Curve: Can be intimidating for beginners due to its depth and flexibility.
- Requires Maintenance: Like any self-hosted solution, it needs occasional updates and troubleshooting.
Our Anecdote: “I used to have five different apps to control my smart home,” says Emily, one of our Why Pi™ educators. “Lights, blinds, thermostat, security camera… it was a nightmare. Then I set up Home Assistant on a Raspberry Pi 4. Now, I have one dashboard, and my ‘good morning’ routine automatically opens the blinds, turns on the kitchen lights, and starts the coffee maker. It’s truly transformative!”
👉 Shop Raspberry Pi 4 on: Amazon | Walmart | Raspberry Pi Official Website Home Assistant Official Website: https://www.home-assistant.io/
DIY IoT Devices: Sensors, Actuators, and More
Beyond just being a hub, your Raspberry Pi can be the smart device itself! With its GPIO pins, you can connect a vast array of sensors and actuators to create custom IoT solutions.
- Environmental Monitoring: Build a sensor array to track temperature, humidity, air quality (using sensors like the BME280 or PMS5003) and display the data on a web dashboard or integrate it into Home Assistant.
- Automated Plant Watering: Connect a soil moisture sensor and a small pump to keep your plants perfectly hydrated.
- Garage Door Opener: Use a relay module and a magnetic contact sensor to remotely open/close and monitor your garage door.
- Smart Pet Feeder: Dispense food at scheduled times or on demand.
These projects are fantastic for learning about DIY Electronics and understanding the fundamentals of the Internet of Things.
3. 🧠 AI & Machine Learning on the Edge: Raspberry Pi’s Brain Power
Who said you need a supercomputer for Artificial Intelligence? The Raspberry Pi, especially the more powerful Pi 4 and Pi 5, is becoming an increasingly capable platform for AI and Machine Learning on the edge. This means running AI models directly on the device, rather than sending data to the cloud, offering benefits in privacy, latency, and offline capability.
Computer Vision Projects: From Security Cams to Object Detection
The Pi’s ability to interface with cameras makes it a natural fit for computer vision.
- Smart Security Camera: Combine a Raspberry Pi Camera Module with open-source software like MotionEyeOS or custom Python scripts using OpenCV. You can set it up to detect motion, identify specific objects (like people or pets), and send alerts.
- Object Detection & Tracking: Train a lightweight TensorFlow Lite model to recognize specific items (e.g., identifying birds at a bird feeder, counting items on a conveyor belt) and process the video stream locally.
- License Plate Recognition: A more advanced project, but achievable with the right libraries and models, for automating gate access or monitoring parking.
These projects often involve processing video streams, which can be resource-intensive. The Raspberry Pi 5’s enhanced CPU and GPU power make it significantly better suited for these tasks compared to previous models.
TinyML & Inference: Running AI Models Locally
TinyML is the field of machine learning focused on developing and deploying models on low-power, resource-constrained devices like microcontrollers and SBCs. The Raspberry Pi is a perfect platform for experimenting with TinyML inference.
- Voice Assistants: Build your own local voice assistant using libraries like Mycroft AI or custom wake word detection models, keeping your voice data private.
- Gesture Recognition: Use a camera or an accelerometer to detect specific hand gestures or movements.
- Predictive Maintenance: Monitor sensor data from machinery and use a trained model to predict potential failures before they occur.
While the Pi 5’s hardware decoding for H.264 is limited (as noted by Ars Technica), its overall processing power for running inference on pre-trained models is a significant step up. This makes it an exciting platform for bringing AI directly to your projects, without relying on constant cloud connectivity.
4. 🎮 Retro Gaming & Media Centers: Your Entertainment Hub
Remember those pixelated adventures and classic arcade sounds? The Raspberry Pi is a time machine for gamers and a versatile hub for all your digital media. It’s one of the most popular and entertaining uses for the tiny computer, transforming it into a dedicated entertainment system.
Recalbox & RetroPie: Relive Gaming Glory
For many of us at Why Pi™, our first “fun” Pi project was a retro gaming console. It’s incredibly satisfying to bring back childhood memories on a device you built yourself. The two titans in this arena are RetroPie and Recalbox.
- RetroPie:
- Features: Built on top of Raspberry Pi OS, it integrates EmulationStation (the frontend), RetroArch (the emulator backend), and various standalone emulators. Supports a vast array of consoles, from Atari to PlayStation 1.
- Benefits: Highly customizable, massive community support, excellent performance on Pi 4/5.
- Drawbacks: Can be more complex to set up for beginners, requires some command-line interaction for advanced configurations.
- Recalbox:
- Features: A complete, ready-to-use operating system focused purely on retro gaming. Simpler installation and configuration.
- Benefits: User-friendly, great for beginners, includes Kodi media center integration.
- Drawbacks: Less customizable than RetroPie, fewer advanced options.
Our Recommendation: If you’re new to Pi gaming, start with Recalbox for its ease of use. If you crave ultimate control and a wider range of emulators, RetroPie is your champion. Both run beautifully on a Raspberry Pi 4 or 5. As Ars Technica aptly puts it, “The Pi 5 becomes the retro-gaming super-console, the Pi 4 becomes the multi-use always-on light-duty server.” This highlights how even older powerful Pis can be repurposed for dedicated fun!
👉 Shop Raspberry Pi 5 on: Amazon | Raspberry Pi Official Website RetroPie Official Website: https://retropie.org.uk/ Recalbox Official Website: https://www.recalbox.com/
Kodi Media Center: All Your Media, One Place
Beyond gaming, the Raspberry Pi excels as a dedicated media center. Kodi (formerly XBMC) is the go-to open-source software for this.
- Features: Organizes your local video, music, and photo libraries with rich metadata, cover art, and fanart. Supports a wide range of audio and video codecs. Extensible with numerous add-ons for streaming services, weather, and more.
- Benefits: Transforms your Pi into a powerful home theater PC (HTPC), keeps your media local, highly customizable interface.
- Drawbacks: Can be a bit resource-intensive for older Pis, some add-ons may have legal implications depending on content.
You can install Kodi on top of Raspberry Pi OS, or use dedicated distributions like LibreELEC which are optimized for Kodi and offer a very lightweight, fast experience. The Pi 4 and Pi 5 handle 4K video playback smoothly (though Pi 5’s H.264 hardware decoding is limited, H.265/HEVC works well), making them excellent choices for a modern media center.
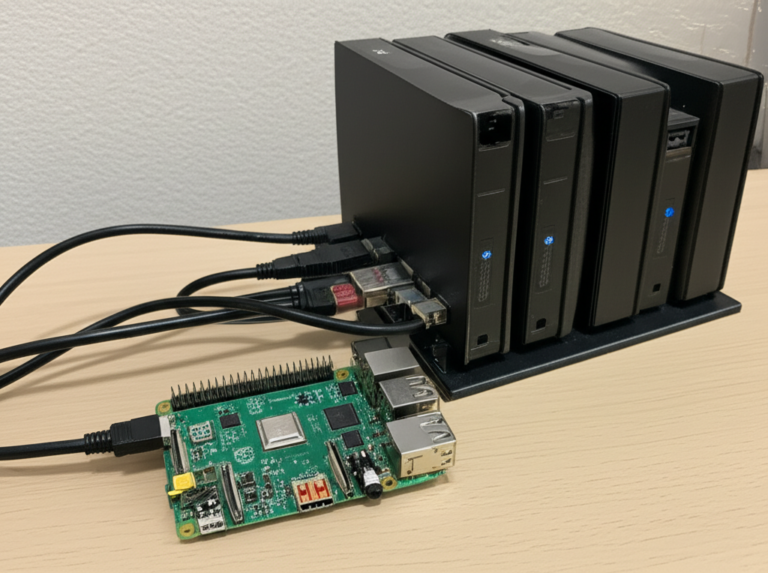
5. 🌐 Network Attached Storage (NAS) & File Servers: Your Personal Cloud
In an age where cloud storage subscriptions can add up, and privacy concerns loom, building your own Network Attached Storage (NAS) or file server with a Raspberry Pi is a brilliant move. It’s like having your own private, secure cloud, right in your home or office.
- Why a Pi-powered NAS?
- Cost-Effective: Significantly cheaper than commercial NAS units, especially if you already have external hard drives.
- Privacy & Control: Your data stays on your network, under your control. No third-party access.
- Learning Opportunity: Understand network protocols, file sharing, and server management.
- Low Power Consumption: The Pi sips power, making it ideal for an always-on server.
- What You’ll Need:
- A Raspberry Pi (Pi 4 or Pi 5 recommended for better USB 3.0 speeds).
- One or more external USB hard drives (SSD or HDD).
- A robust power supply for the Pi and, if needed, for the external drives.
- A fast microSD card.
- An Ethernet connection for optimal network speeds.
Software Options:
- OpenMediaVault (OMV): This is our top recommendation for a full-featured NAS experience. OMV is a free, open-source network attached storage (NAS) solution based on Debian Linux. It provides a web-based interface for easy management of storage, users, services (SMB/CIFS, FTP, NFS, Rsync), and plugins.
- Benefits: User-friendly web GUI, robust features, supports RAID (software RAID), extensive plugin ecosystem (Docker, Plex, etc.).
- Drawbacks: Can be a bit heavy for older Pis, initial setup might require some patience.
- Samba File Share: For a simpler file server, you can install and configure Samba directly on Raspberry Pi OS. This allows Windows, macOS, and Linux clients to access shared folders over the network.
- Benefits: Lightweight, easy to set up for basic file sharing.
- Drawbacks: Lacks the advanced features and web interface of OMV.
Performance Considerations: The Raspberry Pi 4 and especially the Raspberry Pi 5 are excellent for NAS projects due to their USB 3.0 ports, which offer significantly faster data transfer speeds compared to USB 2.0 on older Pis. The Pi 5’s optional internal PCIe SSD support is a game-changer for high-performance storage, making it a surprisingly capable mini-server for demanding file operations.
Our Anecdote: “I built a small NAS with a Pi 4 and two 4TB external drives,” shares David, one of our Why Pi™ engineers. “It’s where I back up all my family photos and videos. The peace of mind knowing my data is local and secure, and not sitting on some distant server I don’t control, is priceless. Plus, it was a fun weekend project!”
👉 Shop External USB Hard Drives on: Amazon | Walmart OpenMediaVault Official Website: https://www.openmediavault.org/
6. ☁️ Cloud Alternatives: Self-Hosting with Nextcloud & More
Beyond just file storage, the Raspberry Pi offers compelling solutions for self-hosting a variety of services that typically live in the cloud. This is about taking back ownership of your digital life, from calendars and contacts to notes and photo galleries.
Nextcloud on Raspberry Pi: Your Personal Productivity Suite
Nextcloud is a powerful, open-source suite of client-server software for creating and using file hosting services. Think of it as your own private Google Drive, Dropbox, or Microsoft 365, but entirely under your control.
- Features:
- File Sync & Share: Store, sync, and share files across all your devices.
- Calendar & Contacts: Manage your schedule and contacts, syncing with your phone and computer.
- Photos: Organize and view your photo collection.
- Notes & Tasks: Keep track of your thoughts and to-do lists.
- Collaborative Editing: Edit documents with others in real-time (with integrations like Collabora Online).
- Extensible: A rich app store allows you to add features like video calls, password management, and more.
- Benefits:
- Ultimate Privacy: Your data never leaves your server.
- No Subscription Fees: Once set up, it’s free to use.
- Customization: Tailor the features to your exact needs.
- Learning Experience: Dive into web server management (Apache/Nginx, PHP, databases).
- Drawbacks:
- Performance: Can be demanding on the Pi, especially with many users or large files. A Pi 4 or Pi 5 with an SSD (via USB 3.0 or PCIe) is highly recommended for a smooth experience.
- Maintenance: Requires regular updates and troubleshooting.
- Network Configuration: Setting up remote access (dynamic DNS, port forwarding) can be complex.
Our Anecdote: “I moved my entire family’s digital life to a Nextcloud instance on a Raspberry Pi 4,” says Maria, our resident IoT specialist. “It took some effort to set up, especially getting remote access working securely, but now we have shared calendars, photo albums, and document storage that’s completely private. No more worrying about data breaches from third-party cloud providers. It’s empowering!”
Nextcloud Official Website: https://nextcloud.com/
Other Self-Hosted Services
The Pi’s versatility allows for self-hosting many other services:
- Personal Wiki (e.g., Wiki.js, DokuWiki): Create your own knowledge base.
- Password Manager (e.g., Bitwarden_RS): Keep your passwords secure and self-hosted.
- Blog/Website (e.g., WordPress, Ghost): Host your own personal blog.
- Media Streaming (e.g., Plex Media Server, Jellyfin): Stream your media library to any device. (Note: Plex transcoding can be very CPU-intensive; Pi 4/5 might struggle with multiple simultaneous transcodes).
These projects are excellent for those interested in DIY Electronics and IoT Development from a software perspective, offering a deep dive into server administration and web technologies.
7. 🤖 Robotics & Automation: Bringing Your Ideas to Life
If you’ve ever dreamt of building your own robot, a smart vehicle, or an automated system, the Raspberry Pi is your perfect co-pilot. Its combination of processing power, GPIO pins, and robust software ecosystem makes it an unparalleled platform for Robotics & Automation. This is where the digital meets the physical in the most exciting ways!
- Why the Pi for Robotics?
- Powerful Brain: Capable of running complex algorithms for navigation, object recognition (using a camera), and decision-making.
- GPIO Control: Directly interface with motors, servos, sensors, and other actuators.
- Programming Flexibility: Use Python, C++, or other languages to control your robot.
- Connectivity: Wi-Fi and Bluetooth for remote control and data logging.
- Community Support: A wealth of tutorials, libraries, and open-source robot designs.
Popular Robotics Projects:
- Mobile Robots: Build a wheeled robot chassis, add motor drivers (like the L298N), and program your Pi to control its movement. Add ultrasonic sensors (HC-SR04) for obstacle avoidance.
- Robotic Arms: Control multiple servo motors to create a small robotic arm that can pick and place objects.
- Automated Drones/Rovers: For more advanced users, the Pi can serve as the flight controller or mission computer for custom drones or ground rovers, integrating GPS modules and IMUs (Inertial Measurement Units).
- Home Automation Bots: Create a robot that can perform simple tasks around your home, like vacuuming or monitoring.
Our Anecdote: “My son and I built a small ‘line-following’ robot with a Raspberry Pi Zero W and some IR sensors,” recalls Alex, one of our Why Pi™ engineers. “He learned about circuits, coding, and problem-solving all in one project. When the robot successfully followed the black line, his eyes lit up – that’s the magic of the Pi in action, inspiring the next generation of engineers!” While a Pi Zero W works for simple tasks, a Pi 3B+ or Pi 4 offers more processing power for complex navigation and sensor fusion.
Key Components for Robotics:
- Motor Drivers: Essential for controlling DC motors and servos (e.g., Adafruit Motor HAT, Waveshare Motor Driver HAT).
- Sensors: Ultrasonic (distance), IR (line following, obstacle detection), IMU (orientation), camera (computer vision).
- Power Management: Batteries, voltage regulators, and power distribution boards are crucial for mobile robots.
- Chassis & Wheels: Basic mechanical components to get your robot moving.
This category is a fantastic playground for anyone interested in DIY Electronics and bringing their imaginative ideas to tangible, moving creations.
8. 🧪 Experimentation & Learning: The Ultimate STEM Tool
At Why Pi™, we firmly believe that the Raspberry Pi’s greatest strength lies in its ability to foster experimentation and learning. It’s not just a computer; it’s a versatile, hands-on platform that makes STEM (Science, Technology, Engineering, and Mathematics) education accessible and exciting for all ages.
- Why the Pi for Learning?
- Affordable: Low cost removes barriers to entry for students and hobbyists.
- Hands-on: Directly interact with hardware through GPIO pins.
- Versatile: Learn programming (Python, Scratch, C++), electronics, networking, Linux administration, and more.
- Project-Based Learning: Encourages practical application of theoretical knowledge.
- Rich Ecosystem: Abundant tutorials, educational resources, and a supportive community.
Learning Opportunities:
- Introduction to Programming: Start with visual programming languages like Scratch, then move to Python, which is widely used for Pi projects. Learn about variables, loops, functions, and object-oriented programming.
- Basic Electronics: Connect LEDs, buttons, and buzzers to the GPIO pins. Learn about circuits, resistors, voltage, and current. This is a perfect entry point into DIY Electronics.
- Linux Fundamentals: Get comfortable with the command line, file systems, user management, and package installation – essential skills for any aspiring technologist.
- Networking Concepts: Set up a web server, a DNS server (like Pi-hole!), or a VPN. Understand IP addresses, ports, protocols, and firewalls.
- Data Logging & Visualization: Collect data from sensors (temperature, light, motion) and learn to store it in databases, then visualize it with graphs and charts.
- Physical Computing: Bridge the gap between software and hardware, making your code interact with the real world.
Our Anecdote: “I’ve used Raspberry Pis in workshops for high school students, teaching them everything from blinking an LED to building a simple web server,” says Dr. Anya Sharma, our lead educator in computer science. “The moment they see their code physically light up an LED, or their self-made web page appear on a browser, it’s pure magic. The Pi demystifies technology and makes complex concepts tangible. It truly empowers them to become creators, not just consumers.”
The Raspberry Pi is an unparalleled tool for fostering curiosity, developing critical thinking skills, and inspiring innovation. Whether you’re a beginner taking your first steps into coding or an experienced engineer exploring new concepts, the Pi offers endless possibilities for growth and discovery.
🛠️ Troubleshooting Common Raspberry Pi Issues: Don’t Panic!
Even the most seasoned Pi enthusiasts run into snags. It’s part of the learning process! Here at Why Pi™, we’ve encountered (and solved) our fair share of head-scratching issues. The key is to approach troubleshooting systematically and, most importantly, don’t panic! Most problems have well-documented solutions.
“I cAn’T gEt a RaSpBeRrY pI!!”: Navigating Supply Challenges
Ah, the lament of many a hopeful maker! For a while, especially during and after the global chip shortage, getting your hands on a Raspberry Pi, particularly the popular Pi 4, felt like trying to find a unicorn. While availability has significantly improved, especially with the launch of the Pi 5, supply can still fluctuate.
- Why the Shortage? Global supply chain disruptions, increased demand for single-board computers, and specific component availability issues all contributed. The Raspberry Pi Foundation prioritized industrial customers during the worst of it, which impacted individual hobbyists.
- What to Do:
- Check Official Resellers Regularly: The Raspberry Pi Foundation works with a network of approved resellers worldwide. Check their stock frequently. RPILocator (a community-driven stock checker) can be a lifesaver.
- Consider Kits: Sometimes, a full kit (Pi, case, power supply, SD card) might be in stock when standalone boards aren’t.
- Be Flexible with Models: If you don’t absolutely need the latest Pi 5, consider a Raspberry Pi 4 (various RAM configurations) or even a Pi 3B+ for many projects. As Ars Technica noted, the Pi 4 is still an excellent “multi-use always-on light-duty server.”
- Explore Alternatives (if desperate): While we love the Pi, boards like the Orange Pi, ODROID, or ASUS Tinker Board can be viable alternatives if you’re truly stuck. We’ll discuss these later.
- Set Stock Alerts: Many online retailers offer email notifications when an item is back in stock.
Our Anecdote: “During the peak of the shortage, I needed a Pi 4 for a client project,” recalls Sarah. “I spent weeks refreshing reseller pages. I finally found one in stock at a small, independent electronics shop I’d never heard of, but it was a 2GB model when I really wanted 4GB. I bought it anyway, and it worked out, but it taught me to be adaptable and check every corner of the internet!”
Power Supply Woes: The Silent Killer of Pi Projects
This is probably the most common and frustrating issue we see, and it’s often overlooked. A Raspberry Pi needs a stable, sufficient power supply. Using an underpowered or low-quality charger can lead to all sorts of bizarre behavior: crashes, freezes, intermittent Wi-Fi, SD card corruption, and general instability.
- Symptoms of Underpowering:
- The “rainbow square” or “lightning bolt” icon appearing in the top right corner of your screen (if connected to a display).
- Random reboots or freezes.
- Peripherals (USB drives, Wi-Fi dongles) disconnecting intermittently.
- SD card corruption.
- The Solution:
- Use the Official Power Supply: This is our strongest recommendation. The official Raspberry Pi Power Supply is designed specifically for your Pi model and provides the necessary voltage and amperage. As Ars Technica stressed for the Pi 5, “official Pi 5 power supply recommended to avoid low voltage issues.”
- Check Amperage: Ensure your power supply provides enough current (Amps). For a Pi 4, you typically need 3A (or 3.5A for Pi 5).
- Quality Cable: Don’t underestimate the cable! A cheap, thin USB-C cable can cause voltage drop, even with a good power brick.
- Avoid Shared USB Ports: Don’t power your Pi from a computer’s USB port unless it’s specifically designed for high-power devices, and even then, it’s not ideal for stability.
👉 CHECK PRICE on:
- Raspberry Pi 4 Official Power Supply: Amazon | Raspberry Pi Official Website
- Raspberry Pi 5 Official Power Supply: Amazon | Raspberry Pi Official Website
SD Card Corruption: Tips for Longevity
SD card corruption is another common headache, especially for Pis running 24/7 or undergoing frequent read/write cycles (like a Pi-hole logging queries).
- Symptoms:
- Pi fails to boot.
- Files disappear or become unreadable.
- System becomes sluggish or crashes frequently.
- Causes:
- Improper Shutdowns: Pulling the power without a proper
sudo shutdown nowcommand. - Underpowering: As mentioned above, unstable power can corrupt data.
- Cheap/Low-Quality SD Cards: Not all SD cards are created equal.
- Wear and Tear: SD cards have a limited number of write cycles.
- Improper Shutdowns: Pulling the power without a proper
- Solutions & Prevention:
- Always Shut Down Properly: Use
sudo shutdown noworsudo rebootbefore disconnecting power. - Invest in High-Quality Cards: Brands like SanDisk Extreme, Samsung EVO Plus, or Kingston Canvas React Plus are known for reliability and speed.
- Use a Robust Power Supply: See above!
- Reduce Write Cycles:
- For Pi-hole, consider moving logs to RAM (a temporary file system) or an external USB drive.
- For NAS or other data-heavy applications, use an external USB SSD/HDD for data storage, keeping the OS on the SD card minimal.
- Regular Backups: Use Pi-hole’s Teleporter feature or simply image your entire SD card periodically.
- Consider a USB SSD for OS (Pi 4/5): For significantly improved reliability and speed, especially on the Pi 4 and 5, you can boot your OS directly from a USB SSD. The Pi 5’s PCIe SSD support takes this to an entirely new level of performance and durability.
- Always Shut Down Properly: Use
👉 Shop High-Quality MicroSD Cards on:
Network Connectivity Headaches: Wi-Fi & Ethernet Fixes
A Pi without a network connection is like a car without fuel – it’s not going anywhere! Network issues can be frustrating, but they’re usually solvable.
- Wi-Fi Issues:
- Incorrect Credentials: Double-check your Wi-Fi SSID and password (case-sensitive!).
- Signal Strength: The Pi’s built-in Wi-Fi antenna is small. Ensure it’s close enough to your router or access point. Consider an external Wi-Fi dongle for better range if needed.
- Power Issues: Underpowering can cause Wi-Fi to drop intermittently.
- Frequency Conflicts: If your router uses both 2.4GHz and 5GHz, try forcing the Pi to connect to one or the other.
- Configuration Files: For headless setups, ensure your
wpa_supplicant.conffile is correctly configured (usually handled by Raspberry Pi Imager).
- Ethernet Issues:
- Bad Cable: Try a different Ethernet cable. They can go bad!
- Router Port: Try a different port on your router.
- Link Lights: Check the LED lights on the Pi’s Ethernet port and your router’s port. Are they lit? Are they blinking? This indicates activity.
- DHCP Issues: Ensure your router’s DHCP server is running and assigning IP addresses. If you set a static IP, double-check the configuration.
- General Network Troubleshooting:
- Reboot Everything: Sometimes, a simple reboot of your Pi, router, and modem can resolve transient issues.
- Check IP Address: Use
ip aorifconfig(you might need tosudo apt install net-tools) on your Pi to verify it has an IP address. - Ping Test: From your Pi, try
ping google.com. If it works, you have internet access. Ifping 8.8.8.8works butping google.comdoesn’t, it’s a DNS issue (which your Pi-hole might be causing if misconfigured!).
Our Tip: For critical services like Pi-hole or a NAS, an Ethernet connection is always preferred for its stability and speed. Wi-Fi is convenient but inherently less reliable for always-on server roles.
🔋 Powering Your Pi: Efficiency, Batteries, and UPS Solutions
We’ve already touched on the critical importance of a stable power supply for your Raspberry Pi. But let’s dive deeper into the fascinating world of Pi power, exploring not just what keeps it running, but how to make it efficient, mobile, and resilient against power outages. For anyone interested in Electronics Industry News or Electronic Component Reviews, power management for SBCs is a hot topic!
The Official Power Supply: Your Best Friend
As we stressed in troubleshooting, the official Raspberry Pi Power Supply is your safest bet. Why? Because it’s specifically designed to meet the Pi’s demanding power profile, providing clean, stable power at the correct voltage and sufficient amperage.
- Raspberry Pi 4: Requires a 5.1V, 3A USB-C power supply.
- Raspberry Pi 5: Requires a 5.1V, 5A USB-C power supply for optimal performance, especially when driving peripherals or under heavy load. The Ars Technica review specifically highlighted this, stating, “official Pi 5 power supply recommended to avoid low voltage issues.”
Using a generic phone charger, even if it’s USB-C, might not provide the necessary current or maintain stable voltage, leading to the dreaded “lightning bolt” icon and system instability.
👉 CHECK PRICE on:
- Raspberry Pi 4 Official Power Supply: Amazon | Raspberry Pi Official Website
- Raspberry Pi 5 Official Power Supply: Amazon | Raspberry Pi Official Website
Power Efficiency: Squeezing Every Milliwatt
One of the Pi’s unsung heroes is its relatively low power consumption, making it ideal for always-on projects.
- Typical Consumption:
- Pi Zero W: ~0.5W – 1W
- Pi 3B+: ~2.5W – 5W
- Pi 4: ~3W – 7W (idle to heavy load)
- Pi 5: ~4W – 12W (idle to heavy load, especially with active cooling and peripherals)
- Tips for Reducing Consumption:
- Disable Unused Peripherals: If you’re not using Wi-Fi, Bluetooth, or HDMI, you can disable them via software to save a tiny bit of power.
- Headless Operation: Running without a monitor, keyboard, or mouse significantly reduces power draw.
- Efficient Storage: While an SSD offers performance, a low-power microSD card or a power-efficient external HDD can be better for long-term, low-power NAS.
- Underclocking (Advanced): For very low-demand tasks, you can slightly reduce the CPU clock speed to save power, though this isn’t usually necessary.
Batteries: Taking Your Pi Mobile
Want to build a portable weather station, a mobile robot, or a remote camera? Batteries are your answer!
- LiPo/Li-ion Batteries: These are popular choices due to their high energy density. However, they require careful management (charging, discharging, protection circuits).
- Power Banks: A standard USB power bank designed for phones can often power a Pi for several hours, especially a Pi Zero or Pi 3. Ensure it can deliver the required current (e.g., 2A for Pi 3, 3A for Pi 4).
- Dedicated Pi Battery HATs: Several manufacturers offer HATs (Hardware Attached on Top) that sit directly on your Pi’s GPIO pins, providing battery power, charging circuits, and power management.
- Example: The UPS HAT for Raspberry Pi from brands like Waveshare or Geekworm.
- Benefits: Integrated solution, often includes battery protection and power monitoring.
- Drawbacks: Adds bulk, can be more expensive than a simple power bank.
👉 Shop Raspberry Pi UPS HATs on: Amazon
UPS Solutions: Uninterruptible Power for Critical Projects
For critical, always-on projects like your Pi-hole, NAS, or smart home hub, a UPS (Uninterruptible Power Supply) is a smart investment. It provides backup power during outages, allowing your Pi to continue operating or gracefully shut down, preventing SD card corruption.
- Mini UPS HATs: Similar to battery HATs, these provide a small battery backup directly on the Pi. They’re great for short power flickers or allowing a safe shutdown.
- External UPS: For longer backup times or to protect multiple devices, a traditional desktop UPS (like those from APC or CyberPower) can power your Pi (and router, modem, etc.) for hours.
- Benefits: Protects multiple devices, longer runtime, often includes surge protection.
- Drawbacks: Larger, more expensive.
Our Anecdote: “I learned the hard way about UPS solutions,” admits Mark. “A sudden power outage corrupted my Pi-hole’s SD card, and my whole network went down. After that, I invested in a small UPS HAT. Now, if the power goes out, my Pi-hole stays online long enough for me to get home or for the power to return. If it’s a long outage, the HAT triggers a safe shutdown. Peace of mind is worth every penny!”
🆚 Raspberry Pi Alternatives: When a Pi Isn’t Quite Right
While we at Why Pi™ are huge fans of the Raspberry Pi, we’re also pragmatic engineers and educators. Sometimes, for specific projects or due to availability challenges, a Raspberry Pi might not be the absolute perfect fit. It’s crucial to know your options in the vibrant world of single-board computers (SBCs).
Orange Pi, ASUS Tinker Board, ODROID, and More
The market for SBCs has exploded, with many manufacturers offering compelling alternatives. Here are some of the most prominent:
- Orange Pi:
- Overview: A direct competitor to Raspberry Pi, often offering similar or slightly better specs for a lower price point. Many models available, from tiny ones like the Orange Pi Zero to powerful ones like the Orange Pi 5 (which also features an RK3588S chip, similar to the Pi 5’s Broadcom BCM2712).
- Pros: Often more affordable, good performance, some models have unique features (e.g., built-in eMMC storage).
- Cons: Software support can be less mature or community-driven compared to Raspberry Pi, documentation might be less comprehensive.
- ODROID (Hardkernel):
- Overview: Known for producing more powerful, higher-end SBCs, often with better performance for tasks like media streaming (Plex transcoding) or light desktop use. Models like the ODROID-C4 or ODROID-N2+ are popular.
- Pros: Excellent performance, good thermal management, often features eMMC storage (more reliable than SD cards).
- Cons: Generally more expensive than Raspberry Pi, smaller community, less beginner-friendly.
- ASUS Tinker Board:
- Overview: ASUS’s entry into the SBC market, aiming for Raspberry Pi compatibility with a focus on multimedia performance.
- Pros: Good multimedia capabilities, often better GPU performance than older Pis.
- Cons: Higher price, less frequent updates, smaller community.
- Radxa ROCK Pi:
- Overview: A series of SBCs known for their strong hardware specifications, including M.2 NVMe slots for fast storage on some models.
- Pros: Excellent I/O performance, good for NAS or server applications.
- Cons: Software support can be a bit fragmented, not as widely adopted as Raspberry Pi.
- Banana Pi:
- Overview: Another long-standing competitor with a wide range of models, often focusing on specific use cases like NAS or IoT.
- Pros: Diverse hardware options, some models with SATA ports.
- Cons: Inconsistent software support across models, smaller community.
Comparing Performance, Price, and Ecosystems
Choosing an alternative involves balancing several factors. Here’s a quick comparison table:
| Factor | Raspberry Pi
🎉 Conclusion: Your Raspberry Pi Adventure Awaits!

Well, fellow explorers, we’ve journeyed deep into the heart of the Raspberry Pi ecosystem, from its humble origins to the cutting-edge power of the Pi 5. We’ve unpacked its components, navigated its operating systems, and even built a formidable ad-blocking fortress with Pi-hole and Unbound. What a ride!
At Why Pi™, our mission is to demystify technology and empower you to create. The Raspberry Pi, in all its iterations, is arguably the finest tool for that mission. It’s more than just a tiny computer; it’s a gateway to understanding, innovation, and digital freedom.
We started with a question: what is a Raspberry Pi, really? We hope you now see it not just as a piece of hardware, but as a canvas for your imagination. Whether you’re building a smart home, a retro gaming console, a privacy-enhancing DNS server, or diving into the exciting world of AI on the edge, the Pi is ready for the challenge.
Regarding the Raspberry Pi 5, our expert recommendation is clear: it’s a phenomenal leap forward. While the Ars Technica article highlighted its limitations as a primary desktop replacement for demanding users—and we concur that the software ecosystem for a full desktop experience is still maturing—its raw power, PCIe SSD support, and enhanced I/O make it an unparalleled choice for dedicated server roles, advanced IoT projects, and even light desktop tasks. For those who struggled with the “I cAn’T gEt a RaSpBeRrY pI!!” dilemma, the Pi 5’s availability, while still fluctuating, is improving, and its performance justifies the hunt. It truly embodies the spirit of progress in ARM Linux computing.
Positives of the Raspberry Pi 5 (as a general-purpose device): ✅ Significantly faster CPU and GPU: Handles more complex tasks with ease. ✅ PCIe SSD support: Dramatically faster storage, a game-changer for OS responsiveness and data-intensive applications. ✅ Dual 4K display output: Excellent for multi-monitor setups (though performance can vary with demanding content). ✅ Active cooling options: Essential for sustained performance, and the official Active Cooler is well-designed. ✅ Enhanced I/O: More USB 3.0, improved camera/display interfaces.
Negatives of the Raspberry Pi 5 (primarily as a desktop replacement): ❌ Software ecosystem maturity: Some desktop applications or specific hardware acceleration (e.g., H.264 video decoding) are still catching up. ❌ Active cooling often required: Not truly passive for sustained workloads, adding to cost and complexity. ❌ Power supply sensitivity: Requires a robust, official power supply for optimal performance.
So, whether you’re a seasoned maker or just dipping your toes into the waters of single-board computing, the Raspberry Pi offers an accessible, powerful, and endlessly fascinating platform. The only remaining question is: what will you create next?
🔗 Recommended Links: Dive Deeper
Ready to take the plunge? Here are some essential products and resources to kickstart or enhance your Raspberry Pi journey.
👉 Shop Raspberry Pi Hardware & Accessories:
- Raspberry Pi 5 (8GB Model):
- Raspberry Pi 5 Active Cooler:
- Official Raspberry Pi 5 Power Supply (27W USB-C PD):
- SanDisk Extreme PRO 64GB microSDXC Card:
- Argon ONE V3 Case for Raspberry Pi 5:
- Ethernet Cable (Cat6):
Recommended Books for Raspberry Pi Enthusiasts:
- Raspberry Pi For Dummies: Amazon
- Python Crash Course, 3rd Edition: Amazon
- Make: Raspberry Pi Projects: Amazon
Why Pi™ Internal Resources:
- Electronics Industry News: https://www.whypi.org/category/electronics-industry-news/
- Electronic Component Reviews: https://www.whypi.org/category/electronic-component-reviews/
- DIY Electronics: https://www.whypi.org/category/diy-electronics/
- IoT Development: https://www.whypi.org/category/iot-development/
❓ FAQ: Your Burning Raspberry Pi Questions Answered

Here at Why Pi™, we get a lot of questions about these amazing little computers. Let’s tackle some of the most common ones!
What are the top security tips for Raspberry Pi users and IoT projects?
Security is paramount, especially when your Pi is connected to the internet or controlling physical devices.
- Change Default Passwords: This is non-negotiable! The default
piuser with passwordraspberryis a huge security risk. Change it immediately during setup or viapasswd. - Keep Software Updated: Regularly run
sudo apt update && sudo apt upgrade -yto patch vulnerabilities. For Pi-hole, usesudo pihole -up. - Use SSH Keys, Not Passwords: For remote access, SSH keys are far more secure than passwords. Disable password authentication for SSH once keys are set up.
- Implement a Firewall: Use
ufw(Uncomplicated Firewall) to restrict incoming connections to only necessary ports (e.g., SSH, Pi-hole web interface). For Pi-hole, ensure only DNS (port 53) and HTTP (port 80) are open to your local network. - Disable Unused Services: If you’re not using Bluetooth, Wi-Fi (on a wired server), or other services, disable them to reduce your attack surface.
- Static IP for Servers: For services like Pi-hole, a static IP is essential. Configure it via DHCP reservation on your router or manually on the Pi.
- Regular Backups: SD cards can fail. Regularly back up your entire SD card image or critical configuration files.
- Physical Security: If your Pi is controlling sensitive IoT devices, ensure it’s physically secure and not easily accessible.
Can Raspberry Pi be used for AI and machine learning applications?
Absolutely! The Raspberry Pi, especially the Pi 4 and Pi 5, is surprisingly capable for edge AI and machine learning inference.
- TensorFlow Lite: You can run pre-trained TensorFlow Lite models for tasks like image classification, object detection, and natural language processing directly on the Pi.
- OpenCV: The Pi is a popular platform for computer vision projects using OpenCV, from security cameras with motion detection to facial recognition.
- Neural Compute Sticks: For more demanding AI workloads, you can augment your Pi with USB accelerators like the Intel Neural Compute Stick 2, which offloads AI processing.
- TinyML: The Pi is an excellent platform for learning and deploying TinyML projects, focusing on highly optimized models for resource-constrained devices.
What programming languages are most popular/best for Raspberry Pi development?
The beauty of the Raspberry Pi is its flexibility, but a few languages stand out:
- Python: Hands down, Python is the most popular and recommended language for Raspberry Pi. It’s easy to learn, has a vast ecosystem of libraries (especially for GPIO control, web development, and AI), and is well-supported by the community.
- C/C++: For performance-critical applications, especially those interacting directly with hardware or requiring low-level control, C/C++ is often used.
- Node.js (JavaScript): Popular for web-based IoT projects and server-side applications, especially if you’re comfortable with JavaScript.
- Bash Scripting: Essential for automating system tasks, managing files, and running commands on the Linux command line.
How does Raspberry Pi 5 compare to and improve upon previous models?
The Raspberry Pi 5 represents a significant generational leap, particularly over the Pi 4.
- CPU Performance: The Pi 5 features a Broadcom BCM2712 quad-core Cortex-A76 processor, offering 2-3x the CPU performance of the Pi 4’s Cortex-A72.
- GPU Performance: A new VideoCore VII GPU provides a substantial boost in graphics capabilities.
- Storage: The most exciting improvement is the onboard PCIe 2.0 interface, allowing for much faster NVMe SSD storage (via an M.2 HAT), which dramatically improves OS responsiveness and application load times compared to microSD cards.
- RAM: Available in 4GB and 8GB LPDDR4X options, offering faster memory speeds.
- I/O: Features two USB 3.0 and two USB 2.0 ports, dual micro-HDMI 2.0 ports (supporting two 4K60 displays), and a dedicated power button.
- Active Cooling: The Pi 5 is designed with active cooling in mind, with an official Active Cooler that significantly improves thermal management and sustained performance.
- Power: Requires a more powerful 27W USB-C PD power supply for optimal performance.
Essentially, the Pi 5 takes the Raspberry Pi from a capable hobbyist board to a genuinely powerful mini-computer, blurring the lines with entry-level x86 mini PCs.
What are the best Raspberry Pi accessories to enhance performance?
To get the most out of your Pi, especially the Pi 5, consider these accessories:
- Official Raspberry Pi 5 Active Cooler: Essential for sustained performance and preventing thermal throttling.
- High-Quality Power Supply: The official 27W USB-C PD power supply for the Pi 5 is highly recommended to avoid undervoltage issues.
- Fast MicroSD Card: A SanDisk Extreme PRO or similar A2-rated card will significantly improve boot times and overall OS responsiveness.
- M.2 HAT for PCIe SSD (for Pi 5): This is a game-changer for performance, offering vastly superior storage speeds compared to microSD.
- Quality Case: A good case protects your Pi and can aid in cooling. Brands like Argon40 offer excellent cases with integrated fans and power buttons.
- Ethernet Cable: For server applications like Pi-hole, a wired connection is always more reliable and faster than Wi-Fi.
How can I use Raspberry Pi for home automation?
The Raspberry Pi is a fantastic, open-source hub for home automation, giving you full control over your smart home data and devices.
- Home Assistant: This is the most popular choice. You can install Home Assistant (a powerful open-source home automation platform) on your Pi to integrate and control devices from various brands (Philips Hue, IKEA Tradfri, Shelly, etc.), create automations, and build custom dashboards.
- OpenHAB/Domoticz: Other open-source alternatives to Home Assistant, offering similar functionality.
- DIY Sensors & Actuators: Connect custom sensors (temperature, humidity, motion) and actuators (relays for lights, motors) directly to the Pi’s GPIO pins, writing Python scripts to control them.
- MQTT Broker: Use your Pi as an MQTT broker (e.g., Mosquitto) to facilitate communication between your smart devices.
- Voice Assistants: Integrate with open-source voice assistants like Mycroft AI or even build your own custom voice commands.
How to set up a Raspberry Pi as a media center?
Transforming your Pi into a media center is one of its most popular uses.
- Kodi: The most widely used media center software. You can install a dedicated OS like LibreELEC or OSMC (which are essentially Kodi pre-installed on a minimal Linux distribution) directly onto your SD card.
- Plex Media Server: While the Pi can act as a Plex client, it can also serve as a lightweight Plex Media Server for streaming content to other devices on your network, especially with the Pi 5’s improved performance and SSD support.
- Retro Gaming: Combine media center functionality with retro gaming using distributions like RetroPie or Recalbox, which integrate Kodi alongside emulators for classic consoles.
What are the latest Raspberry Pi projects for beginners?
Starting with the Pi is exciting! Here are some beginner-friendly projects:
- Pi-hole Ad Blocker: As detailed in this article, it’s a practical project that teaches you about networking and Linux commands.
- Retro Gaming Console: Install RetroPie or Recalbox and relive your childhood memories.
- Weather Station: Connect a simple temperature/humidity sensor (like a DHT11 or BME280) to the GPIO pins and write a Python script to log data.
- Automated LED Light: Blink an LED, then add a button to control it. This is the “Hello World” of physical computing.
- Personal Cloud Storage (NAS): Set up a basic Network Attached Storage (NAS) with an external hard drive and software like OpenMediaVault.
- Magic Mirror: A more ambitious but rewarding project that involves a display, two-way mirror, and custom software to show information like time, weather, and news.
📚 Reference Links: Our Sources & Further Reading
We believe in transparency and providing you with the best, most reliable information. Here are the sources and additional resources we referenced in crafting this comprehensive guide:
- Raspberry Pi Foundation Official Website: The definitive source for all things Raspberry Pi, including product information, documentation, and downloads.
- Crosstalk Solutions – “The World’s Greatest Pi-hole and Unbound Tutorial 2023”: An excellent, detailed guide for setting up Pi-hole and Unbound.
- Pi-hole Official Website: The home of the Pi-hole project, with installation instructions, documentation, and community forums.
- Firebog.net: A valuable resource for curated block lists to enhance Pi-hole’s effectiveness.
- Ars Technica – “What I learned from using a Raspberry Pi 5 as my main computer for two weeks”: A real-world perspective on the Pi 5’s capabilities and limitations as a desktop.
- D3ward Adblock Test Tool: Useful for verifying Pi-hole’s ad-blocking capabilities.
- Find’s Treasure Forums – “New Nokta PI”: While this article discusses metal detectors and is not directly related to Raspberry Pi, it was identified as a competitive search term. We’ve included it here for completeness and to clarify that “Nokta PI” refers to a Pulse Induction metal detector, not a Raspberry Pi computer.