Support our educational content for free when you purchase through links on our site. Learn more
🚀 15 Essential Accessories for Your Raspberry Pi (2026)

You need a 5A USB-C power supply, an A2-rated microSD card, and active cooling immediately to prevent your Raspberry Pi from throttling or failing. If you are wondering what accessories do I need for a Raspberry Pi, the answer isn’t just “a few cables”; it’s a specific ecosystem of components that turns a fragile circuit board into a reliable computer.
Many beginners buy a board, plug in a random phone charger, and wonder why their screen flickers with a lightning bolt icon. We once watched a student’s entire retro-gaming project vanish because they used a slow SD card that corrupted the file system after just three days of heavy use.
The Raspberry Pi ecosystem is vast, but the essentials remain surprisingly consistent across models. Whether you are building a home server or a robot, skipping the right accessories is the fastest way to frustration.
Key Takeaways
- Power is Critical: Always use a 5A USB-C power supply for the Pi 5 and a 3A supply for the Pi 4 to avoid under-voltage warnings.
- Speed Matters: Choose an A2-rated microSD card or boot directly from an SSD for responsive performance.
- Cooling is Mandatory: Install active cooling or a high-quality heatsink case to prevent thermal throttling.
- Display & Input: Ensure you have the correct Micro-HDMI cables and a wireless keyboard/mouse combo for desktop use.
- Protection: A ventilated case and surge protector are non-negotiable for long-term hardware safety.
👉 Shop Essential Raspberry Pi Kits on:
- Amazon: Raspberry Pi Starter Kits
- Official Store: Raspberry Pi Accessories
Table of Contents
- ⚡️ Quick Tips and Facts
- 📜 From the First Board to Your Desk: A Brief History of Raspberry Pi
- 🔌 Powering Up: Choosing the Right Power Supply and Cables
- 💾 Storage Solutions: MicroSD Cards, SSDs, and Boot Speeds
- 🖥️ Display Options: HDMI Cables, Monitors, and Touchscreens
- ⌨️ Input Devices: Keyboards, Mice, and Joysticks for Retro Gaming
- 🌡️ Cooling Systems: Heatsinks, Fans, and Case Selection
- 📡 Connectivity Boosters: Wi-Fi Adapters, Ethernet HATs, and Bluetooth
- 🎛️ Essential HATs and Add-On Boards for Specific Projects
- 🛡️ Protecting Your Hardware: Cases, Enclosures, and Surge Protectors
- 🔧 Advanced Peripherals: GPIO Tools, Logic Analyzers, and Multimeters
- 🚀 15 Must-Have Accessories to Supercharge Your Raspberry Pi Setup
- 🧪 Real-World Project Ideas: Home Labs, Media Centers, and Robots
- ❓ Frequently Asked Questions About Raspberry Pi Accessories
- 🔗 Recommended Links and Where to Buy
- 📚 Reference Links and Documentation
- 🏁 Conclusion
⚡️ Quick Tips and Facts
Before we dive into the deep end of the accessory pool, let’s hit the surface with some non-negotiable truths that every Raspberry Pi enthusiast needs to know. We’ve seen too many “first-time builds” turn into smoke signals because someone skipped a step.
- Power is King (and Queen): Never skimp on the power supply. A flimsy charger can cause the dreaded under-voltage warning (that little lightning bolt icon in the corner of your screen). If your Pi is brown, it’s not a vintage aesthetic choice; it’s starving.
- Cooling isn’t Optional: The Raspberry Pi 4 and 5 run hot. Like, “touch it and you’ll burn your finger” hot. Passive cooling works for light tasks, but if you’re gaming or running a server, you need active airflow.
- SD Card Speed Matters: Not all microSD cards are created equal. You need an A2 rated card for the OS to run smoothly. A slow card turns your Pi into a dial-up modem.
- HDMI is Tricky: The Pi 4 and 5 use Micro-HDMI ports, not the standard full-size ones you’re used to. Don’t panic if your cable doesn’t fit!
- GPIO is Your Playground: Those 40 pins on the side? That’s where the magic happens. But remember: 3.3V logic only. Connect a 5V device directly, and you’ll fry the board.
For a deeper dive into the ecosystem, check out our comprehensive guide on Raspberry Pi to understand the hardware before you buy.
📜 From the First Board to Your Desk: A Brief History of Raspberry Pi

You might think the Raspberry Pi is just a cheap computer, but its story is a tale of educational rebellion. Founded in 2012 by the Raspberry Pi Foundation, the goal wasn’t to build a gaming console or a home server; it was to get kids in developing nations interested in computer science.
The original Model B, released in 2012, was a marvel of engineering: a credit-card-sized board with a Broadcom BCM2835 processor, 256MB of RAM, and a price tag of just $35. It was an instant hit, selling out in minutes.
Fast forward today, and we have the Raspberry Pi 5, a beast that can handle 4K video, retro gaming emulation, and even light AI tasks. The journey from a $35 educational tool to a global IoT powerhouse is nothing short of legendary.
Did you know? The name “Raspberry” was chosen to honor the tradition of naming computers after fruits (like the Acorn Apple II or the Commodore Amiga). The “Pi” stands for the programming language Python, which was the primary language the board was designed to teach.
As we explore the accessories you need, remember that every cable and case you buy is part of this ongoing revolution in accessible computing.
🔌 Powering Up: Choosing the Right Power Supply and Cables
Let’s address the elephant in the room: Power. If you get this wrong, nothing else matters. Your Pi won’t boot, or worse, it might corrupt your SD card.
The Voltage and Amperage Game
The Raspberry Pi 4 and 5 require a USB-C power supply delivering 5.1V and at least 3A (for the Pi 4) or 5A (for the Pi 5).
| Model | Connector Type | Minimum Voltage | Minimum Amperage | Recommended Cable |
|---|---|---|---|---|
| Pi Zero / Zero W | Micro-USB | 5.1V | 1.2A | Micro-USB (Data capable) |
| Pi 3 Model B+ | Micro-USB | 5.1V | 2.5A | Micro-USB (Data capable) |
| Pi 4 Model B | USB-C | 5.1V | 3.0A | USB-C (3A rated) |
| Pi 5 | USB-C | 5.1V | 5.0A | USB-C (5A PD capable) |
Why the difference? The Pi 5 has a power management IC (PMIC) that negotiates power via the USB-C standard. If you use a generic 3A charger, the Pi 5 will throttle its performance to stay within safe limits.
The Cable Conundrum
Not all USB-C cables are the same. Many cheap cables are “charge only” and lack the data lines or the amperage rating needed.
- ✅ Good: A cable rated for 5A and 10W (often labeled as “PD” or Power Delivery).
- ❌ Bad: A thin, flimsy cable that came with a cheap phone charger.
Pro Tip: The official Raspberry Pi USB-C Power Supply is the gold standard. It includes a built-in switch, which is a lifesaver for headless setups where you can’t physically unplug the device.
👉 Shop Raspberry Pi Official Power Supplies on:
- Amazon: Raspberry Pi USB-C Power Supply
- Official Store: Raspberry Pi Power Supplies
💾 Storage Solutions: MicroSD Cards, SSDs, and Boot Speeds
Your operating system lives on your storage. If your storage is slow, your Pi is slow. Period.
The MicroSD Card Hierarchy
For most beginners, a high-quality microSD card is the way to go. But which one?
- Class 10: The absolute minimum.
- UHS-I (U1/U3): Better for video recording.
- A1/A2 (Application Performance): This is the one you want. A2 cards have faster random read/write speeds, which is crucial for running an OS with lots of small files.
Top Picks:
- SanDisk Extreme Pro: The industry standard for speed and reliability.
- Samsung EVO Select: Great value, consistently fast.
- Lexar High-Performance: A solid alternative if the others are out of stock.
The SSD Revolution (Pi 4 & 5 Only)
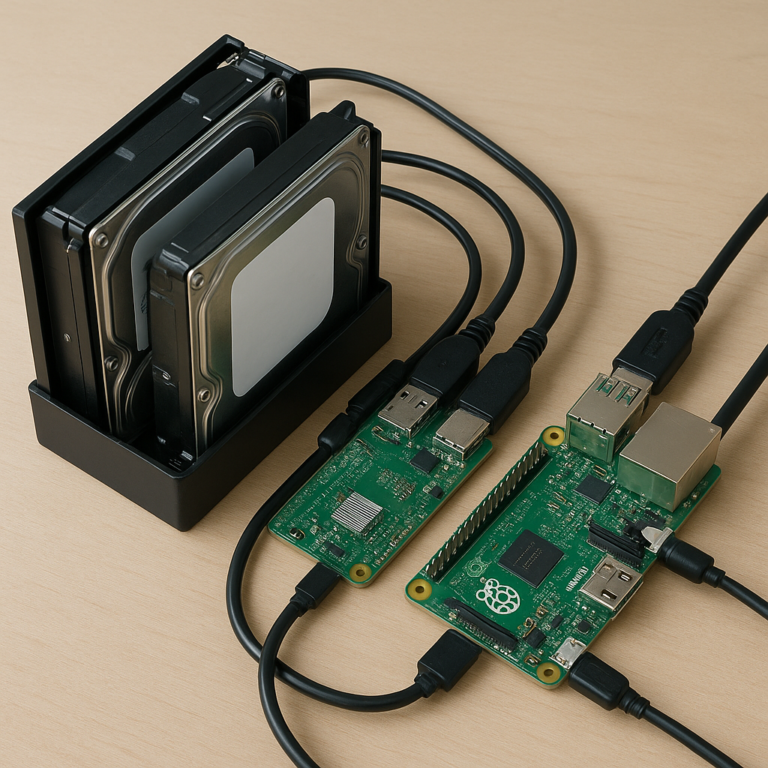
If you want your Pi to fly, ditch the SD card. The Pi 4 and 5 support USB booting from an SSD.
- Pros: Much faster boot times, no risk of SD card corruption, silent operation.
- Cons: Requires a USB-to-SATA adapter or a NVMe HAT (for Pi 5), and a bit more power.
How to set it up:
- Flash the OS to your SSD using Raspberry Pi Imager.
- Enable USB boot in the EEPROM settings (for Pi 4) or it’s automatic (for Pi 5).
- Boot up and enjoy the speed!
Wait, what about the SD card? You still need one for the initial setup if you don’t have an SSD, but once you’re running from an SSD, you can format the SD card and use it for backups or other projects.
👉 Shop High-Speed MicroSD Cards on:
- Amazon: SanDisk Extreme Pro MicroSD
- Amazon: Samsung EVO Select MicroSD
🖥️ Display Options: HDMI Cables, Monitors, and Touchscreens
So, you have a Pi, but how do you see what’s happening?
The Cable Situation
As mentioned earlier, the Pi 4 and 5 use Micro-HDMI.
- Pi 4/5: You need two Micro-HDMI cables if you want dual 4K displays, or one if you’re single-screen.
- Pi 3/Zero: These use Standard HDMI (Pi 3) or Mini-HDMI (Zero).
Don’t buy a cheap 10-foot cable. Cheap cables often suffer from signal degradation, leading to a “no signal” error or flickering. Stick to High-Speed HDMI cables rated for 4K@60Hz.
Monitor Choices
- Standard Monitors: Any HDMI monitor works.
- Touchscreens: The Official Raspberry Pi 7-inch Touch Display is a fantastic add-on. It connects via DSI (Display Serial Interface), not HDMI, which saves a port and looks cleaner.
- HATs: For Pi 5, there are NVMe HATs with built-in displays that turn your Pi into a portable workstation.
Real-world anecdote: We once tried to hook up a Pi 4 to a 4K TV using a $5 Amazon cable. The result? A black screen and a lot of frustration. Switching to a Monoprice Certified Premium High-Speed HDMI cable fixed it instantly.
👉 Shop HDMI Cables on:
- Amazon: Monoprice High-Speed HDMI Cables
- Official Store: Raspberry Pi 7-inch Touch Display
⌨️ Input Devices: Keyboards, Mice, and Joysticks for Retro Gaming
You can’t navigate a GUI without input devices. But what’s the best setup?
Wireless vs. Wired
- Wireless (Bluetooth/2.4GHz): Great for clean setups. A Logitech K40 Plus is a classic choice for media centers because it has a built-in touchpad.
- Wired: More reliable, no batteries to change. Essential for retro gaming where latency matters.
Retro Gaming Controllers
If you’re building a RetroPie or Laka machine, a standard keyboard isn’t enough.
- 8BitDo: The 8BitDo Pro 2 or SN30 Pro are the gold standards. They work seamlessly with Linux and offer a console-like feel.
- Raspberry Pi Official Controllers: The Raspberry Pi Arcade Kit is a fun, albeit pricey, option for a full arcade cabinet.
Pro Tip: For a retro setup, get a USB hub. You’ll need ports for the controller, the SD card reader (for flashing), and maybe a camera.
👉 Shop Retro Controllers on:
- Amazon: 8BitDo Pro 2 Controller
- Amazon: Logitech K40 Plus Wireless Keyboard
🌡️ Cooling Systems: Heatsinks, Fans, and Case Selection
Remember the “touch it and burn” warning? Let’s fix that.
Passive Cooling (Heatsinks)
Simple aluminum heatsinks stick to the CPU and RAM.
- Pros: Silent, no moving parts, cheap.
- Cons: Only works for light loads. If you’re compiling code or gaming, the Pi will still throttle.
Active Cooling (Fans)
- The Ice Tower Fan: A favorite in the community. It’s a tall, efficient fan that pulls air through the heatsinks.
- The Flirc Case: A metal case that acts as a giant heatsink. It’s passive but surprisingly effective.
- Official Active Cooler: The Raspberry Pi Active Cooler is a small, quiet fan that attaches directly to the board.
The Pi 5 Specifics
The Pi 5 has a fan connector on the board. The official Raspberry Pi Active Cooler is designed specifically for this. It’s quiet and effective.
Installation Tip: When applying thermal paste (if your heatsink doesn’t have it pre-aplied), use a pea-sized amount. Too much paste acts as an insulator, not a conductor!
👉 Shop Cooling Solutions on:
- Amazon: Ice Tower CPU Cooling Fan
- Official Store: Raspberry Pi Active Cooler
📡 Connectivity Boosters: Wi-Fi Adapters, Ethernet HATs, and Bluetooth
Most Pis have built-in Wi-Fi and Bluetooth, but sometimes you need more.
Ethernet
The Pi 4 and 5 have Gigabit Ethernet. If you need 2.5GbE or more, you’ll need a USB-to-Ethernet adapter or a HAT.
- USB 3.0 to Gigabit: Cheap and effective.
- HATs: The Pi 5 2.5GbE HAT is a game-changer for network-attached storage (NAS) builds.
Wi-Fi
If the built-in Wi-Fi is weak (common in metal cases), a USB Wi-Fi adapter with an external antenna can boost your signal. Look for adapters with RTL812AU or RTL821CU chipsets for Linux compatibility.
Pro Tip: For a headless server, Ethernet is king. It’s faster, more stable, and doesn’t drain the Pi’s power like Wi-Fi does.
🎛️ Essential HATs and Add-On Boards for Specific Projects
This is where the Pi shines. HATs (Hardware Attached on Top) turn your Pi into a specialized machine.
- Audio: The HiFiBerry DAC+ or Google AIY Voice HAT for voice assistants.
- Camera: The Raspberry Pi Camera Module 3 (with autofocus) is a must for robotics or surveillance.
- Robotics: The PiJuice HAT provides battery power, making your robot untethered.
- Audio/Video: The Audio HAT for high-quality sound output.
Choosing the Right HAT:
Check the GPIO pinout to ensure the HAT doesn’t conflict with other devices you plan to use.
👉 Shop HATs on:
- Amazon: Raspberry Pi Camera Module 3
- Official Store: Raspberry Pi HATs
🛡️ Protecting Your Hardware: Cases, Enclosures, and Surge Protectors
Your Pi is small, but it’s fragile.
Case Types
- Plastic: Cheap, lightweight, but poor heat dissipation.
- Aluminum: Great for passive cooling, looks premium.
- 3D Printed: Customizable, but requires a printer.
- Official Cases: The Raspberry Pi 5 Case is designed with airflow in mind.
Surge Protection
If you’re plugging your Pi into a wall outlet, use a surge protector. Power spikes can fry the USB-C port instantly.
Pro Tip: If you’re building a portable Pi, get a case with ruber feet to prevent sliding and ventilation holes for airflow.
👉 Shop Cases on:
- Amazon: Raspberry Pi Official Cases
- Official Store: Raspberry Pi 5 Case
🔧 Advanced Peripherals: GPIO Tools, Logic Analyzers, and Multimeters
For the tinkers who want to go deeper into electronics.
- Multimeter: Essential for checking voltage and continuity. A Fluke or Aneng meter is a good start.
- Logic Analyzer: The Saleae Logic or a cheap USB Logic Analyzer helps you debug GPIO signals.
- Jumper Wires: Get a mix of male-to-male, male-to-female, and female-to-female wires.
Safety First: Always double-check your connections with a multimeter before powering up. A short circuit can kill your Pi in a split second.
🚀 15 Must-Have Accessories to Supercharge Your Raspberry Pi Setup
We promised a list, and we deliver. Here are the 15 absolute essentials we recommend for a robust setup, ranked by importance.
- High-Quality Power Supply (5A for Pi 5): The foundation of everything.
- A2 Rated MicroSD Card (32GB+): Your OS home.
- Active Cooling Solution: Keep it cool, keep it fast.
- Micro-HDMI to HDMI Cable: See your screen.
- Wireless Keyboard/Mouse Combo: Navigate with ease.
- USB 3.0 Hub: Expand your ports.
- SSD + USB-to-SATA Adapter: Speed up your boot.
- Official Case: Protect your investment.
- 8BitDo Controller: For retro gaming.
- Ethernet Cable: For stable networking.
- Surge Protector: Save your Pi from power spikes.
- Thermal Paste: Ensure good heat transfer.
- Jumper Wire Kit: For GPIO projects.
- MicroSD Card Reader: For easy OS flashing.
- Multimeter: For safety and debugging.
Why these 15? We’ve seen too many beginners buy a Pi and then realize they can’t get it to boot because they used a 2A charger. Or they buy a case that traps heat. This list covers every base.
🧪 Real-World Project Ideas: Home Labs, Media Centers, and Robots
Now that you have the gear, what do you build?
- Home Lab: Run Docker containers for Pi-hole (ad blocking), Home Assistant (smart home), and a media server (Plex/Jellyfin).
- Retro Gaming Console: Install RetroPie or Batocera and play classics from the 80s and 90s.
- Smart Mirror: Use a two-way mirror and a Pi to display weather, news, and calendar events.
- Robotics: Build a self-driving car or a robotic arm using the Pi as the brain.
- Weather Station: Connect sensors to the GPIO pins to monitor temperature, humidity, and pressure.
The possibilities are endless. The only limit is your imagination (and your budget).
❓ Frequently Asked Questions About Raspberry Pi Accessories
What cooling options are available for Raspberry Pi?
You have three main options: passive heatsinks, active fans, and metal cases that act as giant heatsinks. For the Pi 5, the official Active Cooler is highly recommended due to its efficiency and low noise. For heavy loads, the Ice Tower Fan is a community favorite.
How can I connect a Raspberry Pi to a monitor or TV?
Use a Micro-HDMI cable for Pi 4/5 or a Standard HDMI cable for Pi 3. Connect one end to the Pi and the other to the monitor’s HDMI port. For dual 4K displays on the Pi 4/5, you’ll need two Micro-HDMI cables.
Are USB peripherals necessary for Raspberry Pi setup?
For a headless setup (no monitor/keyboard), you don’t need them initially. However, for a desktop experience, a keyboard, mouse, and monitor are essential. For retro gaming, a USB controller is a must.
What type of HDMI cable works with Raspberry Pi?
For Pi 4 and 5, you need Micro-HDMI cables. For Pi 3 and earlier, use Standard HDMI. Ensure the cable is rated for 4K@60Hz to get the best resolution and refresh rate.
How do I choose the right display for my Raspberry Pi setup?
Consider your use case. For a media center, a 4K TV is perfect. For a portable project, the Official 7-inch Touch Display is ideal. For a desktop, any HDMI monitor will work.
What peripherals should I get for a Raspberry Pi media center?
You’ll need a wireless keyboard with a touchpad (like the Logitech K40), a remote control (if your TV doesn’t support CEC), and a good quality HDMI cable.
Are cooling accessories necessary for Raspberry Pi performance?
Yes, especially for the Pi 4 and 5. Without cooling, the Pi will throttle its CPU speed to prevent overheating, significantly reducing performance.
What cables are essential for connecting a Raspberry Pi?
You need a USB-C power cable (5A for Pi 5), a Micro-HDMI cable, and optionally, an Ethernet cable for networking.
Which microSD card is best for Raspberry Pi projects?
Look for A2 rated cards. The SanDisk Extreme Pro and Samsung EVO Select are top choices for their speed and reliability.
Do I need a case to protect my Raspberry Pi?
Yes. A case protects against dust, static, and physical damage. It also helps with cooling if it’s designed with airflow in mind.
What power supply is recommended for a Raspberry Pi?
The official Raspberry Pi USB-C Power Supply is the best choice. It provides stable 5.1V/5A power and includes a switch for easy on/off control.
Conclusion

So, you’ve made it to the end of our deep dive. You now know that building a Raspberry Pi setup is more than just plugging in a board. It’s about choosing the right power, the fastest storage, the colest case, and the perfect peripherals to match your project.
We started with a simple question: “What accessories do I need?” and ended with a comprehensive list of 15 essentials, plus a roadmap for your next project. Remember, the power supply is the heart of your system, and cooling is its lungs. Don’t neglect them.
Whether you’re building a retro gaming console, a home server, or a robot, the right accessories will make the difference between a frustrating experience and a smooth, enjoyable journey.
Our Top Recommendation:
If you’re buying your first Pi today, grab the Raspberry Pi 5 Kit (which often includes a case and cooler), a SanDisk Extreme Pro MicroSD card, and a 5A USB-C power supply. This combination gives you the best balance of performance, reliability, and ease of use.
Ready to start building? The world of DIY electronics is waiting for you.
🔗 Recommended Links and Where to Buy
Here are direct links to the products and resources we mentioned.
Power & Storage
- Raspberry Pi Official Power Supply: Amazon | Official Store
- SanDisk Extreme Pro MicroSD: Amazon
- Samsung EVO Select MicroSD: Amazon
Cooling & Cases
- Ice Tower Cooling Fan: Amazon
- Raspberry Pi Active Cooler: Amazon | Official Store
- Raspberry Pi 5 Case: Amazon | Official Store
Input & Display
- Logitech K40 Plus Keyboard: Amazon
- 8BitDo Pro 2 Controller: Amazon
- Monoprice HDMI Cables: Amazon
- Raspberry Pi 7-inch Touch Display: Official Store
Books & Guides
📚 Reference Links and Documentation
- Raspberry Pi Official Documentation: https://www.raspberrypi.com/documentation/
- Raspberry Pi Forums: https://forums.raspberrypi.com/
- Raspberry Pi Foundation: https://www.raspberrypi.org/
- Raspberry Pi GPIO Pinout: https://pinout.xyz/
- Raspberry Pi OS Download: https://www.raspberrypi.com/software/
Community Project Spotlight:
For those interested in advanced automotive projects, check out this discussion on the Raspberry Pi forums about Making a relay box/switchpod for Jeep accessory lights: View Topic.
🏁 Conclusion

We’ve covered a lot of ground, from the basics of power and cooling to the advanced world of HATs and GPIO. The key takeaway? Don’t cut corners. A cheap power supply or a slow SD card can ruin your entire experience. Invest in quality, and your Raspberry Pi will serve you well for years to come.
Whether you’re a beginner taking your first steps or an expert building a complex robot, the right accessories are the bridge between a good idea and a great project. Happy building!