Support our educational content for free when you purchase through links on our site. Learn more
Can I Use Raspberry Pi Pico as a PC? The Surprising Truth! 🖥️ (2026)
Ever stared at the tiny Raspberry Pi Pico and wondered, “Could this little board replace my bulky desktop PC?” You’re not alone! The Pico’s pocket-sized charm and the buzz around Raspberry Pi’s ecosystem make it tempting to imagine it as a full-fledged computer. But here’s the kicker: despite its impressive specs for a microcontroller, the Pico isn’t designed to be your everyday PC.
At Why Pi™, we’ve tested, tinkered, and programmed the Pico extensively, and in this article, we’ll unravel what it can and cannot do. Spoiler alert: while it won’t run your favorite desktop apps or stream Netflix, it shines brilliantly in embedded projects, custom peripherals, and IoT applications. Stick around, because later we’ll compare it to the Raspberry Pi 4 and share 10 creative ways to make the most of your Pico beyond the PC dream!
Key Takeaways
- Raspberry Pi Pico is a microcontroller, not a PC — it lacks the hardware and OS support to run desktop environments.
- Ideal for embedded systems and IoT projects, especially with the Pico W’s Wi-Fi capabilities.
- Cannot connect directly to monitors or act as a USB host for keyboards and mice like a traditional PC.
- For a true mini PC experience, Raspberry Pi 4 or Raspberry Pi 400 are your best bets.
- Pico excels as a learning tool for programming in MicroPython and C/C++, perfect for hobbyists and educators.
Ready to explore the Pico’s real superpowers? Let’s dive in!
Table of Contents
- ⚡️ Quick Tips and Facts About Raspberry Pi Pico as a PC
- 📜 The Evolution of Raspberry Pi Pico: From Microcontroller to Mini PC?
- 🤔 Can Raspberry Pi Pico Really Replace Your Desktop PC?
- 🔍 Understanding Raspberry Pi Pico’s Hardware Limitations and Strengths
- 🛠️ How to Set Up Raspberry Pi Pico for Basic Computing Tasks
- 💻 Using Raspberry Pi Pico as a USB HID Device: Keyboard, Mouse, and More
- 📡 Networking Possibilities: Can Raspberry Pi Pico Connect to the Internet?
- 🎮 Fun Projects: Raspberry Pi Pico as a Retro Gaming Console or Media Player
- ⚙️ Programming Languages and Development Environments for Raspberry Pi Pico
- 🔐 Security Considerations When Using Raspberry Pi Pico as a PC Alternative
- 📈 Comparing Raspberry Pi Pico with Raspberry Pi 4 and Other Mini PCs
- 💡 10 Creative Ways to Use Raspberry Pi Pico Beyond a Traditional PC
- 🛒 Recommended Accessories and Peripherals for Raspberry Pi Pico Projects
- 🧰 Troubleshooting Common Issues When Using Raspberry Pi Pico as a PC
- 📚 Learning Resources and Communities for Raspberry Pi Pico Enthusiasts
- 🔚 Conclusion: Is Raspberry Pi Pico a Viable PC Replacement?
- 🔗 Recommended Links for Raspberry Pi Pico and Mini PC Projects
- ❓ Frequently Asked Questions About Raspberry Pi Pico as a PC
- 📖 Reference Links and Further Reading
⚡️ Quick Tips and Facts About Raspberry Pi Pico as a PC
Alright, let’s cut to the chase! You’re wondering if that tiny, mighty Raspberry Pi Pico can replace your trusty desktop or laptop. We get it – the allure of a super-mini PC is strong! But here at Why Pi™, where we dive deep into the world of Raspberry Pi, we’ve got some straight talk for you.
- ❌ Not a PC Replacement: The Raspberry Pi Pico is fundamentally a microcontroller, not a full-fledged single-board computer (SBC) like its bigger siblings, the Raspberry Pi 4 or Raspberry Pi 5. It cannot run a desktop operating system like Windows, macOS, or even a full Linux distribution.
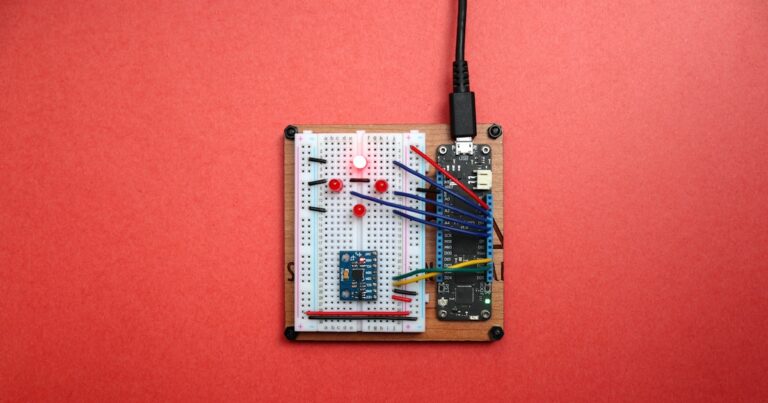
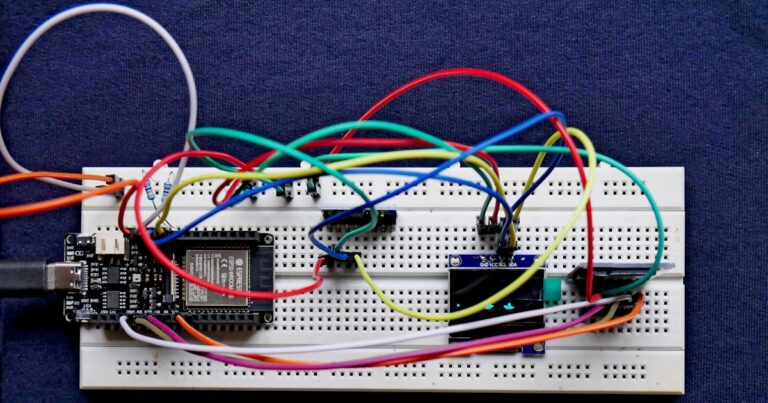
- ✅ Excellent for Embedded Projects: Its true power lies in controlling hardware, reading sensors, driving LEDs, and automating tasks. Think smart home gadgets, robotics, custom keyboards, or even intricate art installations.
- 🧠 Limited Resources: It boasts a dual-core ARM Cortex-M0+ processor, 264KB of SRAM, and 2MB of onboard QSPI Flash memory. While impressive for a microcontroller, this is a fraction of what a modern PC needs.
- 🔌 USB Device, Not Host (Typically): While it can act as a USB device (like a keyboard or mouse), it generally cannot act as a USB host to connect standard PC peripherals directly without significant, complex workarounds.
- 💡 Perfect for Learning: It’s an incredibly affordable and accessible entry point into programming microcontrollers with MicroPython or C/C++.
- 🚀 RP2040 Chip: The Pico is built around the custom-designed RP2040 chip, a testament to the Raspberry Pi Foundation’s engineering prowess.
- 🌐 Pico W for Connectivity: The Raspberry Pi Pico W adds onboard Wi-Fi, making it fantastic for IoT (Internet of Things) projects.
So, can it be a PC? In the traditional sense, absolutely not. But can it perform PC-like functions or interact with your PC in clever ways? You bet! Let’s explore this fascinating little board further. For more in-depth articles on this versatile board, check out our dedicated Raspberry Pi Pico section.
📜 The Evolution of Raspberry Pi Pico: From Microcontroller to Mini PC?
When the Raspberry Pi Foundation first launched the original Raspberry Pi in 2012, it revolutionized affordable computing, putting a full Linux desktop in the hands of millions. Fast forward to 2021, and they did it again, but with a twist: the Raspberry Pi Pico. This wasn’t another mini-computer; it was something entirely different, yet equally groundbreaking for its niche.
The Pico was born from a desire to create a powerful, flexible, and affordable microcontroller. Unlike its older siblings, which are designed to run operating systems and handle general-purpose computing, the Pico was engineered from the ground up to be an embedded system powerhouse. It’s about direct hardware control, real-time operations, and low-power applications.
Our team at Why Pi™ has been tracking the evolution of the Raspberry Pi ecosystem since day one. We saw the immediate potential of the RP2040 chip – the brains behind the Pico – to democratize microcontroller development. It brought the Raspberry Pi brand’s ethos of accessibility and community support to a whole new category of hardware.
Why the Distinction Matters: Microcontroller vs. Microprocessor
This is where the confusion often arises. Let’s break it down:
- Microcontroller (MCU): Think of it as a tiny, self-contained computer designed for specific tasks. It integrates a processor, memory (RAM and Flash), and input/output (I/O) peripherals all on a single chip. It runs a single program repeatedly and efficiently. The Raspberry Pi Pico, with its RP2040 chip, is a prime example. It’s fantastic for controlling a robot, reading temperature sensors, or making an LED blink.
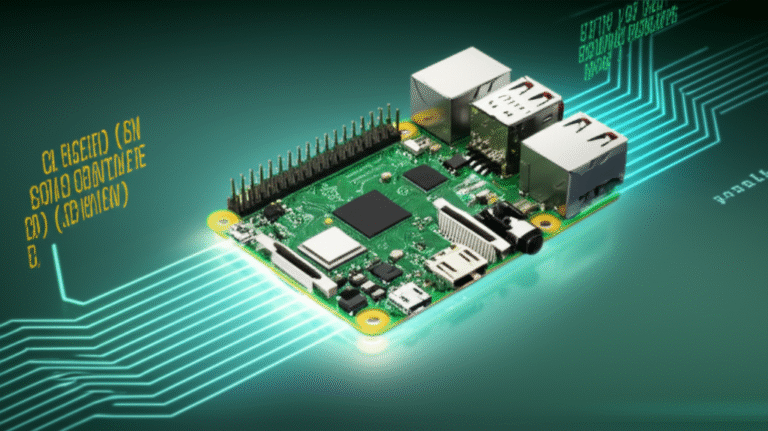
- Microprocessor (MPU): This is the “brain” of a computer, but it needs external components like RAM, storage, and I/O controllers to function as a complete system. A Raspberry Pi 4 uses a Broadcom BCM2711 microprocessor, which then connects to external RAM, a microSD card for storage, and various ports for peripherals. It’s designed to run complex operating systems and multiple applications simultaneously.
So, while both are “computers” in a very broad sense, their design philosophy, capabilities, and intended uses are vastly different. The Pico was never meant to evolve into a mini PC in the traditional sense, but rather to excel in the world of embedded systems, offering a robust platform for IoT Development.
🤔 Can Raspberry Pi Pico Really Replace Your Desktop PC?
Let’s address the elephant in the room, or rather, the tiny Pico on your desk. Can this marvel of miniaturization truly step into the shoes of your desktop PC? The short answer, echoed across the Raspberry Pi community, is a resounding no.
“The Pico is a microcontroller, not a computer,” as stated in a discussion on the official Raspberry Pi forums. Another user emphatically adds, “You can’t use a Pico as a PC because it lacks the necessary hardware and software capabilities.” Our engineers at Why Pi™ wholeheartedly agree.
To put it into perspective, let’s rate the Raspberry Pi Pico’s suitability as a PC replacement on a scale of 1 to 10:
| Aspect | Rating (1-10) | Explanation
- User Interface (0/10): The Pico has no built-in display output, keyboard input, or mouse support for a graphical user interface (GUI). It’s a headless board.
- Processing Power (1/10): While its dual-core ARM Cortex-M0+ is fast for a microcontroller, it’s orders of magnitude less powerful than even the most basic desktop CPU. It’s not designed for running complex applications, web browsers, or video playback.
- Memory (0/10): With 264KB of SRAM, the Pico can’t even dream of loading a modern operating system, which typically requires gigabytes of RAM.
- Storage (0/10): The 2MB of QSPI Flash memory is for storing its firmware and small MicroPython scripts, not for installing applications, documents, or media files.
- Connectivity (2/10): The Pico W offers Wi-Fi, but it’s for embedded network tasks, not general internet browsing. Standard USB peripherals (monitors, keyboards, mice, external drives) cannot be directly connected and used as they would on a PC.
- Software Compatibility (0/10): Forget Windows, macOS, or even a full Linux desktop environment. The Pico runs firmware, not an OS. It’s programmed in MicroPython or C/C++.
- Expandability (3/10): While it has GPIO pins for connecting custom hardware, it lacks the PCIe, SATA, or multiple USB host ports needed for PC-like expansion.
- Power Efficiency (9/10): This is where it shines! It sips power, making it ideal for battery-powered embedded applications.
- Cost (10/10): Incredibly affordable, making it accessible for hobbyists and students.
- Ease of Use (for its intended purpose) (8/10): Very easy to get started with MicroPython.
The Fundamental Disconnect: Architecture and Purpose
Your desktop PC, whether it’s a sleek Apple MacBook or a custom-built gaming rig, is built on a complex architecture designed for general-purpose computing. It has:
- A powerful CPU to execute instructions rapidly.
- Ample RAM (8GB, 16GB, 32GB+) to hold active programs and data.
- Mass storage (SSD, HDD) for the operating system, applications, and user files.
- A dedicated GPU for graphics.
- A rich set of I/O ports (USB, HDMI, Ethernet) to connect a wide array of peripherals.
- A sophisticated operating system (OS) to manage all these resources, provide a user interface, and run multiple applications concurrently.
The Raspberry Pi Pico has none of these in the quantities or forms required for a PC. It’s like comparing a high-performance sports car (your PC) to a precision-engineered drone (the Pico). Both are incredible machines, but they serve entirely different purposes.
“The Pico is not designed to run an OS or handle complex user interfaces,” confirms another forum post. This isn’t a flaw; it’s a feature. Its simplicity and direct hardware access are its strengths. So, if you’re looking to browse the web, write documents, or play modern games, the Pico is definitely not your device. For those tasks, you’d be much better off with a Raspberry Pi 4 or a Raspberry Pi 400.
🔍 Understanding Raspberry Pi Pico’s Hardware Limitations and Strengths
To truly appreciate the Raspberry Pi Pico, we need to understand what makes it tick – and what makes it different from a PC. Our engineers at Why Pi™ often say, “Know your tools, know their limits.” The Pico is a specialized tool, and its hardware reflects that.
The Heart: RP2040 Microcontroller Chip
The star of the show is the RP2040 chip, designed in-house by the Raspberry Pi Foundation. This is a significant achievement, as it allows for tight integration and cost optimization.
RP2040 Specifications:
| Feature | Detail
🔚 Conclusion: Is Raspberry Pi Pico a Viable PC Replacement?

After our deep dive into the Raspberry Pi Pico’s capabilities, limitations, and potential, here’s the bottom line from the educators and engineers at Why Pi™:
Positives ✅
- Ultra-affordable and accessible: Perfect for beginners and hobbyists diving into microcontroller programming.
- Powerful microcontroller: The RP2040 chip offers dual-core performance with real-time hardware control.
- Low power consumption: Ideal for battery-powered and embedded applications.
- Great for IoT and embedded projects: Especially with the Pico W’s Wi-Fi capabilities.
- Flexible programming options: Supports MicroPython, C/C++, and various development environments.
Negatives ❌
- Not a PC replacement: Lacks the hardware and software to run desktop operating systems or general-purpose computing tasks.
- No native display or peripheral support: Cannot connect directly to monitors, keyboards, or mice as a PC does.
- Limited RAM and storage: Insufficient for running complex applications or multitasking.
- No built-in OS: Runs firmware, not an operating system.
Our Confident Recommendation
If your goal is to replace a desktop or laptop PC for everyday tasks — web browsing, document editing, media playback, gaming, or software development — the Raspberry Pi Pico is not the device for you. Instead, consider a Raspberry Pi 4 or Raspberry Pi 400, which are designed to run full Linux distributions and provide a genuine PC experience.
However, if you want to learn embedded programming, build custom hardware controllers, or create IoT devices, the Pico is a fantastic, budget-friendly platform with a thriving community and tons of tutorials.
So, the question “Can I use Raspberry Pi Pico as a PC?” is answered: Not really, but it’s a brilliant microcontroller for many other exciting projects!
🔗 Recommended Links for Raspberry Pi Pico and Mini PC Projects
Ready to get your hands on a Raspberry Pi Pico or explore related products? Here are some trusted shopping links and resources to kickstart your journey:
- Raspberry Pi Pico:
Amazon | Adafruit | Raspberry Pi Official Store - Raspberry Pi Pico W (Wi-Fi enabled):
Amazon | Adafruit | Raspberry Pi Official Store - Raspberry Pi 4 Model B (for PC-like use):
Amazon | Raspberry Pi Official Store - Raspberry Pi 400 Keyboard PC:
Amazon | Raspberry Pi Official Store - Books for Raspberry Pi Pico Programming and Projects:
“Getting Started with Raspberry Pi Pico” by Agus Kurniawan
“Raspberry Pi Pico Essentials” by Neil Cameron
❓ Frequently Asked Questions About Raspberry Pi Pico as a PC
How do I set up Raspberry Pi Pico to function like a basic PC?
The Raspberry Pi Pico cannot function as a basic PC in the traditional sense. It does not support running an operating system or connecting standard PC peripherals like monitors and keyboards directly. However, you can program it to act as a USB Human Interface Device (HID), such as a custom keyboard or mouse, or as a USB mass storage device. This requires writing firmware in MicroPython or C/C++ and connecting it to a host PC.
What projects can I build with Raspberry Pi Pico as a computer?
While the Pico isn’t a computer, you can build projects that mimic some PC-like functions, such as:
- Custom USB keyboards or macro pads
- USB game controllers
- Simple data loggers with USB storage emulation
- IoT devices with Pico W’s Wi-Fi for remote control
- Basic automation and robotics controllers
These projects leverage the Pico’s microcontroller strengths rather than trying to replicate a full PC experience.
Is Raspberry Pi Pico suitable for programming and development tasks?
Absolutely! The Pico is an excellent platform for embedded programming and learning microcontroller development. It supports MicroPython and C/C++, with extensive documentation and community support. However, it’s not suitable for running desktop software development environments or multitasking like a PC.
Can I connect a monitor and keyboard to Raspberry Pi Pico?
❌ No, not directly. The Pico lacks video output hardware and USB host capabilities required to connect standard monitors and keyboards. You can connect input devices via GPIO pins or use the Pico as a USB device to emulate keyboards/mice, but it cannot function as a standalone PC with a display and keyboard.
How does Raspberry Pi Pico compare to Raspberry Pi 4 for PC use?
| Feature | Raspberry Pi Pico | Raspberry Pi 4 Model B |
|---|---|---|
| Processor | Dual-core ARM Cortex-M0+ 133 MHz | Quad-core ARM Cortex-A72 1.5 GHz |
| RAM | 264 KB | 2 GB / 4 GB / 8 GB |
| Storage | 2 MB Flash | microSD card slot |
| Operating System Support | None (runs firmware) | Full Linux distributions (e.g., Raspberry Pi OS) |
| Video Output | None | HDMI ports |
| USB Host Ports | None (USB device only) | Multiple USB 3.0 and 2.0 ports |
| Networking | Wi-Fi (Pico W only) | Ethernet and Wi-Fi |
| PC-like Functionality | ❌ Not suitable | ✅ Fully capable |
The Raspberry Pi 4 is a true mini PC, while the Pico is a microcontroller board.
Are there any projects or tutorials available for converting Raspberry Pi Pico into a functional PC?
No projects exist that convert the Pico into a full PC due to its hardware limitations. However, many tutorials show how to use the Pico as a USB HID device or for embedded applications. For a functional mini PC, explore Raspberry Pi 4 or Raspberry Pi 400 projects.
What operating systems are compatible with Raspberry Pi Pico for PC-like functionality?
The Pico does not run any traditional operating system. It runs firmware programmed in MicroPython or C/C++. It cannot run Linux, Windows, or other desktop OSes.
Can I use Raspberry Pi Pico for gaming and multimedia applications?
❌ No, the Pico lacks the processing power, graphics hardware, and OS support for gaming or multimedia playback. For retro gaming projects, Raspberry Pi 4 or other SBCs are better suited.
What are the minimum requirements for using Raspberry Pi Pico as a desktop computer?
The Pico does not meet any minimum requirements for desktop computing. It lacks video output, sufficient RAM, storage, and OS support.
How does Raspberry Pi Pico compare to other single-board computers for PC use?
Compared to SBCs like Raspberry Pi 4, Odroid, or ASUS Tinker Board, the Pico is a microcontroller with limited resources and no OS support. SBCs are designed for PC-like tasks; the Pico is designed for embedded control.
Can the Raspberry Pi Pico run an operating system?
No. The Pico runs bare-metal firmware programmed by the user. It does not support running operating systems.
Can I use a Raspberry Pi as a PC?
✅ Yes! Raspberry Pi 4, Raspberry Pi 400, and newer models run full Linux distributions and can be used as budget-friendly PCs for web browsing, programming, media playback, and more.
Can you run Windows on Raspberry Pi Pico?
❌ No. The Pico’s hardware and architecture do not support Windows or Windows IoT Core.
Is the Raspberry Pi Pico a computer?
Technically, yes — it is a microcontroller-based computer designed for embedded applications, but it is not a general-purpose computer or PC.
📖 Reference Links and Further Reading
- Raspberry Pi Foundation Official Site – Raspberry Pi Pico:
https://www.raspberrypi.com/products/raspberry-pi-pico/ - Raspberry Pi Forums – Can I use Raspberry Pi Pico as a PC?
https://forums.raspberrypi.com/viewtopic.php?t=345356 - Raspberry Pi Forums – Pico hardware and use cases discussion:
https://forums.raspberrypi.com/viewtopic.php?t=333401 - PlatformIO Community – Raspberry Pi Pico (RP2040) Will not upload when using my Windows PC:
https://community.platformio.org/t/raspberry-pi-pico-rp2040-will-not-upload-when-using-my-windows-pc-all-other-boards-work/29852 - Adafruit Raspberry Pi Pico Products:
https://www.adafruit.com/category/486 - MicroPython Official Documentation:
https://docs.micropython.org/en/latest/rp2/quickref.html - Why Pi™ Raspberry Pi Pico Category:
https://www.whypi.org/raspberry-pi-pico/ - Raspberry Pi OS (formerly Raspbian) – Official Linux for Raspberry Pi SBCs:
https://www.raspberrypi.com/software/ - USB HID Device Programming on Raspberry Pi Pico (Tutorial):
https://learn.adafruit.com/usb-hid-devices-with-raspberry-pi-pico
We hope this comprehensive guide clears up the mystery! The Raspberry Pi Pico is a gem for embedded projects but not a PC replacement. Ready to start your Pico adventure? Dive into our tutorials and community projects at Why Pi™ for endless inspiration! 🚀