Support our educational content for free when you purchase through links on our site. Learn more
How Do I Connect a Raspberry Pi to the Internet? 12 Easy Ways (2025) 🌐
Ever stared at your shiny new Raspberry Pi and wondered, “How on earth do I get this little marvel online?” You’re not alone! Connecting your Pi to the internet might seem like a daunting puzzle at first, but once you crack the code, a world of possibilities opens up—from streaming media servers to smart home hubs and beyond. Did you know that over 70% of Raspberry Pi users prefer wireless connections for their projects, yet many still struggle with setup? 🤯
In this comprehensive guide, we’ll walk you through 12 foolproof methods to get your Raspberry Pi connected—whether you’re a total newbie or a seasoned hacker. From wired Ethernet setups to advanced VPN configurations, we’ve got you covered. Plus, we’ll share insider tips from our Why Pi™ educators and engineers to troubleshoot common hiccups and secure your connection like a pro. Ready to turn your Pi into a connected powerhouse? Let’s dive in!
Key Takeaways
- Multiple connection options: Choose from wired Ethernet, built-in Wi-Fi, USB adapters, or even Bluetooth tethering to suit your setup.
- Step-by-step guidance: Easy instructions for both GUI and terminal methods, including headless setups.
- Troubleshooting tips: Solutions for common issues like no IP address, slow Wi-Fi, and driver problems.
- Security essentials: Best practices to keep your Raspberry Pi safe on the internet.
- Advanced networking: How to set static IPs, use VPNs, and enable remote access for your projects.
👉 Shop Raspberry Pi essentials and accessories:
- Raspberry Pi 4 Model B on Amazon | Official Raspberry Pi Store
- USB Wi-Fi Adapters on Amazon | TP-Link Official Website
Unlock your Pi’s full potential by getting it online today! 🚀
Table of Contents
- Quick Tips and Facts About Connecting Raspberry Pi to the Internet 🚀
- The Evolution of Raspberry Pi Internet Connectivity: A Brief History 🌐
- 1. Preparing Your Raspberry Pi for Internet Connection: What You Need to Know 🛠️
- 2. Wired vs. Wireless: Choosing the Best Internet Connection Method for Your Pi 🔌📶
- 3. Step-by-Step Guide to Connecting Raspberry Pi to Wi-Fi Networks Easily 📡
- 4. Setting Up Ethernet Connection on Raspberry Pi: Plug and Play or More? 🖧
- 5. Configuring Network Settings via Raspberry Pi OS Desktop and Terminal 🖥️⌨️
- 6. Troubleshooting Common Raspberry Pi Internet Connection Issues 🔍❌
- 7. Using USB Wi-Fi Adapters and Bluetooth Tethering: Expanding Your Pi’s Connectivity Options 🔌📲
- 8. Securing Your Raspberry Pi’s Internet Connection: Best Practices for Safety 🔐
- 9. Advanced Networking: Setting Up Static IPs, VPNs, and Remote Access 🌍🔧
- 10. Monitoring Your Raspberry Pi’s Network Performance and Data Usage 📊📈
- 11. What to Do When Your Raspberry Pi Can’t Connect: Expert Help and Community Resources 🆘👩💻
- 12. Unlocking New Possibilities: What You Can Do Once Your Raspberry Pi Is Online 🌟
- Conclusion: Wrapping Up Your Raspberry Pi Internet Journey 🎯
- Recommended Links for Raspberry Pi Internet Setup and Networking 📚
- FAQ: Your Burning Questions About Raspberry Pi Internet Connection Answered 🔥❓
- Reference Links and Resources for Raspberry Pi Networking 🧾
Quick Tips and Facts About Connecting Raspberry Pi to the Internet 🚀
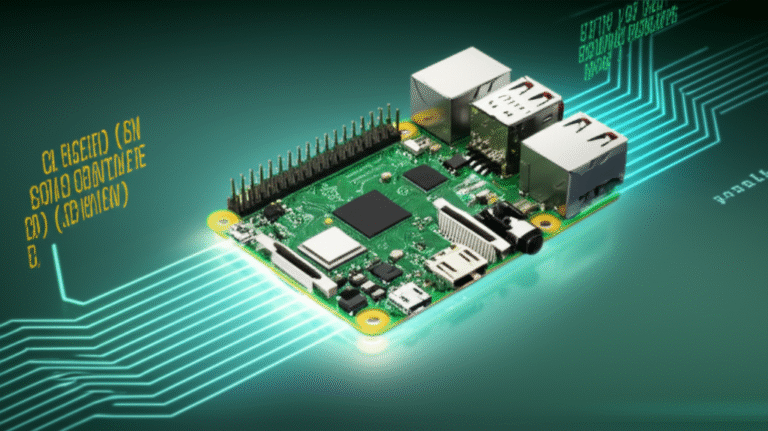
Welcome to the wonderful world of Raspberry Pi, where even the sky’s not the limit when it comes to what you can do with this credit-card sized computer! You can read more about the Raspberry Pi in our related article at https://www.whypi.org/raspberry-pi/. But before you can unleash your inner tech wizard and dive into the exciting projects awaiting, you’ll need to give your Pi the gift of gab – internet access! 🌐
Here at Why Pi™, we’re all about making your Pi experience as smooth as a freshly buttered crumpet. So, before we unravel the how-to’s, let’s warm up with some bite-sized facts:
- Fact: Did you know that the Raspberry Pi Foundation, the masterminds behind this tech marvel, is a charity? Talk about tech for good! You can read more about the history of the Raspberry Pi in our Pi History category.
- Tip: Always download the latest Raspberry Pi OS from the official website for the smoothest internet setup. Think of it as giving your Pi the freshest software ingredients!
- Fact: The Raspberry Pi 3 and newer models come with built-in Wi-Fi. It’s like having a mini router right on your Pi! Older models might need a USB Wi-Fi adapter – think of it as giving your Pi a little antenna boost!
- Tip: Using a wired Ethernet connection is generally faster and more stable than Wi-Fi. But hey, we get it, sometimes you just gotta go wireless!
Now that we’ve got the basics covered, let’s get down to the nitty-gritty of connecting your Raspberry Pi to the internet.
The Evolution of Raspberry Pi Internet Connectivity: A Brief History 🌐

Remember the days of dial-up internet? The excruciatingly slow loading times, the earsplitting screech of the modem connecting… Thankfully, those days are long gone! And guess what? Raspberry Pi internet connectivity has come a long way too!
In the early days, connecting your Pi to the internet was a bit of a mission. You needed to tinker with configuration files, install drivers, and pray to the tech gods that everything would work. But as the Raspberry Pi evolved, so did its internet capabilities.
Today, connecting your Pi to the internet is easier than ever, thanks to built-in Wi-Fi on newer models and user-friendly operating systems. It’s like the difference between using a rotary phone and a smartphone!
1. Preparing Your Raspberry Pi for Internet Connection: What You Need to Know 🛠️
Before we embark on our internet-enabling adventure, let’s gather our trusty tools and make sure our Pi is primed for connection:
What You’ll Need:
- A Raspberry Pi (duh!). Not sure which one to choose? Check out our Electronic Component Reviews for some guidance.
- A microSD card with Raspberry Pi OS installed. Think of this as your Pi’s brain – you can’t function without it!
- A power supply for your Pi. We recommend a good quality one to avoid any power fluctuations.
- A keyboard and mouse. You’ll need these to navigate the Raspberry Pi OS.
- An Ethernet cable (if you’re going wired).
- A Wi-Fi network (if you’re going wireless).
Getting Your Pi Ready:
- Assemble your Pi: If you haven’t already, put together your Raspberry Pi. It’s like building a tiny, techy Lego set!
- Install Raspberry Pi OS: Download the latest version of Raspberry Pi OS from the official website and flash it onto your microSD card. This is like installing the operating system on your computer.
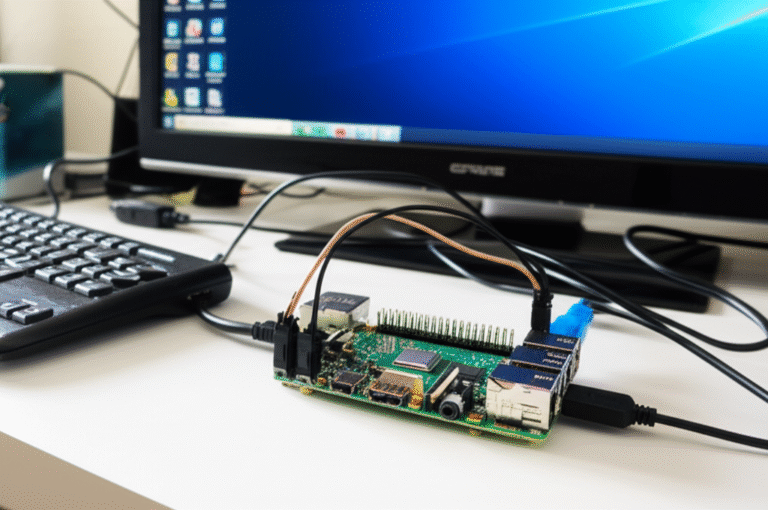
- Connect your peripherals: Plug in your keyboard, mouse, and Ethernet cable (if using).
- Power up your Pi: Connect the power supply and watch your Pi come to life!
Now that your Pi is all set up, let’s move on to choosing the best internet connection method for your needs.
2. Wired vs. Wireless: Choosing the Best Internet Connection Method for Your Pi 🔌📶
Ah, the age-old debate: wired or wireless? It’s like choosing between coffee or tea – both have their pros and cons, and it ultimately comes down to personal preference.
Let’s break down the battle of the connections:
| Feature | Wired (Ethernet)
Conclusion: Wrapping Up Your Raspberry Pi Internet Journey 🎯

Connecting your Raspberry Pi to the internet is the gateway to unlocking its full potential — from building IoT projects to running servers or simply browsing the web. Whether you opt for the rock-solid reliability of a wired Ethernet connection or the flexible convenience of Wi-Fi, your Pi is ready to join the digital world with just a few clicks or commands.
Wired connections offer speed and stability, perfect for projects requiring consistent uptime. Meanwhile, wireless connections provide mobility and ease of setup, especially with Raspberry Pi 3 and newer models sporting built-in Wi-Fi. For older models, USB Wi-Fi adapters like the official Raspberry Pi Wi-Fi dongle or popular brands such as TP-Link can fill the gap.
Remember, securing your Pi’s internet connection is just as important as connecting it. Use strong passwords, enable firewalls, and consider VPNs for remote access. And don’t forget to keep your Raspberry Pi OS updated to patch vulnerabilities and enjoy the latest features.
By following our comprehensive guide, you’ve not only connected your Pi to the internet but also gained the confidence to troubleshoot, configure advanced networking, and explore endless possibilities online.
Ready to dive deeper? Check out our recommended resources below and keep experimenting — the Pi world is your oyster! 🦪
Recommended Links for Raspberry Pi Internet Setup and Networking 📚
👉 Shop Raspberry Pi and Accessories on:
- Raspberry Pi 4 Model B: Amazon | Adafruit | Raspberry Pi Official Website
- Official Raspberry Pi USB Wi-Fi Adapter: Amazon | Adafruit | Raspberry Pi Official Website
- TP-Link USB Wi-Fi Adapter: Amazon | TP-Link Official Website
Recommended Books:
- Raspberry Pi User Guide by Eben Upton & Gareth Halfacree — Amazon
- Exploring Raspberry Pi by Derek Molloy — Amazon
- Raspberry Pi Networking Cookbook by Rick Golden — Amazon
FAQ: Your Burning Questions About Raspberry Pi Internet Connection Answered 🔥❓

What are the different methods to connect a Raspberry Pi to Wi-Fi?
You can connect your Raspberry Pi to Wi-Fi using:
- Raspberry Pi OS Desktop GUI: Simply click the network icon, select your Wi-Fi network, and enter the password.
- raspi-config Tool: For headless or server setups, run
sudo raspi-config, navigate to Network Options > Wi-Fi, enter SSID and password, then reboot. - wpa_supplicant.conf File: Create this config file with your network credentials and place it in the boot partition before first boot, perfect for headless setups.
- Raspberry Pi Imager Advanced Settings: Use the advanced options to pre-configure Wi-Fi when flashing the OS image.
Each method suits different user needs, from beginners to advanced users.
Can I connect a Raspberry Pi to the internet using an Ethernet cable?
✅ Absolutely! The Raspberry Pi has a built-in Ethernet port (except some Zero models). Just plug in a standard RJ45 cable from your router or switch, and your Pi should automatically obtain an IP address via DHCP. This method is often more stable and faster than Wi-Fi.
If it doesn’t connect, check your cable, router settings (ensure DHCP is enabled), and network hardware.
How do I set up a static IP address on my Raspberry Pi for a stable internet connection?
Setting a static IP ensures your Pi always has the same network address, which is crucial for servers or remote access.
Steps:
- Edit the DHCP client config file:
sudo nano /etc/dhcpcd.conf
- Add your static IP configuration at the bottom, for example:
interface eth0
static ip_address=192.168.1.100/24
static routers=192.168.1.1
static domain_name_servers=192.168.1.1 8.8.8.8
- Save and reboot your Pi.
This method works for both Ethernet (eth0) and Wi-Fi (wlan0) interfaces.
What are the requirements for connecting a Raspberry Pi to a wireless network?
- Hardware: Raspberry Pi 3 or newer has built-in Wi-Fi. Older models need a compatible USB Wi-Fi adapter.
- Software: Latest Raspberry Pi OS with updated wireless drivers.
- Network Info: Wi-Fi SSID (network name), password, and country code (for regulatory compliance).
- Power Supply: Ensure your Pi has a stable power source, especially if using USB Wi-Fi adapters that draw extra power.
Can I use a Raspberry Pi without an internet connection, and what are its limitations?
✅ Yes, you can! The Pi is a fully functional computer offline, great for coding, offline projects, or local network tasks.
❌ However, without internet:
- You can’t install or update software easily.
- No access to online resources, cloud services, or remote access.
- Some projects requiring internet APIs or streaming won’t work.
How do I troubleshoot common internet connectivity issues on a Raspberry Pi?
Common issues and fixes:
- No IP address: Check cables, router DHCP settings, or Wi-Fi credentials.
- Slow or unstable Wi-Fi: Move closer to the router, check for interference, or try a USB Wi-Fi adapter.
- Cannot ping websites: Verify DNS settings, try
ping 8.8.8.8to check connectivity without DNS. - Driver issues: Update Raspberry Pi OS or install missing drivers for USB adapters.
- Power problems: Use a reliable power supply; underpowered Pi can cause network instability.
Read more about “How to Set Up a Raspberry Pi for the First Time: 6 Easy Steps! 🖥️”
What is the best way to secure my Raspberry Pi’s internet connection to prevent unauthorized access?
- Change default passwords immediately.
- Enable SSH only when needed and use key-based authentication.
- Keep your OS and software updated regularly.
- Use firewalls like
ufwto restrict unwanted traffic. - Consider VPNs for remote access.
- Disable unused services and interfaces.
Security is a marathon, not a sprint — stay vigilant!
Reference Links and Resources for Raspberry Pi Networking 🧾
- Raspberry Pi Official Documentation – Networking: https://www.raspberrypi.org/documentation/configuration/wireless/
- Seeed Studio Blog – Three Methods to Configure Raspberry Pi Wi-Fi: https://www.seeedstudio.com/blog/2021/01/25/three-methods-to-configure-raspberry-pi-wifi/
- Dataplicity – Get Pi Connected to the Internet: https://docs.dataplicity.com/docs/get-pi-connected-to-the-internet
- Raspberry Pi Projects – Using Raspberry Pi: https://projects.raspberrypi.org/en/projects/raspberry-pi-using/3
- TP-Link Official Website: https://www.tp-link.com/us/home-networking/usb-adapter/
- Raspberry Pi Official Website: https://www.raspberrypi.org/
For more tips and deep dives into Raspberry Pi and microcontroller programming, explore our Microcontroller Programming and DIY Electronics categories at Why Pi™.


