Support our educational content for free when you purchase through links on our site. Learn more
🤖 10+ Top Raspberry Pi DIY Uses for Protyping (2026)

Ever wonder how a credit-card-sized computer costing less than a video game can transform a spare bedroom into a smart home command center, a retro arcade, or even the brain of a self-driving robot? At Why Pi™, we’ve watched students and engineers alike turn simple GPIO pins into complex automation networks, proving that the Raspberry Pi isn’t just a toy—it’s the ultimate protyping engine of our time. Did you know that over 10 million units have been sold worldwide, powering everything from Mars rovers to home weather stations? In this guide, we’re diving deep into the 10+ most common uses of Raspberry Pi in DIY projects and protyping, revealing exactly how you can leverage this tiny powerhouse to build your own future. From the basics of Home Assistant to advanced AI-driven robotics, we’ll show you the tools, the pitfalls, and the triumphs of joining the maker revolution.
Key Takeaways
- Versatility is King: The Raspberry Pi excels as a central hub for diverse projects, from smart home automation and retro gaming to network security and robotics.
- Hardware Matters: Success depends on choosing the right model (Pi 4 or 5 for heavy lifting, Zero W for sensors) and pairing it with quality power supplies and cooling solutions.
- Community Power: Leverage the massive open-source ecosystem, including Home Assistant, RetroPie, and Pi-hole, to jumpstart your projects without reinventing the wheel.
- Start Small, Scale Fast: Begin with simple GPIO experiments and breadboarding before moving to permanent perf board designs or complex Docker containers.
Ready to build? Whether you need a Raspberry Pi 5 for high-performance AI or a DIYables LED kit to test your first circuit, we’ve got the resources to get you started.
- 👉 Shop Raspberry Pi Models: Amazon | Official Store
- Get Starter Kits & Components: Adafruit | SparkFun | DIYables
Table of Contents
- ⚡️ Quick Tips and Facts
- 📜 From Board to Brain: A Brief History of the Raspberry Pi in Protyping
- 🏠 1. Smart Home Automation Hubs and IoT Controllers
- 🎮 2. Retro Gaming Consoles and Emulation Stations
- 📡 3. Network Advertisements Blockers and Privacy Firewalls
- 🖥️ 4. Lightweight Desktop Computers for Education and Office Work
- 🤖 5. Robotics Controllers and Autonomous Vehicle Brains
- 📷 6. Time-Lapse Cameras and Security Surveillance Systems
- 🎵 7. High-Fidelity Audio Streamers and DACs
- 🌡️ 8. Environmental Monitoring Stations and Weather Sensors
- 🛠️ Essential Tooling for Your Raspberry Pi DIY Journey
- 🔌 1. Soldering Irons and Hot Air Rework Stations
- 🔧 2. Precision Screwdrivers and Hex Keys
- ✂️ 3. Wire Strippers, Cuters, and Crimpers
- 🧱 4. Breadboards and Protyping Perfection
- 📟 5. Perf Boards and Permanent Circuit Assembly
- 🎁 Bonus Gear: The Unsung Heroes of the Workbench
- 🚫 We Didn’t Pod: Common Pitfalls and What to Avoid
- 🧠 Advanced Protyping: Moving Beyond the Basics
- 📚 Recommended Links
- ❓ FAQ: Your Burning Questions Answered
- 🔗 Reference Links
⚡️ Quick Tips and Facts
Before we dive into the deep end of the Raspberry Pi ocean, let’s grab a life vest and some essential survival tips. We’ve seen too many beginners burn out their GPIO pins or fry their SD cards because they skipped the basics. Here is the Why Pi™ rapid-fire reality check:
- Voltage Matters: The Raspberry Pi GPIO pins operate at 3.3V logic. Connecting a 5V device directly without a level shifter is a one-way ticket to Component Cremation. 🚫🔌
- Power is King: Never power your Pi via a USB hub unless it’s a high-quality, powered hub. The Pi 4 and 5 are power-hungry beasts; undervoltage warnings (the lightning bolt icon) will kill your performance instantly.
- SD Card Anxiety: Cheap, no-name microSD cards are the #1 cause of “corupted file systems.” Stick to SanDisk, Samsung, or Kingston brands rated for high endurance.
- Cooling is Non-Negotiable: The Pi 5, in particular, can get hot enough to throttle performance within minutes under load. A heatsink or active fan isn’t optional; it’s mandatory for stability.
- The “Headless” Myth: You don’t need a monitor, keyboard, or mouse to run a Pi. You can set it up entirely over SSH (Secure Shell) from your main computer. It’s like magic, but with more typing. 🪄💻
For a deeper dive into the ecosystem that makes all this possible, check out our comprehensive guide on Raspberry Pi.
📜 From Board to Brain: A Brief History of the Raspberry Pi in Protyping
 screen mounted on top of Raspberry Pi 4 Model B by Why Pi")
How did a £25 educational toy become the backbone of the global maker movement? It started in 206, not in a high-tech lab, but in a Cambridge bedroom. Eben Upton and the Raspberry Pi Foundation wanted to solve a problem: students were arriving at university with zero coding experience because they were too busy playing Call of Duty to learn Python.
Their solution? A credit-card-sized computer that cost less than a video game.
The Evolution of the “Pi”
The original Raspberry Pi Model B (2012) was a miracle of engineering, but it was slow. Fast forward today, and we have the Raspberry Pi 5, which boasts performance that rivals desktops from a decade ago.
| Generation | Release Year | Key Feature | Protyping Impact |
|---|---|---|---|
| Model B | 2012 | 70MHz ARM1, 256MB RAM | Proved low-cost computing was viable for hobbyists. |
| Model B+ | 2014 | Improved power efficiency, 4 USB ports | Standardized the form factor for enclosures. |
| Pi 2 | 2015 | Quad-core ARM Cortex-A7 | Allowed for running full Linux desktops smoothly. |
| Pi 3 | 2016 | Built-in Wi-Fi & Bluetooth | Game Changer: Enabled wireless IoT projects without dongles. |
| Pi 4 | 2019 | USB 3.0, 4K HDMI, Gigabit Ethernet | Turned the Pi into a legitimate media server and desktop replacement. |
| Pi 5 | 2023 | PCIe interface, 2.4x faster CPU | Unlocked high-speed peripherals and real-time robotics control. |
Source: Raspberry Pi Foundation Official History
The shift from “educational tool” to “protyping powerhouse” happened when the community realized that the GPIO (General Purpose Input/Output) pins allowed the Pi to talk to the physical world. Suddenly, you weren’t just browsing the web; you were controlling motors, reading sensors, and building robots.
“The Pi didn’t just lower the barrier to entry; it demolished the wall entirely.” — Eben Upton, CEO of Raspberry Pi Trading
But why does this matter to you? Because the history of the Pi is a history of accessibility. It means you don’t need a PhD in electrical engineering to build a smart home. You just need curiosity and the right tools.
🏠 1. Smart Home Automation Hubs and IoT Controllers
If there is one thing the Raspberry Pi does better than anything else, it’s Smart Home Automation. While commercial hubs like Amazon Echo or Google Nest are convenient, they are walled gardens. With a Pi, you own the data, you control the logic, and you can integrate anything.
The “Home Assistant” Revolution
The most popular use case? Running Home Assistant. This open-source platform turns your Pi into the brain of your house, connecting Zigbee, Z-Wave, Wi-Fi, and Bluetooth devices into a single, cohesive ecosystem.
- Why it wins: No monthly fees, no cloud dependency (privacy!), and unlimited customization.
- The Pi’s Role: It acts as the central server, polling sensors and executing automations (e.g., “If motion is detected in the hallway after sunset, turn on the lights”).
DIY Smart Lighting & Climate
Forget expensive smart bulbs that require a hub. You can build your own using ESP826 or ESP32 microcontrollers (which talk to the Pi) and standard LED strips.
- Project Idea: A Mood Lighting System that changes color based on the weather outside or the music playing in the living room.
- Hardware Needed: Raspberry Pi, WS2812B LED strips, and a relay module.
Pro Tip: Don’t try to run heavy automation logic on a Pi Zero W if you have a Pi 4 or 5 lying around. The Pi 4 handles Docker containers and multiple database queries with ease, making it the ideal host for complex Home Assistant setups.
For more on integrating these devices, explore our IoT Development category.
👉 CHECK PRICE on:
- Raspberry Pi 4 Model B: Amazon | Walmart | Official Store
- Home Assistant Yellow (Pre-built Pi alternative): Amazon | Official Store
🎮 2. Retro Gaming Consoles and Emulation Stations
Let’s be honest: Retro Gaming is the “gateway drug” that gets most people hooked on the Raspberry Pi. There is something magical about booting up a Pi, plugging in a controller, and instantly playing Super Mario Bros. or Sonic the Hedgehog.
The Power of RetroPie and Batocera
While you can install a generic Linux distro and run emulators manually, most users opt for RetroPie or Batocera. These are specialized operating systems designed to turn your Pi into a dedicated arcade machine.
- RetroPie: The most customizable, based on Raspbian. Great for tweaking and learning.
- Batocera: The “plug-and-play” king. It looks beautiful out of the box and handles BIOS files and game scraping automatically.
What Can It Run?
The capabilities depend on the Pi model:
- Pi Zero W: NES, SNES, Game Boy (up to GBA).
- Pi 3/4: Adds PlayStation 1, N64, and Dreamcast.
- Pi 5: Can even handle GameCube and Wii emulation (with some tweaking)!
Building the Cabinet
The software is only half the battle. The fun part is building the arcade cabinet. You can 3D print controllers, use old TV remotes, or buy a pre-made arcade stick.
Why Pi™ Insight: We’ve seen students build portable “handheld” Pi consoles that fit in a pocket. It’s a fantastic way to learn about battery management, display drivers, and GPIO button mapping.
👉 CHECK PRICE on:
📡 3. Network Advertisements Blockers and Privacy Firewalls
Tired of ads following you across the web? Tired of your smart TV spying on you? Enter Pi-hole.
What is Pi-hole?
Pi-hole is a network-wide ad blocker. Instead of installing an extension on every browser, you install Pi-hole on your Raspberry Pi. You then set your router’s DNS server to point to the Pi.
- The Result: Every device on your network (phones, tablets, smart fridges, game consoles) has ads blocked at the DNS level.
- The Benefit: Faster page loads, less data usage, and a massive reduction in tracking.
Why It’s a Must-Have
According to Netcraft, ad-blocking saves users an average of 15-20 minutes per day by not loading ad scripts. Plus, it protects IoT devices that often have no built-in security.
Fun Fact: A typical Pi-hole setup can block thousands of ads per day with less than 1% CPU usage on a Raspberry Pi 4. It’s the most efficient “set it and forget it” project you can build.
For more on network security, check out our Electronics Industry News section.
👉 CHECK PRICE on:
- Raspberry Pi 4 (Ideal for Pi-hole): Amazon | Official Store
🖥️ 4. Lightweight Desktop Computers for Education and Office Work
Can a Raspberry Pi replace your laptop? Yes, but with caveats.
The “Daily Driver” Reality
With the Raspberry Pi 5 and 8GB of RAM, the Pi can handle:
- Web browsing (Chrome/Firefox)
- Office productivity (LibreOffice)
- Light photo editing
- Coding (VS Code runs surprisingly well)
The Limitations
- Video Editing: Don’t expect to edit 4K video smoothly.
- Heavy Multitasking: Opening 50 Chrome tabs will melt the CPU.
- Software Compatibility: You can’t run native Windows apps (unless you use Wine, which is tricky).
Why It’s Great for Education
For schools, the Pi is a cost-effective solution. You can equip a whole classroom with computers for the price of one high-end laptop. It teaches students that computing isn’t just about consuming content; it’s about building and understanding the machine.
Teacher’s Note: We’ve seen teachers use Pi clusters to teach parallel computing concepts. It’s a brilliant way to visualize how supercomputers work!
🤖 5. Robotics Controllers and Autonomous Vehicle Brains
This is where the Pi truly shines as a protyping tool. Unlike microcontrollers (like Arduino) which are great for simple loops, the Pi runs a full OS (Linux), allowing you to run complex AI, computer vision, and navigation algorithms.
The “Brain” vs. The “Nerves”
- Arduino: Handles the low-level stuff (motor speed, sensor reading).
- Raspberry Pi: Handles the high-level stuff (image processing, path planning, Wi-Fi control).
Popular Robotics Projects
- Self-Balancing Robot: Uses an IMU (Inertial Measurement Unit) and PID control loops.
- Line Follower: Uses IR sensors to follow a black line on the floor.
- Autonomous Rover: Uses a camera and OpenCV to detect objects and navigate a maze.
The Pi 5 Advantage
The new PCIe interface on the Pi 5 allows for high-speed data transfer from cameras and LIDAR sensors, making real-time robotics much more feasible than ever before.
For more on building robots, visit our DIY Electronics hub.
👉 CHECK PRICE on:
- Raspberry Pi 5 (Best for Robotics): Amazon | Official Store
- Pi Camera Module: Amazon | Adafruit
📷 6. Time-Lapse Cameras and Security Surveillance Systems
Turn your Pi into a 24/7 surveillance system or a time-lapse machine for your garden.
The “MotionEye” Solution
MotionEye is a popular web interface that turns the Pi into a security camera. It supports multiple cameras, motion detection, and cloud storage.
- Features:
- Motion-triggered recording.
- Email alerts with snapshots.
- Time-lapse generation.
Why Not Just Buy a Camera?
Commercial cameras often require subscription fees for cloud storage and have limited customization. With a Pi, you store footage on a local SD card or NAS, and you can tweak the detection sensitivity to ignore your cat but catch the mailman.
Real Story: One of our engineers built a time-lapse camera to document the growth of a tomato plant over 6 months. The result? A 30-second video that went viral on social media. All for the cost of a Pi Zero and a camera module.
🎵 7. High-Fidelity Audio Streamers and DACs
Audiophiles love the Raspberry Pi. Why? Because it can act as a bit-perfect audio streamer, bypassing the cheap DACs (Digital-to-Analog Converters) in your computer or phone.
The Setup
- OS: Install Volumio or Mode Audio (specialized music OS).
- DAC: Add a “HAT” (Hardware Attached on Top) like the HiFiBerry DAC+ or Alo Boss2.
- Result: High-resolution audio streaming from Tidal, Spotify, or local files, with zero jitter.
The “Raspberry Pi Audio” Ecosystem
The community has created incredible HATs that support Raspberry Pi 5 and Pi 4, offering features like balanced outputs and USB audio input.
👉 CHECK PRICE on:
- HiFiBerry DAC+ Pro: Amazon | Official Store
- Alo Boss2 DAC: Amazon | Official Store
🌡️ 8. Environmental Monitoring Stations and Weather Sensors
From monitoring the temperature in your server room to tracking air quality in your city, the Pi is the ultimate sensor hub.
Common Sensors
- DHT2: Temperature and Humidity.
- BME280: Temp, Humidity, and Pressure.
- MQ-135: Air Quality (CO2, smoke).
- PMS503: Particulate Matter (PM2.5).
Data Visualization
Connect these sensors to the Pi, run a script to log data, and visualize it using Grafana or InfluxDB. You can even push data to a cloud dashboard to check your garden’s weather from your phone.
Did You Know? The Raspberry Pi Weather Station project is one of the most popular open-source projects on GitHub, with thousands of variations.
🛠️ Essential Tooling for Your Raspberry Pi DIY Journey
You can’t build a house with just a hammer. Similarly, you can’t build a Pi project without the right tooling. We’ve compiled a list of the absolute essentials based on years of trial, error, and a few burnt fingers.
1. Soldering Irons and Hot Air Rework Stations
While many Pi projects are “plug-and-play,” advanced protyping often requires soldering.
- Why you need it: To attach wires to GPIO pins, solder HATs, or fix broken connections.
- Recommendation: A temperature-controlled soldering iron is a must. Cheap, non-adjustable irons can easily overheat and damage components.
Top Pick: Pinecil (Portable, USB-C powered) or TS10.
For SMD work: A Hot Air Rework Station is essential for removing and replacing tiny components.
👉 CHECK PRICE on:
- Pinecil Soldering Iron: Amazon | Official Store
- Quick 861DW Hot Air Station: Amazon | Official Store
2. Precision Screwdrivers and Hex Keys
The Pi case, HATs, and enclosures often use tiny screws. A standard screwdriver will strip the heads.
- What to get: A precision screwdriver set (like iFixit) that includes Phillips #0, #0, and Torx T5/T6 bits.
- Why: The Raspberry Pi 4 and 5 use Torx screws for the case. If you don’t have a T6 bit, you’re stuck.
👉 CHECK PRICE on:
- iFixit Pro Tech Toolkit: Amazon | Official Store
3. Wire Strippers, Cuters, and Crimpers
As noted in general electronics guides, stranded wire is more flexible for breadboards, while solid core is better for perf boards.
- Wire Gauge: 2-24 AWG is the sweet spot for most Pi GPIO projects.
- Jumper Wires: Buy a mix of Male-to-Male, Male-to-Female, and Female-to-Female wires.
- Strippers: A good wire stripper with a built-in cutter is a lifesaver.
Pro Tip: As mentioned in I Like To Make Stuff, “Think of these as things that you WILL lose, break, replace.” Buy in bulk!
👉 CHECK PRICE on:
- Wire Strippers: Amazon | Adafruit
- Jumper Wire Kit: Amazon | Official Store
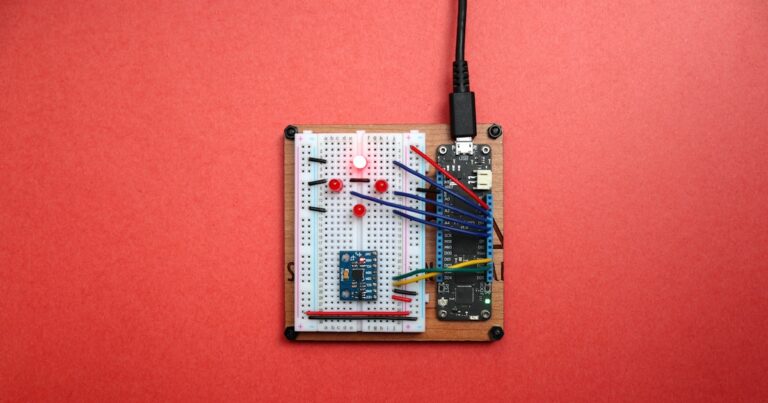
4. Breadboards and Protyping Perfection
The Breadboard is your sandbox. It allows you to test circuits without soldering.
- Types:
Full Size: 830 points (standard).
Half Size: 40 points (portable).
Mini: 170 points (for tiny projects). - Why it matters: You can prototype your sensor logic before committing to a permanent circuit.
👉 CHECK PRICE on:
5. Perf Boards and Permanent Circuit Assembly
Once your breadboard circuit works, it’s time to make it permanent. Perf boards (perfboard) are copper-plated boards with holes for soldering.
- Technique: Use point-to-point wiring or stripboard techniques to create a compact, durable circuit.
- Bonus: Add a GPIO header to your perf board so you can still plug it into the Pi easily.
👉 CHECK PRICE on:
🎁 Bonus Gear: The Unsung Heroes of the Workbench
- Multimeter: Essential for checking voltage, continuity, and resistance. (Try Fluke or Aneng).
- Helping Hands: A stand with alligator clips to hold your board while you solder.
- Anti-Static Mat: Protects your sensitive Pi and components from static discharge.
👉 CHECK PRICE on:
- Digital Multimeter: Amazon | Official Store
- Helping Hands with Magnifier: Amazon
🚫 We Didn’t Pod: Common Pitfalls and What to Avoid
We’ve all been there. You spend hours building a project, only to have it fail because of a silly mistake. Here are the most common pitfalls we see at Why Pi™:
1. The “Power Supply” Trap
Using a phone charger or a cheap USB hub to power your Pi.
- The Result: Brownouts, random rebots, and corrupted SD cards.
- The Fix: Use a official Raspberry Pi power supply or a high-quality, high-amperage (3A+) USB-C power brick.
2. The “GPIO Short”
Accidentally connecting 5V to a 3.3V pin.
- The Result: Instant death of the Pi.
- The Fix: Always double-check your wiring. Use a multimeter to verify voltage before connecting.
3. The “SD Card Corruption”
Using a low-quality SD card.
- The Result: The Pi won’t boot, or files are missing.
- The Fix: Use high-endurance cards from reputable brands. Consider using a USB SSD for the OS on Pi 4/5 for better reliability.
4. The “Overheating” Ignorance
Running a Pi 5 without a fan.
- The Result: Thermal throttling (slow performance).
- The Fix: Install a heatsink and fan immediately.
🧠 Advanced Protyping: Moving Beyond the Basics
Once you’ve mastered the basics, it’s time to level up. The Raspberry Pi ecosystem is vast, and the advanced features can unlock incredible potential.
1. Docker and Containerization
Run multiple services (Pi-hole, Home Assistant, Media Server) in isolated containers. This keeps your system clean and makes updates easier.
2. Kubernetes Clusters
Turn multiple Pis into a cluster for high-availability computing. This is great for learning about distributed systems.
3. AI and Machine Learning
Use TensorFlow Lite or PyTorch to run AI models directly on the Pi. You can build a face recognition doorbell or a gesture-controlled robot.
4. Custom HAT Design
Design your own PCB HAT using KiCad or Eagle. This allows you to create custom interfaces for your specific project needs.
Why Pi™ Challenge: Can you build a project that uses AI, IoT, and Robotics all in one? We bet you can.
For more advanced tutorials, check out our Electronic Component Reviews section.
📚 Recommended Links
- Raspberry Pi Official Documentation
- Home Assistant Project
- RetroPie Project
- Pi-hole Project
- Adafruit Learning System
- SparkFun Tutorials
❓ FAQ: Your Burning Questions Answered

Q: Can I run Windows on a Raspberry Pi?
A: Technically, yes, but it’s not recommended. Windows 10/1 on ARM exists, but performance is poor. Stick to Linux (Raspberry Pi OS, Ubuntu, etc.) for the best experience.
Q: Which Raspberry Pi model is best for beginners?
A: The Raspberry Pi 4 Model B (4GB or 8GB) is the sweet spot. It’s powerful enough for almost any project but affordable. The Pi 5 is great if you need maximum performance.
Q: Do I need a monitor to set up a Pi?
A: No! You can set it up headless using SSH. Just configure the Wi-Fi and SSH settings on the SD card before inserting it.
Q: How much power does a Pi 5 consume?
A: Idle: ~2-3W. Under load: ~7-10W. Always use a 27W USB-C power supply for the Pi 5.
Q: Can I use a Raspberry Pi for gaming?
A: Absolutely! It’s one of the best platforms for retro gaming and can even handle some modern indie games.
Q: What is the difference between a HAT and a Bonet?
A: HAT (Hardware Attached on Top) is the official term for boards that fit on the GPIO pins and have an EEPROM for auto-configuration. Bonet is a community term for similar boards that don’t have an EEPROM.
🔗 Reference Links
- Raspberry Pi Foundation
- Raspberry Pi OS Download
- Home Assistant Documentation
- Pi-hole Documentation
- RetroPie Documentation
- Adafruit Raspberry Pi Guide
- SparkFun Raspberry Pi Tutorials
- I Like To Make Stuff: Electronics Tools
- DIYables LED Kit
- Netcraft Ad-Blocking Stats
Conclusion

So, we started this journey asking: What are the most common uses of Raspberry Pi in DIY projects and protyping? By now, you’ve seen that the answer isn’t just a single list; it’s a universe of possibilities. From the humble beginnings of a £25 educational board to the powerhouse Raspberry Pi 5 driving autonomous robots, smart homes, and retro gaming empires, the Pi has proven itself to be the ultimate maker’s canvas.
We promised to resolve the mystery of whether a Pi can truly replace a desktop or a dedicated microcontroller. The verdict? It depends on your needs.
- For heavy lifting (AI, complex networking, media servers): The Pi is unbeatable.
- For simple, real-time loops (blinking an LED, reading a single sensor): A microcontroller like an Arduino or ESP32 is often more efficient and cheaper.
- The Sweet Spot: Using them together! Let the Pi be the “brain” and the microcontroller be the “nerves.”
The Verdict: Why You Should Start Today
If you are on the fence, here is our confident recommendation: Buy a Raspberry Pi 4 or 5 today.
- Positives: Incredible community support, massive software ecosystem, versatility (it does everything), and a low barrier to entry.
- Negatives: Power consumption is higher than microcontrollers, and it requires a bit more setup (OS, drivers) than a plug-and-play Arduino.
- The Bottom Line: The learning curve is worth every second. You aren’t just buying a computer; you’re buying a ticket to the future of technology.
Don’t let the fear of soldering or coding stop you. Start with a breadboard, an LED, and a resistor. As we learned from the DIYables LED Kit insights, even the smallest components can teach you the most valuable lessons. The only thing standing between you and your first working project is the decision to start.
Recommended Links
Ready to build? Here are the essential tools, kits, and books to get your project off the ground.
🛒 Essential Hardware & Kits
- Raspberry Pi 5 (8GB) – The Powerhouse:
- Amazon | Walmart | Official Store
- Raspberry Pi 4 Model B (4GB) – The Value King:
- Amazon | Adafruit | Official Store
- DIYables 5MM Red Light LED Kit (Perfect for Beginners):
- Includes pre-matched resistors for easy GPIO experiments.
- Amazon | DIYables Official
- Official Raspberry Pi Power Supply (27W USB-C for Pi 5):
- Amazon | Official Store
- SanDisk High Endurance microSD Card (128GB):
- Amazon | Walmart
- Pinecil Portable Soldering Iron:
- Amazon | Official Store
- iFixit Pro Tech Toolkit:
- Amazon | Official Store
📚 Must-Read Books
- “Raspberry Pi User Guide” by Eben Upton & Gareth Halfacree: The definitive guide to the hardware and software.
- Amazon
- “Make: Getting Started with Raspberry Pi” by Jason Andrews & Simon Monk: A fantastic hands-on introduction for beginners.
- Amazon
- “Raspberry Pi Robotics” by Peter Hoddie: Dive deep into building your own robots.
- Amazon
FAQ: Your Burning Questions Answered

What software is essential for Raspberry Pi robotics protyping?
To get started with robotics, you need a robust OS and specific libraries.
- Operating System: Raspberry Pi OS (64-bit) is the standard, offering the best hardware support. For advanced robotics, Ubuntu Core or ROS 2 (Robot Operating System) are industry standards.
- Libraries: GPIO Zero (Python library) is the easiest way to control motors and sensors. For computer vision, OpenCV is essential. For motor control, pigpio offers precise timing.
- Why: These tools abstract the complex hardware details, allowing you to focus on the logic of movement and sensing.
How do I power a Raspberry Pi for portable DIY prototypes?
Portability requires careful power management.
- Power Bank: Use a high-quality USB-C Power Bank with Power Delivery (PD) support. It must output at least 5V/3A (15W) for a Pi 4, or 5V/5A (25W) for a Pi 5.
- Battery Packs: For longer runs, consider LiPo batteries with a DC-DC buck converter to step down the voltage to 5V.
- Caution: Never connect a LiPo battery directly to the GPIO 5V pin without a regulator; it can damage the Pi.
What are the most popular Raspberry Pi retro gaming projects?
The retro gaming scene is massive.
- RetroPie: The most customizable, allowing you to build a system from the ground up.
- Batocera: The “plug-and-play” favorite, known for its beautiful interface and automatic game scraping.
- Laka: A lightweight, Linux-based distribution that turns the Pi into a dedicated retro console.
- Hardware: Most users pair these with 8BitDo controllers or custom 3D-printed arcade sticks.
Can Raspberry Pi be used for 3D printer control boards?
Yes, but with a distinction.
- The Pi as a Host: The Pi is rarely the direct motor controller. Instead, it runs Kliper or OctoPrint.
- How it works: The Pi handles the UI, slicing, and G-code interpretation, sending commands to a dedicated microcontroller (like a BigTreeTech SKR or Creality Ender 3 board) that actually moves the motors.
- Benefit: This setup allows for remote monitoring, web interfaces, and advanced features like input shaping without overloading the printer’s mainboard.
What sensors work best with Raspberry Pi for IoT projects?
The “best” sensor depends on your data needs.
- Environmental: BME280 (Temp, Humidity, Pressure) is the gold standard for accuracy.
- Air Quality: PMS503 for particulate matter (PM2.5) and MQ-135 for general air quality.
- Motion: PIR sensors (HC-SR501) are cheap and effective for presence detection.
- Distance: Ultrasonic sensors (HC-SR04) or Time-of-Flight (ToF) sensors like the VL53L0X for precise distance measurement.
How can I use a Raspberry Pi for home automation protyping?
- Central Hub: Install Home Assistant on the Pi. It integrates with almost every smart device brand (Philips Hue, Tuya, Zigbee, Z-Wave).
- Logic: Create automations like “If the front door opens after sunset, turn on the hallway lights.”
- Expansion: Add Zigbee or Z-Wave USB dongles (like the Sonoff Zigbee 3.0 USB Dongle) to the Pi to talk to local devices without cloud dependency.
What are the best Raspberry Pi models for beginner DIY projects?
- Raspberry Pi 4 Model B (4GB): The best all-rounder. It has enough power for almost any project, dual 4K HDMI, and USB 3.0.
- Raspberry Pi Zero 2 W: Perfect for tiny, low-power projects like weather stations or simple sensors. It’s small, cheap, and surprisingly capable.
- Avoid: The original Pi 1 or 2 for new projects; they are too slow for modern software.
How does Raspberry Pi support learning programming and hardware skills?
- Python First: The Pi comes with Python pre-installed, making it the perfect language for beginners to learn coding logic.
- Hardware Interaction: Libraries like GPIO Zero allow students to control physical hardware with just a few lines of code, bridging the gap between software and the physical world.
- Linux Mastery: Using the Pi teaches Linux command line skills, which are essential for any career in IT or engineering.
What sensors and modules are commonly paired with Raspberry Pi?
- Camera Module: For image processing and security.
- Relay Modules: To control high-voltage appliances (lights, fans) safely.
- LCD/OLED Displays: To show status information or sensor readings.
- Motor Drivers (H-Bridges): To control DC motors and stepper motors for robotics.
- WiFi/Bluetooth Dongles: For older models that lack built-in wireless.
How do makers use Raspberry Pi for IoT protyping?
- Edge Computing: Makers run MQTT brokers (like Mosquito) on the Pi to handle local data traffic, reducing latency.
- Data Logging: Storing sensor data in InfluxDB and visualizing it with Grafana.
- Protyping: Using the Pi to test logic before deploying to cheaper, mass-produced microcontrollers.
What are popular Raspberry Pi projects for beginners?
- Pi-hole: A network-wide ad blocker.
- Retro Gaming Console: Using RetroPie.
- Smart Mirror: A two-way mirror with a display behind it showing weather and news.
- Weather Station: Monitoring local temperature and humidity.
- Magic Mirror: A reflective display that shows information when you look at it.
Can Raspberry Pi be used for robotics and how?
- Yes. The Pi acts as the high-level controller.
- How: It processes camera feeds (OpenCV) for navigation, runs path-planning algorithms, and sends commands to a motor driver or microcontroller (like Arduino) that handles the low-level motor control.
- Example: A self-driving car that uses a Pi to “see” the road and an Arduino to steer the wheels.
How is Raspberry Pi used in home automation systems?
- Server: It runs the automation software (Home Assistant, OpenHAB).
- Gateway: It bridges different protocols (Zigbee to Wi-Fi).
- Interface: It provides a web dashboard accessible from any device in the house.
- Automation: It executes complex logic, like adjusting thermostat based on occupancy and weather forecasts.
What DIY electronics projects can I build with a Raspberry Pi?
- Network Ad Blocker (Pi-hole)
- Retro Gaming Console
- Smart Home Hub
- Security Camera System
- Weather Station
- Media Server (Plex/Jellyfin)
- Robotics Platform
- Time-Lapse Camera
- Audio Streamer
- Personal Cloud Storage
Reference Links
- Raspberry Pi Foundation: Official Website
- Raspberry Pi OS: Download Page
- Home Assistant: Documentation
- RetroPie: Project Page
- Pi-hole: Project Page
- Adafruit Learning System: Raspberry Pi Category
- SparkFun Tutorials: Raspberry Pi Tutorials
- I Like To Make Stuff: Getting Started with Electronics Tools
- DIYables: 5MM Red Light LED Kit
- Netcraft: Ad-Blocking Statistics
- OpenCV: Computer Vision Library
- Kliper 3D: 3D Printer Firmware
- OctoPrint: 3D Printer Hosting
- MQTT: Messaging Protocol
- InfluxDB: Time Series Database
- Grafana: Visualization Platform