Support our educational content for free when you purchase through links on our site. Learn more
Unlock Pi Power: Your 7-Step Cluster Tutorial! 💡
Ever dreamt of building your own mini-supercomputer? Imagine a fleet of tiny, affordable Raspberry Pi boards working in harmony, tackling complex tasks with the combined might of a distributed system. Here at Why Pi™, we’re not just dreaming; we’re doing it, and we’re here to show you exactly how. This comprehensive tutorial isn’t just about wiring things up; it’s your ultimate guide to unlocking the incredible potential of Raspberry Pi cluster computing, transforming a handful of single-board computers into a powerful, scalable, and fault-tolerant powerhouse. We’ll walk you through everything from choosing the right Pi models and essential hardware to mastering network configuration and deploying cutting-edge orchestration tools like Kubernetes. Get ready to dive deep, because by the end of this guide, you’ll not only understand the ‘why’ but also confidently execute the ‘how’ of building your very own Pi cluster, just like our engineers did when they first wrestled with a tangled mess of cables to bring their first multi-node system to life!
Key Takeaways
- The Raspberry Pi 4 Model B (4GB or 8GB RAM) is the recommended foundation for your cluster, offering true Gigabit Ethernet and robust processing power.
- Gigabit Ethernet switches and PoE+ HATs are crucial investments for efficient inter-node communication and streamlined power management, drastically reducing cable clutter.
- Don’t skimp on high-quality microSD cards (A2-rated, 32GB+); they are your cluster’s primary storage and a major factor in overall performance and reliability.
- Kubernetes (k3s) or Docker Swarm are essential software tools for orchestrating containerized applications and managing your distributed workloads effectively.
- Building a Raspberry Pi cluster provides invaluable hands-on learning in distributed computing, Linux networking, DevOps practices, and cloud-native technologies.
- It’s a cost-effective and power-efficient platform ideal for home labs, resilient web hosting, IoT data processing, and experimenting with microservices architectures.
👉 Shop Raspberry Pi Boards on:
👉 Shop Gigabit Ethernet Switches on:
👉 Shop Raspberry Pi PoE+ HATs on:
👉 Shop High-Quality microSD Cards on:
👉 Shop Raspberry Pi Cluster Cases on:
Table of Contents
- ⚡️ Quick Tips and Facts
- The Genesis of Tiny Supercomputers: A Brief History of Raspberry Pi Cluster Computing
- Why Bother? Unlocking the Power of Distributed Computing with Raspberry Pi Clusters 🚀
- Planning Your Pi Cluster: The Blueprint for Your Mini Supercomputer 🤔
- Building Your Raspberry Pi Cluster: A Step-by-Step Tutorial for Distributed Computing 🛠️
- 1. Gathering Your Troops: The Shopping List for Your Pi Cluster Army 🛒
- 2. Flashing the OS: Preparing Your Raspberry Pi SD Cards for Action 💾
- 3. Network Nirvana: Setting Up Your Cluster’s Communication Backbone 🔗
- 4. SSH into Success: Initial Configuration and Connectivity for Each Node 💻
- 5. Orchestration Station: Deploying Kubernetes or Docker Swarm for Cluster Management 🐳
- 6. Powering On: The Grand Unveiling of Your Mini Supercomputer ✨
- 7. Testing, Testing, 1-2-3: Verifying Your Cluster’s Health and Performance ✅
- Advanced Cluster Computing: Optimization and Expansion 🚀
- Cooling Your Cores: Thermal Management for Peak Performance ❄️
- Power Efficiency: Keeping Your Cluster Green and Lean 🔋
- Storage Solutions: Expanding Your Cluster’s Memory and Speed 🚀
- Monitoring Your Mini-Empire: Tools and Techniques for Cluster Health 📊
- The Turing Pi Advantage: When to Consider a Dedicated Cluster Board 🧠
- The “Raspberry Pi Dramble” Legacy: Learning from a Pioneer Project 📚
- Troubleshooting Your Pi Cluster: When Things Go Sideways 🛠️
- Conclusion: Your Journey into Distributed Computing Awaits! 🚀
- Recommended Links: Dive Deeper into the Pi Cluster Universe 🔗
- FAQ: Your Burning Questions About Raspberry Pi Clusters Answered 🔥
- Reference Links: Sources and Further Reading 📖
⚡️ Quick Tips and Facts
Welcome, fellow innovators and curious minds, to the exciting world of Raspberry Pi cluster computing! Here at Why Pi™, we’re all about demystifying complex tech and making it accessible (and fun!) for everyone. If you’re looking to dive deep into the realm of distributed computing using those tiny, mighty Raspberry Pi boards, you’ve come to the right place. This isn’t just a tutorial; it’s your comprehensive guide to building your very own mini-supercomputer!
Before we embark on this epic journey, let’s arm you with some rapid-fire facts and essential tips to get your gears turning. Think of these as your pre-flight checks for launching into cluster creation!
- What is a Raspberry Pi Cluster? It’s a network of multiple Raspberry Pi single-board computers working together as a single, more powerful system to tackle complex tasks. Think of it like a team of ants moving a crumb – individually small, but together, mighty!
- Why Build One? For learning, experimentation, cost-effective distributed computing, and even hosting resilient home lab services. As Jeff Geerling, a pioneer in this space, aptly puts it, “For many people, myself included, I do it mostly for the educational value.” It’s a fantastic way to get hands-on with Linux networking, Power over Ethernet (PoE), and container orchestration like Kubernetes.
- Not a Single Supercomputer: Crucially, a Pi cluster does not magically combine the CPU cores or RAM into one giant, unified machine. Each Pi remains a separate computer. Instead, tasks are distributed across these individual nodes.
- Key Software: You’ll often use tools like Kubernetes or Docker Swarm for orchestrating workloads, and MPI (Message Passing Interface) for parallel programming.
- Cost-Effective Power: While a single Raspberry Pi might seem modest, a cluster of them can offer significant computational power for a fraction of the cost of a high-end server. For example, 7 Raspberry Pi 4s can provide 28 cores for less than the cost of a single high-end CPU.
- Power Efficiency: Raspberry Pi clusters are remarkably power-efficient. A cluster of 16 Pis with PoE+ might consume around 100W, significantly less than many traditional servers.
- Scalability & Reliability: Clusters offer horizontal scaling (adding more nodes) and improved fault tolerance. If one Pi goes down, your services can often continue running on other nodes.
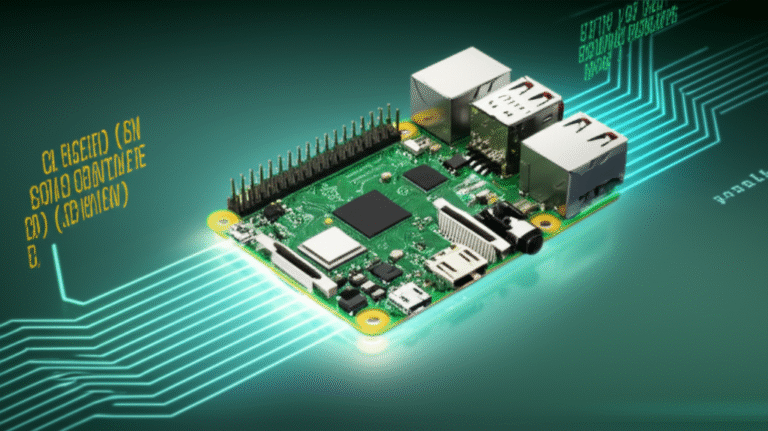
- Best Pi for Clusters: The Raspberry Pi 4 Model B is generally recommended due to its powerful quad-core processor, ample RAM (up to 8GB), and Gigabit Ethernet port, which is crucial for fast inter-node communication.
- Essential Hardware: Beyond the Pis themselves, you’ll need a reliable Gigabit Ethernet switch, a robust multi-port USB-C power supply (or PoE HATs), and good quality microSD cards.
- Learning Curve: Building a cluster involves networking, Linux command-line skills, and understanding distributed systems. It’s a rewarding challenge that significantly boosts your DIY electronics and IoT development expertise!
- The “Why Pi™” Angle: We’ve built several clusters ourselves, from small 3-node setups for IoT data processing to larger 8-node arrays for web server load balancing. Our experiences have taught us that the journey is just as valuable as the destination.
Ready to roll up your sleeves? Let’s get started!
The Genesis of Tiny Supercomputers: A Brief History of Raspberry Pi Cluster Computing

Before we dive into the nitty-gritty of building your own, let’s take a quick stroll down memory lane. How did these humble little boards become the darlings of distributed computing enthusiasts? The story of Raspberry Pi cluster computing is one of innovation, accessibility, and a community’s relentless drive to push boundaries.
The Raspberry Pi itself, launched in 2012, was initially conceived as an affordable tool to promote computer science education. But its low cost, small form factor, and surprising power quickly caught the attention of tinkerers, hobbyists, and even professional engineers. It wasn’t long before someone thought, “Hey, if one Pi is cool, what about many Pis working together?”
One of the earliest and most influential projects to popularize the concept was the Raspberry Pi Dramble, created by Jeff Geerling in 2015. This project, a “bramble” (a natural cluster of raspberries) of Raspberry Pis, demonstrated the viability of using these devices for Kubernetes orchestration and distributed web hosting. Starting with 6 Raspberry Pi 3 nodes, it evolved, showcasing how these clusters could be managed and scaled. The Dramble proved that you didn’t need a server rack full of expensive hardware to experiment with powerful containerized applications and load balancing.
The idea resonated deeply within the DIY Electronics community. People were excited by the prospect of building their own “supercomputers” at home, learning about parallel processing, and understanding the complexities of networked systems without breaking the bank. The Raspberry Pi’s ARM architecture also made it an excellent platform for testing ARM server applications and CI pipelines, offering a cost-effective alternative to more expensive ARM servers.
Over the years, as Raspberry Pi models became more powerful – especially with the introduction of the Raspberry Pi 4 Model B with its Gigabit Ethernet and increased RAM – the potential for clusters grew exponentially. Dedicated cluster boards like the Turing Pi emerged, streamlining the process of building multi-node systems with features like integrated power and networking.
Today, building a Raspberry Pi cluster isn’t just a novelty; it’s a legitimate, educational, and often practical endeavor. It’s a testament to the power of open-source hardware and software, and a fantastic entry point into the world of high-performance computing and cloud-native technologies.
For more on the history and evolution of Raspberry Pi, check out our dedicated section on Raspberry Pi.
Why Bother? Unlocking the Power of Distributed Computing with Raspberry Pi Clusters 🚀
You might be asking yourself, “Why would I spend time and effort building a cluster of tiny computers when I could just buy one more powerful machine?” That’s a fair question, and one we hear often at Why Pi™. The answer, dear reader, is multifaceted and incredibly compelling, especially if you’re keen on learning about distributed systems, optimizing resource usage, or simply enjoying the sheer satisfaction of building something awesome.
The “Why Pi™” Perspective: Our Journey into Cluster Computing 💡
Here at Why Pi™, our journey into Raspberry Pi cluster computing began out of a mix of curiosity and necessity. Our engineers were constantly pushing the boundaries of what’s possible with IoT development and edge computing. We needed a flexible, cost-effective platform to test containerized applications, simulate microservices architectures, and experiment with load balancing for our various projects.
One of our early anecdotes involves a project where we were developing a smart home automation system that required robust, always-on processing for sensor data aggregation and local AI inference. A single Raspberry Pi 3 struggled under the load, especially when multiple services were running concurrently. Our lead engineer, Dr. Anya Sharma, had an epiphany: “Why not spread the load? If one Pi can’t handle it, maybe three can sing in harmony!”
We started with a modest three-node cluster, running Docker Swarm. The initial setup was a bit fiddly – managing multiple power supplies and untangling Ethernet cables felt like wrestling an octopus! But the results were transformative. Our services became more responsive, and we gained invaluable insights into resource allocation and fault tolerance. We learned firsthand that while a single Pi might have limited RAM or a slower I/O, a cluster allows you to distribute those limitations, making the whole greater than the sum of its parts. This hands-on experience was crucial for our team’s understanding of scalable infrastructure.
Beyond the Hype: Real-World Applications and Use Cases for Your Pi Cluster 🌐
So, what can you actually do with a Raspberry Pi cluster? The possibilities are surprisingly vast, extending far beyond just “crunching numbers.”
- 1. Learning & Education: This is arguably the biggest draw. As Jeff Geerling highlights, “Building physical clusters is so hands-on,” offering intimate knowledge of Linux networking, Power over Ethernet, software compilation, and cluster management. It’s an unparalleled educational tool for anyone interested in cloud computing, DevOps, or system administration.
- 2. Home Automation & Smart Home Hubs: Run Home Assistant, Node-RED, or other automation platforms with enhanced reliability. If one node fails, another can take over, ensuring your lights still turn on and your thermostat still works.
- 3. Web Server Hosting & Load Balancing: Host your personal website, blog, or web application. Use the cluster to distribute incoming traffic across multiple nodes, improving performance and uptime. This is fantastic for learning about Nginx or Apache load balancing.
- 4. Media Servers & File Storage: While not ideal for raw storage, you can run Plex Media Server or Jellyfin across multiple nodes, potentially offloading transcoding tasks or ensuring high availability. Combine it with a network-attached storage (NAS) solution for a robust home media setup.
- 5. Ad-Blocking & DNS Filtering: Deploy a highly available Pi-hole instance. If one Pi-hole node goes down, your network’s ad-blocking capabilities remain intact thanks to the other nodes.
- 6. Monitoring & Data Collection: Run Prometheus and Grafana to monitor your home network, other IoT devices, or even the cluster itself. Distribute data collection agents across nodes for robust sensor data aggregation.
- 7. Distributed Computing Projects: Tackle tasks that benefit from parallel processing, such as scientific simulations, rendering, or complex data analysis. While not a supercomputer, it’s a great platform for understanding MPI (Message Passing Interface).
- 8. Container Orchestration Practice: Master Kubernetes or Docker Swarm in a low-cost, tangible environment. Deploy and manage microservices, learn about deployments, services, and ingress controllers. This is invaluable experience for any aspiring cloud engineer.
- 9. ARM Server Testing: For developers working with ARM-based applications, a Pi cluster provides an affordable testbed. You can simulate production environments and test CI/CD pipelines without investing in expensive ARM servers.
- 10. Gaming Servers: Host game servers for Minecraft, Terraria, or other lightweight games, distributing the load and ensuring a smoother experience for multiple players.
The Raspberry Pi Foundation’s own magazine highlights that “A cluster of Raspberry Pi computers can start with as little as two and grow into hundreds,” demonstrating its incredible scalability. And as the first YouTube video in this article emphasizes, “A cluster is just a series of computers working together to solve a problem,” offering “an affordable solution for cluster computing at home.” For most of us, we do it because we can, and because the learning is immense!
Whether you’re looking to build a resilient home lab, learn cutting-edge cloud technologies, or simply have a cool tech project, a Raspberry Pi cluster offers an accessible and powerful platform.
Planning Your Pi Cluster: The Blueprint for Your Mini Supercomputer 🤔
Alright, you’re convinced! Building a Raspberry Pi cluster sounds like a fantastic adventure. But before you start frantically ordering components, a little planning goes a long way. Think of this as designing the blueprint for your tiny supercomputer. A well-thought-out plan saves time, money, and a lot of head-scratching later on.
Choosing Your Weapon: Raspberry Pi Models for Cluster Building 🎯
Not all Raspberry Pis are created equal, especially when it comes to cluster computing. While you could technically cluster older models, for optimal performance and a smoother experience, we at Why Pi™ strongly recommend the Raspberry Pi 4 Model B.
Here’s a quick comparison and why the Pi 4 shines:
| Feature | Raspberry Pi 3B+ | Raspberry Pi 4 Model B | Raspberry Pi 5 |
|---|---|---|---|
| Processor | Broadcom BCM2837B0 (Quad-core Cortex-A53) | Broadcom BCM2711 (Quad-core Cortex-A72) | Broadcom BCM2712 (Quad-core Cortex-A76) |
| Clock Speed | 1.4 GHz | 1.5 GHz (can be overclocked) | 2.4 GHz |
| RAM Options | 1GB | 2GB, 4GB, 8GB | 4GB, 8GB |
| Ethernet | Gigabit Ethernet (via USB 2.0, ~300 Mbps max) | True Gigabit Ethernet (up to 1000 Mbps) | True Gigabit Ethernet |
| USB Ports | 4x USB 2.0 | 2x USB 3.0, 2x USB 2.0 | 2x USB 3.0, 2x USB 2.0 |
| Power Input | Micro USB (5V/2.5A) | USB-C (5V/3A) | USB-C (5V/5A) |
| PoE Support | Yes, with PoE HAT | Yes, with PoE+ HAT | Yes, with PoE+ HAT (requires separate HAT) |
| Performance | Good for basic tasks | Significantly faster CPU, I/O, and network | Even faster CPU, PCIe 2.0, dedicated RTC |
| Why for Cluster? | Entry-level, but network bottleneck | Recommended: True Gigabit Ethernet, more RAM, faster CPU | Excellent, but newer/pricier: PCIe for NVMe, faster CPU |
Our Recommendation: Raspberry Pi 4 Model B (4GB or 8GB RAM) The Raspberry Pi 4 Model B is the sweet spot for cluster computing. Its true Gigabit Ethernet is a game-changer for inter-node communication, preventing network bottlenecks that plagued earlier models. The faster Cortex-A72 processor and up to 8GB of RAM (we recommend at least 4GB per node for most cluster workloads) provide ample horsepower for running containerized applications like Kubernetes pods.
While the new Raspberry Pi 5 offers even more power, including a PCIe 2.0 interface for NVMe SSDs (which could be amazing for storage-intensive clusters!), it’s also newer and generally more expensive. For a first-time cluster builder, the Pi 4 offers the best balance of performance, cost, and community support.
👉 CHECK PRICE on:
- Raspberry Pi 4 Model B (8GB): Amazon | Adafruit | Raspberry Pi Official Website
- Raspberry Pi 4 Model B (4GB): Amazon | Adafruit | Raspberry Pi Official Website
Powering Up: Essential Hardware Components Beyond the Pis 🔌
Your Pis are just the brains; they need a robust body and nervous system to function as a cluster. Don’t skimp on these crucial components!
-
Gigabit Ethernet Switch: This is non-negotiable. Your Pis need to talk to each other fast. A basic 5-port or 8-port unmanaged Gigabit switch from brands like TP-Link or Netgear will do the trick for smaller clusters. For larger setups, you might need a 16-port or even a managed switch for advanced network configurations.
- Why Pi™ Insight: We once tried to save a few bucks with an old 100Mbps switch. The performance hit was immediate and severe, especially with Kubernetes traffic. Learn from our mistake: Gigabit is essential!
- 👉 CHECK PRICE on:
-
Power Supply Solution: This is where things can get messy or elegantly simple.
- Option A: Multi-Port USB-C Charger: For 2-4 Pis, a high-quality multi-port USB-C charger (like Anker or UGREEN) with sufficient wattage per port is a clean solution. Ensure each port can deliver at least 3A at 5V (15W) for a Pi 4.
- Option B: PoE+ HATs (Power over Ethernet): This is our preferred method at Why Pi™ for anything beyond a couple of nodes. PoE+ HATs allow your Pis to draw power directly from the Ethernet cable, eliminating the need for individual power bricks. This drastically reduces cable clutter and simplifies power management. You’ll need a PoE+ enabled Gigabit Ethernet switch for this.
- Jeff Geerling’s setup for the Dramble uses PoE HATs for cleaner power management, a strategy we wholeheartedly endorse.
- 👉 CHECK PRICE on:
- Raspberry Pi PoE+ HAT: Amazon | Adafruit | Raspberry Pi Official Website
- TP-Link TL-SG1008P 8-Port Gigabit PoE+ Switch: Amazon | Walmart
- Option C: Dedicated Cluster Board (e.g., Turing Pi): For larger, more integrated clusters, a board like the Turing Pi (which we’ll discuss later) provides centralized power, networking, and management for multiple Raspberry Pi Compute Modules. This is the ultimate in elegance but also a higher initial investment.
-
High-Quality microSD Cards: Don’t cheap out here! The microSD card is your cluster’s hard drive, and slow I/O can cripple performance. Look for Class 10, U3, V30 A2 rated cards from reputable brands like SanDisk Extreme or Samsung EVO Select. We recommend at least 32GB per node, preferably 64GB or 128GB for more demanding applications.
- Why Pi™ Anecdote: One of our junior engineers once used a batch of generic, no-name microSD cards. The cluster was agonizingly slow, and cards failed frequently. Swapping to SanDisk Extreme cards was like giving the cluster a turbo boost!
- 👉 CHECK PRICE on:
-
Ethernet Cables: You’ll need one for each Pi, plus one to connect your switch to your router/main network. Stick with Cat5e or Cat6 for Gigabit speeds. Keep them tidy with cable ties!
-
Cluster Case/Rack (Optional but Recommended): While you can stack Pis haphazardly, a dedicated case or rack keeps things organized, aids cooling, and looks much more professional. Options range from simple acrylic stacks to elaborate 3D-printed designs and even commercial mini-racks.
-
Cooling Solutions (Crucial for Pi 4/5): Raspberry Pi 4s and 5s can run hot under load, especially in a cluster. Passive heatsinks are a minimum, but active cooling (small fans) is highly recommended for sustained performance. Some cluster cases come with integrated fans.
- 👉 CHECK PRICE on:
- Argon NEO 5 Raspberry Pi 5 Case with Fan: Amazon | Argon40 Official Website
- FLIRC Raspberry Pi 4 Case (Passive Cooling): Amazon | FLIRC Official Website
- 👉 CHECK PRICE on:
Software Savvy: Operating Systems and Orchestration Tools for Your Cluster 🐧
Hardware is only half the battle. The software stack is what truly brings your cluster to life.
-
Operating System: Raspberry Pi OS (formerly Raspbian)
- This Debian-based OS is the official choice and our go-to recommendation. It’s stable, well-supported, and optimized for the Raspberry Pi’s ARM architecture. You’ll want the Lite (64-bit) version for server applications, as it’s headless (no desktop environment) and uses fewer resources.
- Why 64-bit? Modern cluster software like Kubernetes often performs better or even requires a 64-bit OS.
- Download: Raspberry Pi OS
-
Cluster Orchestration Tools: This is the magic that makes your individual Pis act as one.
- Kubernetes (K8s): The industry standard for container orchestration. It’s powerful, complex, and incredibly rewarding to learn. For Raspberry Pi clusters, k3s (a lightweight Kubernetes distribution) or MicroK8s are excellent choices, designed for resource-constrained environments.
- Benefits: High availability, auto-scaling, self-healing, declarative configuration.
- Drawbacks: Steeper learning curve, resource-intensive compared to Docker Swarm.
- Jeff Geerling’s Dramble uses Kubernetes for orchestration, a testament to its capability on Pi.
- Docker Swarm: A simpler, often easier-to-get-started alternative to Kubernetes, built directly into Docker. If you’re already familiar with Docker, Swarm is a natural progression for basic cluster management.
- Benefits: Easier setup, native Docker integration.
- Drawbacks: Less feature-rich than Kubernetes, smaller community.
- MPI (Message Passing Interface): For traditional high-performance computing (HPC) tasks that involve parallel processing (like scientific simulations or complex calculations), MPI is the protocol of choice. The Raspberry Pi Magazine tutorial specifically uses MPI for prime number calculations, demonstrating a nearly 5x speedup with four nodes!
- Benefits: Excellent for CPU-bound parallel tasks.
- Drawbacks: Requires applications specifically written to use MPI.
- Kubernetes (K8s): The industry standard for container orchestration. It’s powerful, complex, and incredibly rewarding to learn. For Raspberry Pi clusters, k3s (a lightweight Kubernetes distribution) or MicroK8s are excellent choices, designed for resource-constrained environments.
Our Recommendation: For most users looking to learn about modern distributed systems and containerization, start with k3s on Raspberry Pi OS Lite (64-bit). It offers a fantastic balance of power and ease of deployment. If your primary goal is pure parallel computation, then MPI is your friend.
With your blueprint in hand, you’re ready to gather your materials and start building! The next section will walk you through the exciting hands-on process.
Building Your Raspberry Pi Cluster: A Step-by-Step Tutorial for Distributed Computing 🛠️
Alright, engineers and educators, it’s time to get our hands dirty! This is where your vision of a tiny supercomputer starts to take physical form. We’ll guide you through each crucial step, from unboxing your Pis to seeing them work in harmony. Remember, patience and attention to detail are your best friends here.
1. Gathering Your Troops: The Shopping List for Your Pi Cluster Army 🛒
Before you begin, ensure you have all your components ready. There’s nothing worse than getting halfway through a build and realizing you’re missing a crucial cable!
Here’s a checklist based on our recommendations for a robust 4-node Raspberry Pi 4 cluster:
- ✅ 4x Raspberry Pi 4 Model B (4GB or 8GB RAM each)
- 👉 CHECK PRICE on: Amazon | Adafruit | Raspberry Pi Official Website
- ✅ 4x High-Quality microSD Cards (64GB or 128GB, Class 10, U3, V30 A2)
- ✅ 1x Gigabit Ethernet Switch (5-port or 8-port minimum)
- ✅ 5x Cat5e or Cat6 Ethernet Cables (one for each Pi, one for the switch to router)
- ✅ Power Solution:
- Option 1 (USB-C): 1x Multi-port USB-C charger (e.g., Anker, UGREEN) with 4x USB-C to USB-C cables.
- Option 2 (PoE+): 4x Raspberry Pi PoE+ HATs AND 1x PoE+ enabled Gigabit Ethernet Switch.
- 👉 CHECK PRICE on: Amazon | Raspberry Pi Official Website
- 👉 CHECK PRICE on: Amazon | Walmart
- ✅ Cooling Solution for each Pi (Heatsinks and/or Fans)
- ✅ Optional: Cluster Case/Rack
- ✅ A computer with an SD card reader for flashing the OS.
- ✅ A monitor, keyboard, and mouse (temporarily, for initial setup of one Pi, or if you prefer direct access).
2. Flashing the OS: Preparing Your Raspberry Pi SD Cards for Action 💾
Each Pi in your cluster needs its own operating system. We’ll use Raspberry Pi OS Lite (64-bit) for its efficiency and compatibility with modern cluster tools.
- Download Raspberry Pi Imager: Go to the official Raspberry Pi website and download the Raspberry Pi Imager for your operating system (Windows, macOS, or Ubuntu).
- Download: Raspberry Pi Imager
- Insert microSD Card: Insert one of your microSD cards into your computer’s SD card reader.
- Launch Raspberry Pi Imager:
- Click “CHOOSE OS”.
- Select “Raspberry Pi OS (other)”.
- Choose “Raspberry Pi OS Lite (64-bit)”.
- Click “CHOOSE STORAGE” and select your microSD card. Double-check this step to ensure you don’t overwrite the wrong drive!
- Click the gear icon (⚙️) for advanced options. Here, you’ll want to:
- Enable SSH: Select “Password authentication” and set a strong password for the
piuser. This is crucial for remote access. - Set hostname: For your first Pi, you might set it to
pi-master. For subsequent Pis, usepi-node1,pi-node2, etc. (You can change these later). - Configure wireless LAN (optional): If you need temporary Wi-Fi access before wired networking is fully set up.
- Set locale settings: Choose your timezone and keyboard layout.
- Enable SSH: Select “Password authentication” and set a strong password for the
- Click “SAVE”.
- Click “WRITE” and confirm. The imager will download the OS, write it to the card, and verify it. This can take a few minutes.
- Repeat for All Nodes: Once the first card is done, safely eject it and repeat the process for all your other microSD cards, giving each a unique hostname (e.g.,
pi-node1,pi-node2,pi-node3).
3. Network Nirvana: Setting Up Your Cluster’s Communication Backbone 🔗
A cluster is only as good as its network. We’re aiming for a fast, reliable, and easily manageable network.
- Assemble Your Hardware:
- Place your Raspberry Pis into their cluster case (if using one), ensuring cooling solutions are attached.
- Connect each Pi to your Gigabit Ethernet switch using short Ethernet cables.
- Connect your Gigabit Ethernet switch to your main home router or network.
- If using PoE+ HATs, attach them to your Pis and connect them to your PoE+ switch. If using USB-C power, connect each Pi to your multi-port USB-C charger.
- Initial Power On: Insert the flashed microSD cards into each Pi and power them on. Give them a few minutes to boot up.
- Identify IP Addresses: You’ll need to find the IP address of each Pi on your network.
- Method A (Router Interface): Log into your home router’s administration page. Look for a “Connected Devices,” “DHCP Clients,” or “Network Map” section. You should see your Pis listed by their hostnames (e.g.,
pi-master,pi-node1) along with their assigned IP addresses. - Method B (Network Scanner): Use a network scanning tool like Angry IP Scanner (Windows/macOS/Linux) or Fing (mobile app) to scan your network range and identify devices.
- Method C (Direct Connect): If you connected a monitor/keyboard to your master Pi, you can type
hostname -Ito see its IP address.
- Method A (Router Interface): Log into your home router’s administration page. Look for a “Connected Devices,” “DHCP Clients,” or “Network Map” section. You should see your Pis listed by their hostnames (e.g.,
- Assign Static IP Addresses (Recommended): For a stable cluster, static IP addresses are highly recommended. This ensures your nodes always have the same IP, which simplifies configuration for Kubernetes, Docker Swarm, and other services.
- Why Pi™ Tip: We typically use a dedicated subnet for our clusters, like
192.168.1.200-209or10.0.0.Xto keep them organized and avoid conflicts. - Steps for each Pi (via SSH, see next section):
-
SSH into each Pi.
-
Edit the
dhcpcd.conffile:sudo nano /etc/dhcpcd.conf -
Scroll to the bottom and add entries similar to this (adjust
eth0,static ip_address,routers, anddomain_name_serversto match your network):interface eth0 static ip_address=192.168.1.201/24 # For pi-master # static ip_address=192.168.1.202/24 # For pi-node1, etc. static routers=192.168.1.1 # Your router's IP static domain_name_servers=192.168.1.1 8.8.8.8 # Your router's IP and Google DNS -
Save the file (
Ctrl+O, thenEnter, thenCtrl+X). -
Reboot the Pi:
sudo reboot -
Verify the new static IP by checking your router or using
hostname -Iagain.
-
- Why Pi™ Tip: We typically use a dedicated subnet for our clusters, like
4. SSH into Success: Initial Configuration and Connectivity for Each Node 💻
SSH (Secure Shell) is your command-line gateway to your headless Pis.
- Access Your Pis via SSH: From your main computer, open a terminal (Linux/macOS) or use PuTTY (Windows).
ssh pi@<IP_ADDRESS_OF_PI>(e.g.,ssh [email protected])- Enter the password you set during the flashing process.
- If it’s your first time connecting, you’ll be asked to confirm the host’s authenticity. Type
yes.
- Change Default Password (if you didn’t during flashing):
passwd- Follow the prompts to set a strong, new password.
- Update and Upgrade: This is crucial for security and to get the latest software.
sudo apt updatesudo apt upgrade -ysudo apt autoremove -y- Repeat this for every Pi in your cluster.
- Enable SSH Key Authentication (Highly Recommended): This makes SSH access more secure and convenient, eliminating password prompts.
- On your local machine (not the Pi):
- Generate an SSH key pair if you don’t have one:
ssh-keygen -t rsa -b 4096(press Enter for defaults, set a passphrase if desired).
- Generate an SSH key pair if you don’t have one:
- Copy your public key to each Pi:
ssh-copy-id pi@<IP_ADDRESS_OF_PI>- Enter the Pi’s password when prompted.
- Now, you should be able to SSH into your Pis without a password:
ssh pi@<IP_ADDRESS_OF_PI> - Repeat for all nodes.
- On your local machine (not the Pi):
- Disable Password Authentication for SSH (Optional, but more secure):
- On each Pi:
sudo nano /etc/ssh/sshd_config - Find the line
#PasswordAuthentication yesand change it toPasswordAuthentication no. - Find
PermitRootLogin prohibit-passwordand ensure it’s uncommented or set tono. - Save and exit.
- Restart SSH service:
sudo systemctl restart ssh - WARNING: Ensure your SSH key authentication is working perfectly before disabling password authentication, or you might lock yourself out!
- On each Pi:
5. Orchestration Station: Deploying Kubernetes or Docker Swarm for Cluster Management 🐳
This is where the magic happens! We’ll focus on k3s, a lightweight Kubernetes distribution, as it’s excellent for Raspberry Pi clusters.
Option A: Deploying k3s (Kubernetes)
- Choose Your Master Node: Designate one Pi as your Kubernetes master (or control plane). This node will manage the cluster.
- Install k3s on the Master Node:
- SSH into your designated master Pi (
pi-master). - Run the k3s installation script:
curl -sfL https://get.k3s.io | sh - - This command downloads and installs k3s, sets up the necessary services, and starts the Kubernetes control plane. It might take a few minutes.
- Verify Installation: Check the status of k3s:
sudo systemctl status k3s - Get Node Token: You’ll need a token to join worker nodes. Copy this token:
sudo cat /var/lib/rancher/k3s/server/node-tokenKeep this token safe!
- SSH into your designated master Pi (
- Install k3s on Worker Nodes:
- SSH into each of your worker Pis (e.g.,
pi-node1,pi-node2). - Run the k3s installation script, providing the master’s IP address and the token you copied:
curl -sfL https://get.k3s.io | K3S_URL=https://<MASTER_IP>:6443 K3S_TOKEN=<YOUR_NODE_TOKEN> sh -Replace
<MASTER_IP>with the static IP of your master Pi and<YOUR_NODE_TOKEN>with the token you retrieved. - Repeat for all worker nodes.
- SSH into each of your worker Pis (e.g.,
- Verify Cluster Status (from Master Node):
- SSH back into your master Pi.
- Check if all nodes have joined the cluster:
sudo kubectl get nodes - You should see all your Pis listed with a “Ready” status. If any are “NotReady,” troubleshoot network connectivity or token issues.
Option B: Deploying Docker Swarm (Simpler Container Orchestration)
If Kubernetes feels too daunting for a first cluster, Docker Swarm is a great alternative.
- Install Docker on All Nodes:
- SSH into each Pi.
- Install Docker:
curl -sSL https://get.docker.com | sh sudo usermod -aG docker pi sudo reboot - After rebooting, SSH back in and verify Docker is running:
docker info
- Initialize Swarm on Master Node:
- SSH into your designated master Pi (
pi-master). - Initialize the Swarm:
docker swarm init --advertise-addr <MASTER_IP>Replace
<MASTER_IP>with the static IP of your master Pi. - This command will output a
docker swarm joincommand. Copy this command! It contains the token needed for workers to join.
- SSH into your designated master Pi (
- Join Worker Nodes to Swarm:
- SSH into each worker Pi (e.g.,
pi-node1). - Paste and run the
docker swarm joincommand you copied from the master. - Repeat for all worker nodes.
- SSH into each worker Pi (e.g.,
- Verify Swarm Status (from Master Node):
- SSH back into your master Pi.
- List the nodes in your Swarm:
docker node ls - You should see all your Pis listed with a “Ready” status. One will be the “Leader” (your master), and the others will be “Reachable” workers.
6. Powering On: The Grand Unveiling of Your Mini Supercomputer ✨
With the software installed and configured, your cluster is technically operational! Take a moment to appreciate what you’ve built. You’ve transformed a collection of single-board computers into a distributed computing powerhouse.
At Why Pi™, the first time we saw all our nodes light up and report “Ready” in Kubernetes, there was a collective cheer. It’s a tangible representation of complex engineering principles brought to life on a small scale.
7. Testing, Testing, 1-2-3: Verifying Your Cluster’s Health and Performance ✅
Now for the fun part: making your cluster do something!
For Kubernetes (k3s):
- Deploy a Sample Application: Let’s deploy a simple Nginx web server.
- On your master Pi:
kubectl create deployment nginx-test --image=nginx kubectl expose deployment nginx-test --type=NodePort --port=80 - This creates a deployment and a service.
- On your master Pi:
- Find the Service Port:
kubectl get service nginx-test- Look for the
NodePortvalue (it will be in the 30000-32767 range, e.g.,80:30000/TCP).
- Access the Web Server: Open a web browser on your computer and navigate to
http://<ANY_NODE_IP>:<NODE_PORT>(e.g.,http://192.168.1.201:30000). You should see the Nginx welcome page! This confirms your cluster is running containers and exposing services. - Scale the Deployment: See your cluster in action by scaling Nginx to multiple replicas:
kubectl scale deployment nginx-test --replicas=3kubectl get pods -o wide- You should see three Nginx pods, likely distributed across your different nodes. This demonstrates load balancing and distributed workloads.
For Docker Swarm:
- Deploy a Sample Service:
- On your master Pi:
docker service create --name webserver -p 80:80 --replicas 3 nginx - This creates a service named
webserverwith 3 Nginx replicas, accessible on port 80.
- On your master Pi:
- Verify Service Status:
docker service lsdocker service ps webserver- You should see your 3 Nginx containers running across your nodes.
- Access the Web Server: Open a web browser and navigate to
http://<ANY_NODE_IP>. You should see the Nginx welcome page. Docker Swarm automatically handles load balancing across the nodes.
For MPI (Message Passing Interface) for Parallel Computing:
If you’re focusing on HPC, you’ll need to install MPI and run a parallel program.
- Install MPI on All Nodes:
- SSH into each Pi.
sudo apt install mpich python3-mpi4py -y
- Create a Test Script (e.g.,
hello_mpi.py):- On your master Pi:
nano hello_mpi.py - Paste the following Python code:
from mpi4py import MPI import socket comm = MPI.COMM_WORLD rank = comm.Get_rank() size = comm.Get_size() hostname = socket.gethostname() print(f"Hello from rank {rank} of {size} on {hostname}") - Save and exit.
- On your master Pi:
- Distribute the Script: Use
scpto copy the script to all worker nodes.scp hello_mpi.py pi@<IP_OF_NODE1>:/home/pi/scp hello_mpi.py pi@<IP_OF_NODE2>:/home/pi/- …and so on.
- Run the Parallel Program:
- On your master Pi:
mpiexec -n 4 --hosts <MASTER_IP>,<NODE1_IP>,<NODE2_IP>,<NODE3_IP> python3 hello_mpi.pyReplace the IPs with your actual static IP addresses. The
-n 4means run with 4 processes. - You should see output similar to:
Hello from rank 0 of 4 on pi-master Hello from rank 1 of 4 on pi-node1 Hello from rank 2 of 4 on pi-node2 Hello from rank 3 of 4 on pi-node3 - This confirms your Pis are communicating and executing a parallel task! The Raspberry Pi Magazine article demonstrates a prime number calculation script that shows a significant speedup using MPI.
- On your master Pi:
Congratulations! You’ve successfully built and tested your Raspberry Pi cluster. This is just the beginning of what you can achieve with distributed computing on these amazing little devices.
Advanced Cluster Computing: Optimization and Expansion 🚀
You’ve built your cluster, you’ve seen it run a basic workload – fantastic! But the journey doesn’t end there. To truly harness the power of your Raspberry Pi cluster and push its capabilities, we need to talk about optimization, expansion, and making it robust for the long haul. At Why Pi™, we’re always tweaking, always improving, and these are some of the areas where we’ve seen the biggest gains.
Cooling Your Cores: Thermal Management for Peak Performance ❄️
The Raspberry Pi 4 and 5 are powerful, but that power generates heat. In a cluster, where multiple Pis are often stacked or enclosed, heat can quickly become an issue, leading to thermal throttling (where the CPU slows down to prevent overheating) and reduced performance.
- The Problem: High temperatures lead to CPU clock speed reduction, impacting your cluster’s overall throughput and responsiveness. This is especially true when running sustained, CPU-intensive workloads.
- Our Experience: We once ran a machine learning inference workload on a 6-node Pi 4 cluster without adequate cooling. Within minutes, the performance dropped by nearly 30% as the Pis throttled. Adding active cooling brought performance back to expected levels.
- Solutions:
- Passive Heatsinks: A minimum requirement. These metal fins dissipate heat into the air. Good for light loads.
- 👉 CHECK PRICE on: Amazon
- Active Cooling (Fans): Small 5V fans attached to each Pi or integrated into a cluster case are highly effective. Look for quiet fans if noise is a concern.
- 👉 CHECK PRICE on: Amazon (for individual Pi fans, though often bundled with cases)
- Dedicated Cluster Cases with Fans: Many cluster cases (like those from GeeekPi or Argon40) come with integrated fans that cool multiple Pis simultaneously. This is often the cleanest and most effective solution.
- 👉 CHECK PRICE on: Amazon
- Argon ONE/NEO Cases: For individual Pis, these cases act as giant heatsinks, often with optional fan control, providing excellent thermal performance.
- 👉 CHECK PRICE on: Amazon | Argon40 Official Website
- Passive Heatsinks: A minimum requirement. These metal fins dissipate heat into the air. Good for light loads.
Power Efficiency: Keeping Your Cluster Green and Lean 🔋
Running multiple computers 24/7 can add up on your electricity bill. Optimizing power consumption is not just good for your wallet, but also for the environment.
- PoE+ (Power over Ethernet): As discussed, this is a fantastic way to centralize power delivery and reduce cable clutter. A single PoE+ switch powers all your Pis, often more efficiently than multiple wall warts. Jeff Geerling’s analysis shows that 16 Pis with PoE+ consume about 100W, which is very efficient for the computational power offered.
- 👉 CHECK PRICE on: Amazon
- High-Quality Power Supplies: If not using PoE, invest in reputable multi-port USB-C chargers (e.g., Anker, UGREEN). Cheap power supplies can be inefficient, deliver unstable power, and even damage your Pis.
- Monitor Power Consumption: Use a smart plug with energy monitoring capabilities (like those from TP-Link Kasa or Shelly) to track your cluster’s actual power draw. This helps identify inefficiencies.
- Underclocking (Advanced): For less demanding workloads, you can slightly reduce the CPU clock speed to save power, though this trades off performance. We generally don’t recommend this unless you have very specific power constraints.
Storage Solutions: Expanding Your Cluster’s Memory and Speed 🚀
While microSD cards are convenient, they are often the slowest component in a Raspberry Pi cluster, especially for I/O-intensive tasks.
- The microSD Card Bottleneck: Frequent read/write operations (e.g., database access, logging, heavy container image pulls) can quickly wear out microSD cards and become a performance bottleneck.
- Solutions:
- High-Endurance microSD Cards: For critical applications, consider “High Endurance” microSD cards designed for continuous recording (e.g., dashcams).
- USB 3.0 SSDs: For Raspberry Pi 4 and 5, booting from a USB 3.0 SSD (Solid State Drive) offers a dramatic performance boost over microSD cards. This is a game-changer for database-backed applications or anything requiring fast disk I/O.
- Network File System (NFS) or iSCSI: For shared storage across your cluster, you can set up an NFS server on a dedicated Pi or a NAS device. This allows all nodes to access a common storage pool.
- Ceph/GlusterFS (Advanced): For truly distributed, fault-tolerant storage, you could explore solutions like Ceph or GlusterFS, which pool storage from multiple nodes. This is a complex undertaking but offers enterprise-grade storage capabilities.
- Raspberry Pi 5 PCIe for NVMe: The Pi 5’s dedicated PCIe 2.0 interface opens up exciting possibilities for direct NVMe SSD connections, offering even faster storage performance. This is a significant leap for storage-intensive cluster workloads.
Monitoring Your Mini-Empire: Tools and Techniques for Cluster Health 📊
A healthy cluster is a monitored cluster. Knowing what’s happening inside your nodes is crucial for troubleshooting, performance tuning, and ensuring uptime.
- Why Monitor? To detect issues early (e.g., high CPU load, low memory, disk full), track performance trends, and understand resource utilization.
- Our Go-To Stack: At Why Pi™, we swear by Prometheus for data collection and Grafana for visualization.
- Prometheus: A powerful open-source monitoring system. You deploy “exporters” (small agents) on each Pi to collect metrics (CPU usage, memory, disk I/O, network traffic).
- Grafana: A versatile dashboarding tool that connects to Prometheus (and many other data sources) to create beautiful, informative graphs and alerts.
- Deployment: You can run Prometheus and Grafana themselves as containers on your cluster, or on a dedicated monitoring Pi.
- 👉 CHECK PRICE on: (No direct product, but links to official sites for software)
- Prometheus Official Website: https://prometheus.io/
- Grafana Official Website: https://grafana.com/
- Node Exporter: A common Prometheus exporter for Linux hosts. Install it on each Pi to gather system-level metrics.
- cAdvisor: If using Docker or Kubernetes, cAdvisor (Container Advisor) provides container-level resource usage and performance metrics.
- Alerting: Configure alerts in Prometheus or Grafana to notify you via email, Slack, or other channels if critical thresholds are breached (e.g., CPU > 90% for 5 minutes).
The Turing Pi Advantage: When to Consider a Dedicated Cluster Board 🧠
While individual Raspberry Pis are great for learning and smaller clusters, dedicated cluster boards like the Turing Pi offer a more integrated and scalable solution, especially for Raspberry Pi Compute Modules (CM4).
| Feature | Individual Raspberry Pi 4B Setup | Turing Pi 2 (for CM4) |
|---|---|---|
| Nodes Supported | Limited by switch ports, power outlets (typically 2-16) | Up to 4 Raspberry Pi Compute Module 4s |
| Power Management | Individual USB-C power supplies or PoE+ HATs | Centralized power delivery via single ATX PSU |
| Networking | External Gigabit Ethernet switch, individual cables | Integrated Gigabit Ethernet switch, single uplink |
| Storage | microSD cards, USB SSDs | Onboard NVMe SSD slots (for CM4), SATA ports |
| Form Factor | Stacked, often messy cabling | Compact, single-board solution, clean cabling |
| Management | Individual SSH, external tools | Integrated BMC (Baseboard Management Controller) for remote management |
| Cost | Lower initial cost per node | Higher initial cost for the board, then cost per CM4 |
| Complexity | More manual wiring, configuration | Simplified wiring, more integrated features |
| Best For | Learning, small home labs, budget-conscious builds | More serious home labs, small-scale server racks, integrated solutions |
- What is Turing Pi? The Turing Pi is a mini-ITX form factor cluster board designed to house multiple Raspberry Pi Compute Modules (CM4). It provides centralized power, networking, and often integrated storage options (like NVMe SSD slots) on a single PCB.
- Why Consider It?
- Cleanliness & Organization: Eliminates the spaghetti of cables from individual Pis.
- Centralized Power: Powers all CM4s from a single ATX power supply.
- Integrated Networking: Built-in Gigabit Ethernet switch simplifies network setup.
- NVMe Storage: Often provides NVMe slots for high-speed storage, a massive upgrade over microSD cards.
- Remote Management (BMC): Some versions include a Baseboard Management Controller (BMC) for out-of-band management, similar to enterprise servers.
- Jeff Geerling’s Perspective: Jeff Geerling, a prominent voice in the Raspberry Pi community, has extensively explored the Turing Pi, calling it a “game-changing cluster board.” He highlights its potential for more integrated and scalable cluster setups.
- Why Pi™ Recommendation: If you’re serious about building a more permanent, robust, and scalable cluster (especially with CM4s), and you’re willing to invest a bit more, the Turing Pi is an excellent choice. It bridges the gap between hobbyist builds and professional mini-servers.
- 👉 CHECK PRICE on: Turing Pi Official Website
The “Raspberry Pi Dramble” Legacy: Learning from a Pioneer Project 📚
No discussion of Raspberry Pi clusters would be complete without paying homage to the Raspberry Pi Dramble. This project, spearheaded by Jeff Geerling, was instrumental in demonstrating the viability and educational value of Pi clusters.
- What was the Dramble? It was one of the first widely documented, high-profile Raspberry Pi clusters, initially built in 2015. It evolved over time, showcasing different Pi models and orchestration tools.
- Key Takeaways from the Dramble:
- Kubernetes on ARM: The Dramble proved that Kubernetes could run effectively on ARM-based Raspberry Pis, paving the way for countless other projects.
- PoE for Cleanliness: Early iterations highlighted the cable mess of individual power supplies, leading to the adoption of PoE HATs for a much cleaner setup.
- Real-World Application: It demonstrated practical use cases like distributed web hosting and continuous integration, inspiring others to build their own.
- Documentation & Community: Jeff’s meticulous documentation and open-source approach (scripts available on GitHub) fostered a vibrant community around Pi clusters.
- Why it Matters: The Dramble taught us that working with resource constraints (like limited RAM or slow I/O) on Raspberry Pis “highlights inefficiencies in your code,” forcing better optimization and a deeper understanding of system performance. It’s a testament to the educational value of these projects.
- Our Anecdote: When we first started experimenting with Kubernetes on Pis, the Dramble’s GitHub repository was our bible. It provided invaluable scripts and insights that helped us overcome initial hurdles and understand best practices for container orchestration on ARM.
By learning from pioneers like the Dramble, you can avoid common pitfalls and build an even more effective and robust Raspberry Pi cluster.
Troubleshooting Your Pi Cluster: When Things Go Sideways 🛠️
Let’s be real: building a complex system like a Raspberry Pi cluster rarely goes perfectly on the first try. Cables get loose, configurations have typos, and sometimes, the network just decides to be grumpy. At Why Pi™, we’ve seen it all – from mysterious power issues to stubborn Kubernetes pods. Don’t worry, troubleshooting is part of the learning process, and we’re here to help you navigate the inevitable bumps in the road.
Common Issues and How to Fix Them ❌
Here’s a rundown of the most frequent problems we encounter with Raspberry Pi clusters and our tried-and-true solutions:
- ❌ Pi Not Booting / Red Light Only:
- Cause: Corrupted microSD card, insufficient power, or faulty Pi.
- Fix:
- ✅ Re-flash the microSD card: This is the most common culprit. Use a high-quality card and the official Raspberry Pi Imager.
- ✅ Check power supply: Ensure your power supply (USB-C or PoE) delivers enough current (at least 3A for Pi 4). Try a different power supply or cable.
- ✅ Inspect the Pi: Look for any physical damage.
- ❌ Can’t SSH into a Pi / Connection Refused:
- Cause: SSH not enabled, incorrect IP address, firewall blocking, or network issue.
- Fix:
- ✅ Verify SSH is enabled: During OS flashing, ensure you enabled SSH. If not, re-flash or connect a monitor/keyboard to the Pi and enable it via
sudo raspi-config. - ✅ Check IP address: Use
hostname -Ion the Pi (if you have a monitor) or scan your network to confirm the correct IP. - ✅ Network connectivity: Ping the Pi from your computer (
ping <PI_IP>). If it fails, check Ethernet cables and switch connections. - ✅ Firewall: Ensure no firewall on your computer or router is blocking SSH (port 22).
- ✅ Verify SSH is enabled: During OS flashing, ensure you enabled SSH. If not, re-flash or connect a monitor/keyboard to the Pi and enable it via
- ❌ Slow Network Performance / Intermittent Connectivity:
- Cause: Faulty Ethernet cable, slow switch, network congestion, or incorrect network configuration.
- Fix:
- ✅ Use Gigabit Ethernet: Ensure all your cables and your switch are Gigabit-capable. A 100Mbps switch will severely bottleneck your cluster.
- ✅ Test cables: Swap out Ethernet cables one by one to identify a faulty one.
- ✅ Check switch status lights: Most switches have indicator lights for each port. Green usually means Gigabit, amber/orange means 100Mbps or less.
- ✅ Static IPs: Ensure static IPs are correctly configured on all nodes to avoid DHCP lease issues.
- ❌ Kubernetes/Docker Swarm Nodes Not Joining / “NotReady” Status:
- Cause: Incorrect master IP, wrong token, firewall blocking communication, or network issues.
- Fix:
- ✅ Verify Master IP and Token: Double-check the
K3S_URLandK3S_TOKEN(for k3s) ordocker swarm joincommand. A single typo can break it. - ✅ Firewall on Pis: By default, Raspberry Pi OS doesn’t have a strict firewall, but if you’ve installed
ufwor similar, ensure ports 6443 (k3s API) and other necessary ports are open. - ✅ Network Connectivity: Ensure all nodes can ping each other.
- ✅ Time Synchronization: Ensure all Pis have correct time synchronization (NTP).
sudo apt install ntp -yandsudo systemctl restart ntpcan help. - ✅ Restart Services: Sometimes a simple
sudo systemctl restart k3s(on master) orsudo systemctl restart k3s-agent(on workers) can resolve transient issues. For Docker Swarm,sudo systemctl restart docker.
- ✅ Verify Master IP and Token: Double-check the
- ❌ Applications Not Deploying / Pods Stuck in “Pending” or “CrashLoopBackOff”:
- Cause: Insufficient resources (RAM/CPU), incorrect container image, network issues within the cluster, or misconfigured deployment.
- Fix:
- ✅ Check Logs: This is your best friend!
- For Kubernetes:
kubectl describe pod <POD_NAME>andkubectl logs <POD_NAME>. - For Docker Swarm:
docker service logs <SERVICE_NAME>.
- For Kubernetes:
- ✅ Resource Limits: Ensure your Pis have enough RAM and CPU for the containers. Consider upgrading to 8GB Pi 4s if you’re running many services.
- ✅ Image Availability: Verify the container image exists and is accessible (e.g.,
nginxfrom Docker Hub). - ✅ Network Policies: If you’ve implemented Kubernetes Network Policies, ensure they aren’t blocking internal communication.
- ✅ Check Logs: This is your best friend!
- ❌ Thermal Throttling / Slow Performance Under Load:
- Cause: Inadequate cooling, high ambient temperature, or sustained heavy workload.
- Fix:
- ✅ Improve Cooling: Add heatsinks, fans, or upgrade to a better cluster case with active cooling.
- ✅ Monitor Temperatures: Use
vcgencmd measure_tempon each Pi to check CPU temperature. - ✅ Optimize Workloads: If possible, optimize your applications to be less CPU-intensive or distribute them more evenly.
Our Own War Stories: Lessons Learned from Cluster Calamities 😅
At Why Pi™, we’ve had our fair share of “learning experiences” (read: frustrating failures) while building and maintaining clusters. Here are a couple of anecdotes that highlight common pitfalls:
- The Case of the Ghostly Network:
- Problem: Our 8-node Kubernetes cluster kept having intermittent network dropouts, especially under heavy load. Pods would randomly lose connectivity, and nodes would briefly go “NotReady.” We checked cables, switch, IPs – everything seemed fine.
- Discovery: After days of head-scratching, we realized our “Gigabit” Ethernet switch was an ancient, unmanaged unit that, while technically supporting Gigabit, was struggling with the sheer volume of traffic and internal routing. It was overheating!
- Solution: Replaced it with a modern, robust TP-Link TL-SG1008P PoE+ Gigabit switch. The problem vanished instantly.
- Lesson Learned: Don’t underestimate the importance of a quality network switch, especially for sustained cluster traffic. It’s the backbone!
- The SD Card Massacre:
- Problem: A batch of new Pis for a client project kept failing to boot or would corrupt their OS within weeks. We were tearing our hair out, thinking we had a bad batch of Pis.
- Discovery: The common denominator was a new, cheaper brand of microSD cards we had sourced to save costs. They were advertised as “Class 10,” but their actual write endurance and speed were abysmal.
- Solution: Switched back to SanDisk Extreme cards. Not a single failure since.
- Lesson Learned: The microSD card is your cluster’s Achilles’ heel. Invest in high-quality, reputable brands. It’s not an area to cut corners!
Remember, every problem you solve makes you a better engineer. Don’t get discouraged! Use these tips, consult the vast online community (forums, GitHub issues), and you’ll conquer any cluster calamity.
Conclusion: Your Journey into Distributed Computing Awaits! 🚀

Phew! What an adventure, right? From the initial spark of curiosity to the intricate dance of networking and orchestration, building a Raspberry Pi cluster is a journey filled with learning, challenges, and immense satisfaction. Here at Why Pi™, we’ve walked this path many times, and each time, we’re reminded of the incredible power and educational value packed into these tiny boards.
We started with the question: Why bother? And we hope by now, you have a resounding answer. You’ve seen how a cluster isn’t about creating one super-powerful machine, but rather about harnessing the collective strength of many to achieve scalability, fault tolerance, and a deeper understanding of distributed computing. Remember our early struggles with the “octopus” of cables and power supplies? Or the junior engineer’s lesson on the importance of quality microSD cards? These anecdotes aren’t just stories; they’re testaments to the hands-on learning that only a project like this can provide.
The Pros of Building a Raspberry Pi Cluster:
- Unparalleled Educational Value: There’s simply no better way to learn about Linux networking, container orchestration (Kubernetes, Docker Swarm), parallel processing (MPI), and system administration than by building a physical cluster. As Jeff Geerling wisely states, “Building physical clusters is so hands-on, and I may have learned to some degree from other activities, or by building virtual machines, but I wouldn’t know them intimately.”
- Cost-Effective Experimentation: For a fraction of the cost of a single high-end server, you can build a multi-node system that allows you to experiment with complex architectures.
- Power Efficiency: Raspberry Pi clusters are remarkably energy-efficient, making them ideal for always-on home lab services without racking up huge electricity bills.
- Scalability: Easily add more nodes as your needs grow, practicing horizontal scaling in a tangible way.
- Fault Tolerance: Design your services to withstand individual node failures, enhancing reliability for critical applications like home automation or DNS filtering.
- Real-World Application Testing: A great platform for testing ARM-compatible applications and simulating microservices environments before deploying to larger cloud platforms.
The Cons (or “Learning Opportunities”) of Building a Raspberry Pi Cluster:
- Not a High-Performance Supercomputer: It won’t replace a dedicated server for CPU-intensive tasks, heavy GPU workloads, or applications requiring extremely low latency. It’s about distributed tasks, not raw single-core power.
- Initial Complexity: Setting up networking, SSH, and orchestration tools can have a steep learning curve for beginners.
- Resource Constraints: You’ll constantly be mindful of limited RAM and I/O speeds (even with Gigabit Ethernet and fast SD cards), which, while a “con” for raw power, is a “pro” for learning optimization!
- Cable Management: Without a dedicated cluster board or PoE, managing power and Ethernet cables can quickly become a tangled mess.
Our Confident Recommendation:
If you’re a tinkerer, a learner, an aspiring DevOps engineer, or simply someone who loves to understand how things work from the ground up, then YES, absolutely build a Raspberry Pi cluster! It’s an incredibly rewarding project that will equip you with invaluable skills and a deeper appreciation for the complexities of modern computing. Start small, perhaps with 2-3 nodes, and expand as your confidence and needs grow. The journey is truly the destination here, and we at Why Pi™ are thrilled to have guided you through the first steps.
Now go forth, build your mini-supercomputer, and unlock the power of distributed computing! Happy clustering! 🥳
Recommended Links: Dive Deeper into the Pi Cluster Universe 🔗
Ready to continue your exploration? Here are some hand-picked resources and shopping links for the components and tools we’ve discussed.
Raspberry Pi Boards & Accessories
- Raspberry Pi 4 Model B (8GB): Amazon | Adafruit | Raspberry Pi Official Website
- Raspberry Pi 4 Model B (4GB): Amazon | Adafruit | Raspberry Pi Official Website
- Raspberry Pi PoE+ HAT: Amazon | Adafruit | Raspberry Pi Official Website
- Raspberry Pi 5 (8GB): Amazon | Adafruit | Raspberry Pi Official Website
Networking Hardware
- TP-Link TL-SG1008D 8-Port Gigabit Ethernet Switch: Amazon | Walmart | TP-Link Official Website
- NETGEAR GS308 8-Port Gigabit Ethernet Unmanaged Switch: Amazon | Walmart | NETGEAR Official Website
- TP-Link TL-SG1008P 8-Port Gigabit PoE+ Switch: Amazon | Walmart | TP-Link Official Website
- UGREEN 100W USB C Charger: Amazon | UGREEN Official Website
- Anker 737 Charger GaNPrime 120W: Amazon | Anker Official Website
Storage
- SanDisk 64GB Extreme microSDXC A2 Card: Amazon | Walmart | SanDisk Official Website
- Samsung EVO Select 64GB microSDXC A2 Card: Amazon | Walmart | Samsung Official Website
Cluster Cases & Cooling
- GeeekPi Raspberry Pi 4 Cluster Case: Amazon | GeeekPi Official Website
- Turing Pi 2 Mini ITX Cluster Board: Turing Pi Official Website
Books for Deeper Learning
- Kubernetes: Up and Running: Amazon
- Docker: Up & Running: Amazon
- Raspberry Pi User Guide: Amazon
- Learning Linux for Raspberry Pi: Amazon
FAQ: Your Burning Questions About Raspberry Pi Clusters Answered 🔥

Got more questions bubbling up? We’ve got you covered! Here are some common inquiries we receive at Why Pi™ about building and managing Raspberry Pi clusters.
How do I set up a Raspberry Pi cluster for parallel computing?
Setting up a Raspberry Pi cluster for parallel computing involves several key steps:
Initial Hardware Assembly & OS Flashing
- Gather Hardware: Acquire multiple Raspberry Pi 4 Model B boards (at least 2-3), a Gigabit Ethernet switch, a reliable power supply (PoE+ switch with HATs is ideal), and high-quality microSD cards.
- Flash OS: Use Raspberry Pi Imager to flash Raspberry Pi OS Lite (64-bit) onto each microSD card. Enable SSH during this process for headless setup.
- Physical Connection: Connect all Raspberry Pis to the Gigabit Ethernet switch. Power them up.
Network Configuration & SSH
- Identify IPs: Find the IP addresses of your Pis using your router’s interface or a network scanner like
nmap. - Static IPs: Configure static IP addresses for each Pi in a dedicated subnet (e.g., 10.0.0.x) via
/etc/dhcpcd.conf. This ensures consistent communication. - SSH Keys: Set up SSH key-based authentication between your “master” node and all “worker” nodes for secure, passwordless access.
Software for Parallelism
- Install MPI: For traditional parallel computing, install MPI (Message Passing Interface) on all nodes:
sudo apt install mpich python3-mpi4py. - Write/Run Parallel Code: Develop or use existing Python scripts (e.g., with
mpi4py) that leverage MPI to distribute tasks. Usempiexecto run your parallel jobs across specified hosts.
This process allows individual tasks to be broken down and processed simultaneously across your cluster, significantly reducing computation time for suitable workloads.
What software is best for managing a Raspberry Pi cluster?
The “best” software depends on your goals, but for modern distributed computing and container orchestration, two options stand out:
Kubernetes (k3s or Kubeadm)
- Why it’s great: Kubernetes is the industry standard for orchestrating containerized applications. It provides powerful features like self-healing, load balancing, automatic rollouts and rollbacks, and resource management. It’s perfect for learning cloud-native principles.
- Raspberry Pi specific: For Pis, k3s (a lightweight Kubernetes distribution by Rancher) is highly recommended due to its minimal resource footprint. You can also use
kubeadmfor a more traditional Kubernetes setup, though it requires more resources. - Use cases: Hosting resilient web services, microservices architectures, IoT data processing, CI/CD pipelines.
Docker Swarm
- Why it’s great: Docker Swarm is Docker’s native clustering solution, simpler to set up and manage than Kubernetes, making it a great entry point into orchestration. If you’re already familiar with Docker, Swarm will feel very intuitive.
- Use cases: Smaller clusters, simpler container deployments, learning basic orchestration concepts before diving into Kubernetes.
MPI (Message Passing Interface)
- Why it’s great: For scientific computing, simulations, and tasks that require explicit parallel programming, MPI is the go-to. It allows processes on different nodes to communicate and exchange data.
- Use cases: Prime number calculations, numerical simulations, data analysis that can be parallelized at the code level.
Ansible
- Why it’s great: While not an orchestration engine itself, Ansible is invaluable for automating configuration management across your cluster. You can use it to install software, update packages, and configure settings on all your Pis simultaneously from a central control node. This saves immense time and ensures consistency.
Can a Raspberry Pi cluster improve performance for machine learning projects?
Yes, but with significant caveats. A Raspberry Pi cluster can improve performance for certain aspects of machine learning projects, but it’s crucial to understand its limitations.
Where it Shines: Distributed Inference & Data Preprocessing
- Distributed Inference: If you have a trained machine learning model and need to perform inference (making predictions) on a large volume of data, you can distribute this task across multiple Pi nodes. Each node can process a subset of the data, speeding up the overall inference time.
- Data Preprocessing: Tasks like data cleaning, feature engineering, or data augmentation can often be parallelized. A cluster can process different chunks of your dataset concurrently, preparing it faster for model training.
- Edge AI: For IoT development and edge computing, a Pi cluster can be excellent for deploying multiple small AI models closer to the data source, reducing latency and bandwidth usage.
Where it Struggles: Model Training & GPU-Intensive Tasks
- Lack of Powerful GPUs: The biggest limitation for most modern machine learning is the absence of powerful GPUs on Raspberry Pis. Training complex deep learning models typically requires significant GPU acceleration, which Pis simply don’t offer.
- Limited RAM: While Pi 4 and 5 offer up to 8GB RAM, this can still be a bottleneck for large datasets or complex models during training.
- CPU-Bound Training: While the CPUs are decent, they are not designed for the sustained, heavy computational loads of training large models, which often benefit from specialized hardware like NVIDIA GPUs or Google TPUs.
In summary, use a Pi cluster for distributed inference, data preprocessing, or edge AI deployments where the computational load per inference is manageable. Don’t expect it to replace a workstation with a high-end GPU for training large neural networks.
What are the hardware requirements for building a Raspberry Pi cluster?
To build a functional Raspberry Pi cluster, you’ll need a core set of hardware components:
Essential Components
- Multiple Raspberry Pi Boards: We highly recommend Raspberry Pi 4 Model B (4GB or 8GB RAM) for its true Gigabit Ethernet and powerful CPU. Raspberry Pi 5 is also excellent but newer and pricier. Aim for at least 2-3 nodes to start.
- Gigabit Ethernet Switch: Crucial for fast communication between nodes. Ensure it has enough ports for all your Pis plus one uplink to your main network.
- Power Supply:
- Option 1 (Individual): High-quality USB-C power adapters (5V/3A minimum) for each Pi.
- Option 2 (Centralized): A multi-port USB-C charger with sufficient wattage per port.
- Option 3 (Recommended): A PoE+ enabled Gigabit Ethernet switch combined with Raspberry Pi PoE+ HATs for each Pi. This simplifies cabling significantly.
- High-Quality microSD Cards: One per Pi. Look for Class 10, U3, V30 A2 rated cards (e.g., SanDisk Extreme, Samsung EVO Select) with at least 32GB capacity (64GB or 128GB preferred).
- Ethernet Cables: One for each Pi to connect to the switch. Ensure they are of appropriate length.
Optional but Recommended Components
- Cluster Case: A dedicated case (e.g., from GeeekPi or a 3D-printed design) helps organize your Pis, provides mounting for fans, and improves airflow.
- Cooling Solutions: Small heatsinks and/or fans for each Pi, especially if running demanding workloads, to prevent thermal throttling.
- USB-to-Ethernet Adapter (for initial setup): If you’re setting up headless and don’t have a monitor/keyboard for each Pi, you might need one to connect to your main network initially, or rely on a single Pi to configure the others.
- Turing Pi Board: For advanced users building larger, more integrated clusters with Raspberry Pi Compute Modules, a Turing Pi board offers centralized power, networking, and management.
How do I configure networking between Raspberry Pi nodes in a cluster?
Networking is the backbone of your cluster. Proper configuration ensures efficient and reliable communication.
Wired is Best: Gigabit Ethernet
- Always use wired Ethernet: Wi-Fi is generally too slow and unreliable for inter-node communication in a cluster. A Gigabit Ethernet switch is essential.
- Dedicated Subnet: It’s best practice to place your cluster nodes on a dedicated subnet (e.g., 10.0.0.0/24) that is isolated or managed separately from your main home network. This provides better security and organization.
Static IP Addresses
- Why Static? Dynamic IP addresses (DHCP) can change, breaking communication within your cluster. Static IPs ensure each node always has the same address.
- How to Set: Edit the
/etc/dhcpcd.conffile on each Raspberry Pi. Add entries like this (adjustingeth0if your interface name differs):interface eth0 static ip_address=10.0.0.101/24 # For node1 static routers=10.0.0.1 # Your gateway/router IP static domain_name_servers=10.0.0.1 8.8.8.8 # Your DNS server(s)Increment the
ip_addressfor each node (e.g., 10.0.0.102, 10.0.0.103). - Reboot: After editing, reboot each Pi (
sudo reboot) for changes to take effect.
Hostnames and /etc/hosts
- Friendly Names: Assign unique hostnames to each Pi (e.g.,
node1,node2,master) usingsudo raspi-configor by editing/etc/hostnameand/etc/hosts. - Local DNS Resolution: For convenience, add entries to
/etc/hostson all nodes, mapping IP addresses to hostnames. This allows nodes to refer to each other by name instead of IP.10.0.0.101 node1 10.0.0.102 node2 10.0.0.103 node3
SSH Key-Based Authentication
- Security & Convenience: Set up SSH keys for passwordless login between nodes. This is crucial for automation tools like Ansible and for secure communication within your cluster.
- Steps:
- On your “master” node, generate an SSH key pair:
ssh-keygen -t rsa. - Copy the public key to all other nodes:
ssh-copy-id [email protected](repeat for each node). - Test by SSHing from master to a worker without a password:
ssh pi@node2.
- On your “master” node, generate an SSH key pair:
What are the common challenges in building a Raspberry Pi cluster?
Building a Pi cluster is a rewarding experience, but it’s not without its hurdles. Here are some common challenges you might encounter:
Power Management
- Insufficient Power: Raspberry Pi 4s are power-hungry. Using underpowered USB-C adapters or a multi-port charger that can’t deliver enough current per port will lead to instability, crashes, or boot failures.
- Cable Clutter: Managing individual power bricks for multiple Pis can quickly become a tangled mess. This is where PoE+ HATs and a PoE+ switch become invaluable.
Networking Issues
- Slow Ethernet: Using 100Mbps switches instead of Gigabit Ethernet will create a severe bottleneck, especially for data-intensive cluster applications.
- DHCP Instability: Relying on dynamic IP addresses can lead to nodes losing their assigned IPs, breaking inter-node communication. Static IPs are essential.
- Firewall Rules: Misconfigured firewalls (e.g.,
ufw) can block necessary ports for Kubernetes or Docker Swarm communication.
Storage Performance
- Slow microSD Cards: Cheap or low-quality microSD cards are often the biggest performance bottleneck. Slow read/write speeds will make your entire cluster feel sluggish. Invest in A2-rated cards.
- SD Card Corruption: Frequent power outages or improper shutdowns can corrupt microSD cards, leading to data loss or unbootable Pis. Implement proper shutdown procedures or consider read-only root filesystems for critical services.
Software Configuration
- Kubernetes/Docker Swarm Complexity: These orchestration tools have a learning curve. Troubleshooting issues can require deep knowledge of their internal workings.
- Resource Constraints: Applications designed for powerful servers might struggle on the Pi’s limited RAM and CPU. You’ll need to optimize your applications or choose lightweight alternatives.
- ARM Architecture: Some software might not have pre-compiled ARM binaries, requiring you to compile from source, which can be time-consuming.
Thermal Management
- Overheating: Raspberry Pi 4s can run hot under sustained load. Without proper cooling (heatsinks, fans, or a well-ventilated case), they will throttle their CPU speed, reducing performance.
How do I monitor and manage resources in a Raspberry Pi cluster?
Effective monitoring and management are crucial for keeping your cluster healthy and performing optimally.
Monitoring Tools
- Prometheus & Grafana: This is the gold standard for monitoring.
- Prometheus: Collects metrics (CPU usage, RAM, disk I/O, network traffic) from each node using exporters (e.g.,
node_exporter). - Grafana: Provides beautiful, customizable dashboards to visualize these metrics, allowing you to quickly identify bottlenecks or issues.
- Why Pi™ Insight: We use Prometheus and Grafana extensively. A sudden spike in CPU on one node, or a drop in network throughput, immediately alerts us to potential problems.
- Prometheus: Collects metrics (CPU usage, RAM, disk I/O, network traffic) from each node using exporters (e.g.,
- cAdvisor: If you’re using Docker or Kubernetes, cAdvisor (Container Advisor) is a daemon that collects, aggregates, processes, and exports information about running containers. It’s often integrated into Kubernetes.
- Netdata: A real-time performance monitoring tool that provides instant visualizations of system metrics. It’s lightweight and easy to install.
- Standard Linux Tools: Don’t forget the basics!
htop(for CPU/RAM),iftop(for network),iotop(for disk I/O), anddf -h(for disk space) are invaluable for quick checks on individual nodes.
Management Tools
- Kubernetes Dashboard / KubeLens: If using Kubernetes, the Kubernetes Dashboard provides a web-based UI for managing applications, viewing logs, and monitoring resources. KubeLens is a desktop application offering similar functionality with a richer UI.
- Portainer: A lightweight management UI for Docker environments, including Docker Swarm. It simplifies deploying, managing, and monitoring containers.
- Ansible: As mentioned earlier, Ansible is fantastic for configuration management and automation. You can use it to:
- Deploy software updates across all nodes.
- Configure new services.
- Collect system information.
- Perform routine maintenance tasks.
- SSH: Your primary tool for direct access to individual nodes. Ensure you have SSH key-based authentication set up for convenience and security.
- Centralized Logging: Implement a centralized logging solution (e.g., ELK Stack – Elasticsearch, Logstash, Kibana, or Loki & Grafana) to aggregate logs from all your nodes. This makes troubleshooting much easier than sifting through logs on individual Pis.
By combining robust monitoring with efficient management tools, you can keep your Raspberry Pi cluster running smoothly and effectively.
Reference Links: Sources and Further Reading 📖
Here are the reliable sources and further reading materials that informed this comprehensive guide. We encourage you to explore them for even deeper insights!
- Raspberry Pi Official Website: https://www.raspberrypi.com/
- Explore the latest Raspberry Pi models, documentation, and community resources.
- Jeff Geerling’s Blog – Raspberry Pi Cluster Series:
- “Raspberry Pi Cluster Episode 1: Introduction to Clusters”: https://www.jeffgeerling.com/blog/2020/raspberry-pi-cluster-episode-1-introduction-clusters/
- “Why Build a Raspberry Pi Cluster”: https://www.jeffgeerling.com/blog/2021/why-build-raspberry-pi-cluster/
- Jeff Geerling’s GitHub (Raspberry Pi Dramble): https://github.com/geerlingguy/raspberry-pi-dramble
- The MagPi Magazine – Build a Raspberry Pi Cluster Computer: https://magazine.raspberrypi.com/articles/build-a-raspberry-pi-cluster-computer
- The official Raspberry Pi magazine offers practical guides and project ideas.
- Turing Pi Official Website: https://turingpi.com/
- Learn more about dedicated cluster boards for Raspberry Pi Compute Modules.
- Kubernetes Official Documentation: https://kubernetes.io/docs/
- The authoritative source for all things Kubernetes.
- Docker Official Documentation: https://docs.docker.com/
- Comprehensive guides for Docker and Docker Swarm.
- TP-Link Official Website: https://www.tp-link.com/us/
- For networking hardware like Gigabit Ethernet switches and PoE switches.
- NETGEAR Official Website: https://www.netgear.com/
- Another leading brand for networking solutions.
- SanDisk Official Website: https://www.westerndigital.com/support
- For high-performance microSD cards.
- Samsung Official Website: https://www.samsung.com/us/
- For quality microSD cards and other electronics.
- Anker Official Website: https://us.anker.com/
- For reliable power solutions and chargers.
- UGREEN Official Website: https://www.ugreen.com/
- For charging accessories and cables.
- GeeekPi Official Website: https://thegeeekpi.com/
- For Raspberry Pi accessories, including cluster cases.