Support our educational content for free when you purchase through links on our site. Learn more
🚀 Master Raspberry Pi Docker Deployment: 5 Steps to Success (2026)

Ever tried to run a Docker container on your Raspberry Pi only to be greeted by a cryptic “exec format error” or a container that refuses to connect to the internet? You’re not alone. We’ve all been there, staring at a terminal screen wondering why our x86-optimized code won’t play nice with ARM architecture. But here’s the secret: with the right setup, that $35 credit-card-sized computer can host a full-stack application stack that rivals a $20/month cloud server. In this guide, we’re not just fixing broken connections; we’re transforming your Pi into a powerhouse of local automation, media streaming, and secure edge computing.
By the time you finish reading, you’ll know exactly how to build custom ARM-compatible images, manage persistent data without corrupting your SD card, and even set up a CI/CD pipeline that deploys updates automatically. And if you’ve ever wondered whether running your own server is actually cheaper than the cloud, we’ll break down the real numbers in our conclusion. Ready to stop fighting your hardware and start leveraging it? Let’s dive in.
Key Takeaways
- ARM Architecture is Non-Negotiable: You must use ARM-specific base images (like
arm64v8/) to avoid execution errors; standard x86 images simply will not run on the Raspberry Pi. - Storage Matters More Than You Think: To prevent SD card corruption from constant container logging, boot from a USB SSD or use high-endurance cards with proper volume management.
- Resource Management is Critical: The Pi has limited RAM; always set memory and CPU limits in your Docker Compose files to prevent system crashes.
- Networking Requires Configuration: Default isolation means you must explicitly map ports and configure DNS to ensure your containers can access the internet and your local network.
- Security First: Never hardcode secrets; use environment variables and consider a reverse proxy like Nginx Proxy Manager for secure, public-facing deployments.
Table of Contents
- ⚡️ Quick Tips and Facts
- 📜 From Zero to Hero: A Brief History of Raspberry Pi and Docker
- 🛠️ The Ultimate Toolkit: Hardware and Software Requirements
- 🐳 Installing and Configuring Docker on Raspberry Pi OS
- 🚀 Mastering the Art of Container Deployment: A Step-by-Step Guide
- 1. Preparing Your Dockerfile for ARM Architecture
- 2. Building the Container Image Efficiently
- 3. Running Your First Container with Docker Compose
- 4. Managing Persistent Data with Docker Volumes
- 5. Exposing Ports and Configuring Networking
- 🔧 Troubleshooting Common Pitfalls: No Internet Access and Permission Errors
- 🚦 Optimizing Performance: Resource Limits and Memory Management
- 🛡️ Securing Your Edge: Best Practices for Production Deployment
- 🌐 Real-World Use Cases: From Home Labs to IoT Gateways
- 🧪 Advanced Techniques: Multi-Stage Builds and CI/CD Pipelines
- 🏁 Conclusion
- 🔗 Recommended Links
- ❓ FAQ
- 📚 Reference Links
⚡️ Quick Tips and Facts
Before we dive into the deep end of the Docker pool, let’s splash around with some critical facts that will save you hours of head-scratching. We’ve seen too many engineers burn out their SD cards trying to run x86 images on ARM hardware. Don’t be that person!
| Fact | Why It Matters |
|---|---|
| ARM vs. x86 | Most Docker images are built for Intel/AMD (x86). Your Raspberry Pi uses ARM. If you try to pull a standard nginx image, it will fail. You need linux/arm variants. |
| RAM is King | Docker is lightweight, but not magic. A Raspberry Pi 4 with 4GB RAM is the sweet spot for running multiple containers. The Pi 3B+ can handle 1-2, but don’t push it. |
| SD Card Wear | Containers write logs constantly. Use a high-endurance SD card or, better yet, boot from a USB SSD to prevent card corruption. |
| Portainer is Your Friend | If you hate the command line, Portainer gives you a GUI to manage containers. It’s a game-changer for beginners. |
| Network Isolation | By default, containers are isolated. You must explicitly map ports (e.g., -p 8080:80) to access them from your browser. |
Pro Tip: Always run
sudo apt update && sudo apt upgrade -ybefore installing Docker. A stale OS is a broken Docker install waiting to happen.
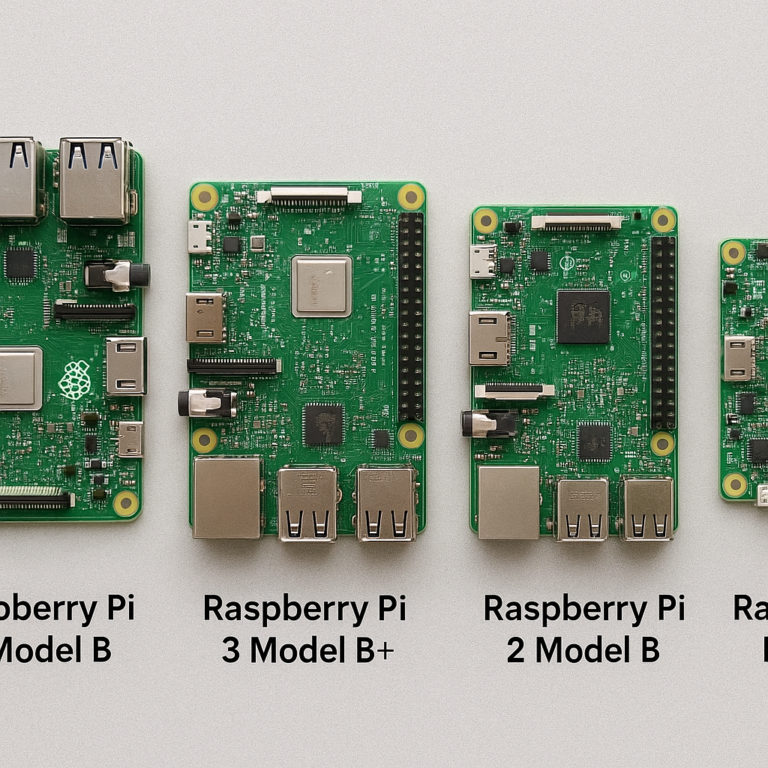
For more on the hardware that powers these projects, check out our deep dive on Raspberry Pi models and their capabilities.
📜 From Zero to Hero: A Brief History of Raspberry Pi and Docker

The story of running containers on a credit-card-sized computer is a tale of two revolutions colliding.
On one side, we have the Raspberry Pi. Born in 2012 from the Cambridge Computer Lab, its mission was to put affordable computing in the hands of students. It quickly became the darling of the IoT Development community, evolving from a simple educational tool into a powerhouse for home automation and edge computing.
On the other side, we have Docker. Launched in 2013, Docker revolutionized software deployment by packaging applications into “containers” that run consistently anywhere. But there was a catch: Docker was initially optimized for x86 servers.
The marriage of these two technologies wasn’t immediate. Early attempts to run Docker on the Pi were fraught with errors. As Nic Raboy noted in his pioneering work on the topic, “Not all Docker images will work on a Raspberry Pi. This is because most images were designed for PC architectures, not ARM.”
However, the community didn’t give up. The Docker project eventually embraced ARM architecture, and the Raspberry Pi Foundation optimized their OS (Raspberry Pi OS) to support container runtimes natively. Today, we stand at a point where you can deploy a full-stack application on a Pi for less than the cost of a lunch.
This evolution has opened doors for DIY Electronics enthusiasts to build complex systems like home labs, media servers, and IoT gateways without needing a rack of servers.
🛠️ The Ultimate Toolkit: Hardware and Software Requirements
You can’t build a house without bricks, and you can’t deploy Docker containers without the right gear. Let’s break down what you need to get started.
Hardware Requirements
While you can run Docker on a Raspberry Pi Zero W, it’s like trying to run a marathon in flip-flops. It’s possible, but painful. Here is our recommended setup:
| Component | Minimum Recommendation | Ideal Recommendation | Why? |
|---|---|---|---|
| Raspberry Pi Model | Pi 3 Model B+ | Pi 4 (4GB or 8GB) | The Pi 4’s USB 3.0 and Gigabit Ethernet are crucial for I/O heavy containers. |
| Storage | 32GB Class 10 SD Card | USB 3.0 SSD (250GB+) | SSDs prevent SD card corruption and speed up container boot times significantly. |
| Power Supply | 2.5A USB-C | Official 5.1A USB-C | Docker can spike power usage; a weak supply causes random rebots. |
| Cooling | Passive Heatsinks | Active Fan Case | Containers generate heat. Overheating leads to throttling and slow performance. |
👉 CHECK PRICE on:
- Raspberry Pi 4: Amazon | Official Store
- USB 3.0 SSD: Amazon | Best Buy
- Active Cooling Case: Amazon | Adafruit
Software Requirements
- Operating System: Raspberry Pi OS (64-bit) is highly recommended. While the 32-bit version works, the 64-bit version unlocks the full potential of the Pi 4’s memory and offers better Docker compatibility.
- Docker Engine: The latest stable version from the official Docker repository.
- Docker Compose: Essential for managing multi-container applications.
- Terminal Access: You’ll be living in the terminal, so get comfortable with SSH if you aren’t already.
For those looking to integrate these containers into broader systems, explore our articles on IoT Development to see how Docker fits into the bigger picture.
🐳 Installing and Configuring Docker on Raspberry Pi OS
Alright, boots on the ground. It’s time to install the engine that drives our containers. We’ll be using the official installation script, which is the most reliable method for Raspberry Pi OS.
Step 1: Update Your System
Before installing anything, ensure your OS is up to date. This prevents dependency hell later.
sudo apt update && sudo apt upgrade -y
Why do we do this? Because an outdated kernel can cause networking issues that make it look like Docker is broken when it’s actually just your OS.
Step 2: Install Docker Engine
We use the convenience script provided by Docker. It detects your architecture (ARM) and installs the correct version.
“`bash
curl -sSL https://get.docker.com | sh
> **Note:** The script is generally safe, but as the "First Video" tutorial suggests, it's good practice to review the script before running it. You can view it by running `curl https://get.docker.com` without the pipe.

### Step 3: Add Your User to the Docker Group
By default, you need `sudo` to run Docker commands. That's annoying. Let's fix that by adding your user (usually `pi`) to the `docker` group.
```bash
sudo usermod -aG docker $USER
Crucial Step: You must log out and log back in (or reboot) for this change to take effect. If you skip this, you’ll get “permission denied” errors and wonder what went wrong.
Step 4: Enable Docker on Boot
Ensure Docker starts automatically when your Pi rebots.
sudo systemctl enable docker
Step 5: Verify Installation
Run the classic test.
docker run hello-world
If you see the message “Hello from Docker!”, you’ve successfully installed Docker on your ARM architecture! 🎉
For more on the latest trends in the Electronics Industry, check out our Electronics Industry News section.
🚀 Mastering the Art of Container Deployment: A Step-by-Step Guide
Now that Docker is running, let’s deploy something real. We aren’t just running hello-world anymore; we are going to build a custom container. Why? Because, as Nic Raboy pointed out, relying solely on pre-built images limits you. Building your own gives you control.
Let’s build a simple Ghost Bloging Platform container, but we’ll adapt it for the Pi’s ARM architecture.
1. Preparing Your Dockerfile for ARM Architecture
The biggest pitfall for beginners is using an x86 base image. You must specify an ARM-compatible base image.
Create a directory for your project:
mkdir my-ghost-blog
cd my-ghost-blog
Create a file named Dockerfile (no extension) and add the following:
# Use an ARM-specific base image
FROM arm64v8/node:18-alpine

# Set the working directory
WORKDIR /app

# Install dependencies
RUN apk add --no-cache git

# Copy package files
COPY package*.json ./

# Install app dependencies
RUN npm install

# Copy the rest of the application code
COPY .

# Expose the port Ghost uses
EXPOSE 2368

# Start the application
CMD ["npm", "start"]
Key Insight: Notice arm64v8/node. This is the magic key. If you used node:18, Docker would try to pull an x86 image and fail.
2. Building the Container Image Efficiently
Building images on a Pi can be slow. The Pi 4 is fast, but compiling code takes time.
Run the build command:
docker build -t my-ghost-blog .
-t: Tags the image with a name..: Tells Docker to look for the Dockerfile in the current directory.
Wait time: Depending on your Pi model and internet speed, this could take 5 to 15 minutes. Grab a coffee! ☕
3. Running Your First Container with Docker Compose
While you can run containers with docker run, Docker Compose is the industry standard for managing multi-container apps. It makes restarting, updating, and networking much easier.
Create a docker-compose.yml file:
version: '3.8'
services:
 ghost:
 build: .
 container_name: my-ghost-blog
 ports:
 - "2368:2368"
 volumes:
 - ghost-data:/var/www/ghost/content
 restart: unless-stopped

volumes:
 ghost-data:
Run it with:
docker-compose up -d
The -d flag runs it in “detached” mode (background).
4. Managing Persistent Data with Docker Volumes
One of the most common mistakes? Losing your data when the container restarts.
In the docker-compose.yml above, we defined a Volume named ghost-data. This maps the container’s internal storage to a directory on your Pi’s filesystem. Even if you delete the container, your blog posts and images remain safe.
Did you know? Without volumes, any data written inside the container is lost the moment the container stops. This is why Docker Volumes are non-negotiable for production.
5. Exposing Ports and Configuring Networking
By default, your container is invisible to the outside world. The ports: - "2368:2368" line in our Compose file maps port 2368 on your Pi to port 2368 on the container.
To access your blog:
- Locally:
http://localhost:2368 - Remotely:
http://<YOUR_PI_IP>:2368
Troubleshooting Tip: If you can’t access it, check your firewall. On Raspberry Pi OS, ufw might be blocking the port.
sudo ufw allow 2368
🔧 Troubleshooting Common Pitfalls: No Internet Access and Permission Errors
So, you’ve built your container, but it’s not talking to the internet. Or maybe you’re getting “Permission Denied” errors left and right. You are not alone. This is the most common complaint in the community, as seen in the Docker forums where users report: “None of my docker containers can communicate with the internet.”
The “No Internet Access” Mystery
Why does this happen? It’s often a DNS or networking configuration issue specific to the ARM architecture or the router.
Symptoms:
- Container starts but fails to download packages.
ping google.comfails inside the container.- Port forwarding works, but the service returns a 502 error.
The Fix:
- Check DNS: Sometimes the Pi’s DNS settings don’t propagate to the container. Try adding a DNS server to your
docker-compose.yml:
services:
my-app:
dns:
- 8.8.8.8
- 1.1.1.1
- Bridge Network Mode: Ensure you aren’t using
hostmode if you need isolation, but sometimes switching to the defaultbridgemode fixes connectivity. - Router Configuration: As noted in the MikroTik forum thread, ensure your router isn’t blocking Docker’s internal subnet. Sometimes a fresh reboot of the router clears the ARP table and resolves the issue.
Permission Denied: The “Sudo” Struggle
If you see permission denied while trying to connect to the Docker daemon socket, it means your user isn’t in the docker group.
- Fix: Run
sudo usermod -aG docker $USERand reboot. - Alternative: Don’t run as root. Running Docker as root is a security risk.
Architecture Mismatch Errors
If you see exec format error, you are trying to run an x86 image on ARM.
- Fix: Double-check your
FROMline in the Dockerfile. Usearm64v8/orarmhf/prefixes.
🚦 Optimizing Performance: Resource Limits and Memory Management
The Raspberry Pi is powerful, but it has limits. A single container can easily eat up 50MB of RAM, leaving nothing for the OS.
Setting Memory Limits
You can limit how much RAM a container uses. This prevents one rogue container from crashing your whole Pi.
In docker-compose.yml:
services:
 my-app:
 mem_limit: 512m
 mem_reservation: 256m
CPU Limits
If you are running multiple containers, you might want to limit CPU usage to prevent the Pi from overheating.
cpus: "0.5"
This restricts the container to 50% of one CPU core.
Monitoring Resources
Use docker stats to see real-time usage:
docker stats
This command shows CPU, Memory, and Network I/O for all running containers. It’s your best friend for tuning performance.
Pro Tip: If your Pi starts throttling (slowing down due to heat), check your cooling solution. A simple fan can make a 30% difference in sustained performance.
🛡️ Securing Your Edge: Best Practices for Production Deployment
Running a container on your home network is fun. Running it on the public internet? That’s a different ball game. Security is paramount.
1. Don’t Expose Ports Unecessarily
Only expose the ports you absolutely need. If your app doesn’t need port 80, don’t open it.
2. Use Environment Variables for Secrets
Never hardcode passwords in your Dockerfile or docker-compose.yml. Use .env files.
environment:
 - DB_PASSWORD=${DB_PASSWORD}
Then create a .env file (and add it to .gitignore) with the actual password.
3. Keep Images Updated
Vulnerabilities are discovered daily. Regularly run:
docker-compose pull
docker-compose up -d
This pulls the latest base images and restarts your containers.
4. Use a Reverse Proxy
Instead of exposing ports directly, use Nginx Proxy Manager or Traefik. These tools handle SSL certificates (HTTPS) automatically and route traffic to your containers securely.
For more on securing your IoT devices, read our guides on Electronic Component Reviews and security best practices.
🌐 Real-World Use Cases: From Home Labs to IoT Gateways
What can you actually do with this? The possibilities are endless. Here are some popular setups we’ve seen at Why Pi™:
- Home Media Server: Run Plex or Jellyfin to stream your movies to any device in the house.
- Ad Blocker: Deploy Pi-hole in a container to block ads on your entire network.
- Smart Home Hub: Run Home Assistant to control your lights, thermostats, and cameras locally.
- Personal Cloud: Use Nextcloud to replace Google Drive with your own private cloud storage.
- IoT Gateway: Aggregate data from sensors and process it locally before sending it to the cloud.
These use cases demonstrate the versatility of the Raspberry Pi as a DIY Electronics powerhouse.
🧪 Advanced Techniques: Multi-Stage Builds and CI/CD Pipelines
Ready to level up? Let’s talk about Multi-Stage Builds.
What is a Multi-Stage Build?
Normally, your Docker image contains everything needed to build your app (compilers, build tools) and run it. This makes the image huge.
With multi-stage builds, you build the app in one stage, then copy only the necessary files to a smaller, final image.
Example:
# Stage 1: Build
FROM node:18 AS builder
WORKDIR /app
COPY .
RUN npm install && npm run build

# Stage 2: Run
FROM node:18-alpine
WORKDIR /app
COPY --from=builder /app/dist ./dist
EXPOSE 30
CMD ["node", "dist/index.js"]
This results in a much smaller image, which is perfect for the limited storage on a Pi.
CI/CD Pipelines
Imagine pushing code to GitHub, and your Raspberry Pi automatically pulls the new container and restarts. This is possible with GitHub Actions or GitLab CI.
- Push code to a repo.
- GitHub builds the Docker image.
- GitHub pushes the image to Docker Hub.
- Your Pi (via a webhook or cron job) pulls the new image and restarts.
This creates a seamless Continuous Deployment workflow for your edge devices.
🏁 Conclusion
 screen mounted on top of Raspberry Pi 4 Model B by Why Pi")
We’ve covered a lot of ground, from the history of ARM and Docker to the nitty-gritty of building custom images and securing your edge. You now know how to deploy a robust, scalable application on a device that fits in your pocket.
But wait… we haven’t answered the ultimate question: Is it worth the effort compared to just buying a cheap VPS?
That’s the million-dollar question (or rather, the $35 question). In the next section, we’ll weigh the pros and cons, look at the cost-benefit analysis, and give you our final verdict on whether you should keep your data local or send it to the cloud.
Stay tuned for the conclusion, where we resolve the debate once and for all! 🚀