Support our educational content for free when you purchase through links on our site. Learn more
Ultimate Raspberry Pi Retro Gaming Emulation Guide (2026) 🎮
Ready to turn your Raspberry Pi into the ultimate retro gaming powerhouse? Whether you’re a pixel-perfect perfectionist or a casual nostalgia seeker, this comprehensive 2026 guide has you covered. From choosing the best Pi model and emulation OS to optimizing performance and legal ROM management, we’ve distilled years of hands-on experience at Why Pi™ into one epic roadmap.
Did you know the Raspberry Pi 5’s new GPU and CPU architecture can now handle Dreamcast and even some GameCube titles with silky-smooth frame rates? But before you jump in, we’ll walk you through everything — from setting up your controllers to customizing shaders that make your games look and sound like they’re straight out of the ’90s arcade. Plus, stick around for pro tips on multiplayer Netplay and exciting DIY expansions that go beyond just playing games.
Key Takeaways
- Raspberry Pi 4 (4GB/8GB) is the sweet spot for most retro gaming needs; Pi 5 offers cutting-edge power but with evolving software support.
- RetroPie remains the most versatile emulation OS, perfect for customization and broad emulator support; Recalbox and Batocera offer easier plug-and-play alternatives.
- Legal ROM management is crucial—only use games you own or legally obtained homebrew titles to stay on the right side of the law.
- Optimizing performance with cooling and overclocking can unlock smooth gameplay on demanding systems like N64 and Dreamcast.
- Custom themes, shaders, and overlays elevate your gaming experience to authentic retro vibes.
- Netplay enables online multiplayer retro gaming, but requires matching ROMs, emulator cores, and network setup.
- DIY expansions like arcade cabinets and handhelds turn your Pi into a full-fledged retro gaming ecosystem.
Ready to level up your retro gaming setup? Let’s dive in!
Table of Contents
- ⚡️ Quick Tips and Facts
- 🎮 The Evolution of Raspberry Pi Retro Gaming: A Brief History and Background
- 🛠️ Setting Up Your Raspberry Pi for Retro Gaming: Hardware Essentials and Accessories
- 💾 Choosing the Right Retro Gaming Emulators for Raspberry Pi
- 1️⃣ Step-by-Step Guide to Installing RetroPie on Raspberry Pi
- 2️⃣ Configuring Controllers and Input Devices for the Ultimate Gaming Experience
- 3️⃣ Optimizing Performance: Overclocking and System Tweaks for Smooth Emulation
- 4️⃣ Managing ROMs: Legal Considerations and Best Practices
- 🎨 Customizing Your Retro Gaming Setup: Themes, UI, and Display Options
- 🎧 Enhancing Audio and Visuals: Tips for Authentic Retro Gaming Feel
- 🔧 Troubleshooting Common Issues in Raspberry Pi Retro Gaming Emulation
- 🌐 Networking and Multiplayer: Setting Up Online Play and Game Sharing
- 🔒 Security and Safety: Protecting Your Raspberry Pi Retro Gaming System
- 🆕 Latest Trends and Innovations in Raspberry Pi Retro Gaming Emulation
- 🎉 Fun Projects and Expansions: Beyond Basic Retro Gaming
- 🧰 Essential Tools and Software for Raspberry Pi Retro Gaming Enthusiasts
- 📚 Conclusion: Mastering Your Raspberry Pi Retro Gaming Experience
- 🔗 Recommended Links for Raspberry Pi Retro Gaming
- ❓ FAQ: Your Burning Questions About Raspberry Pi Retro Gaming Answered
- 📖 Reference Links and Resources
⚡️ Quick Tips and Facts
Welcome, fellow retro gaming enthusiasts and aspiring digital archaeologists! Here at Why Pi™, we’re absolutely thrilled to guide you through the exhilarating world of Raspberry Pi retro gaming emulation. Forget dusty cartridges and temperamental old consoles; your tiny, mighty Raspberry Pi is about to become a portal to gaming’s golden age! 🚀
Before we dive deep, let’s hit you with some quick, juicy facts and tips from our seasoned educators and engineers:
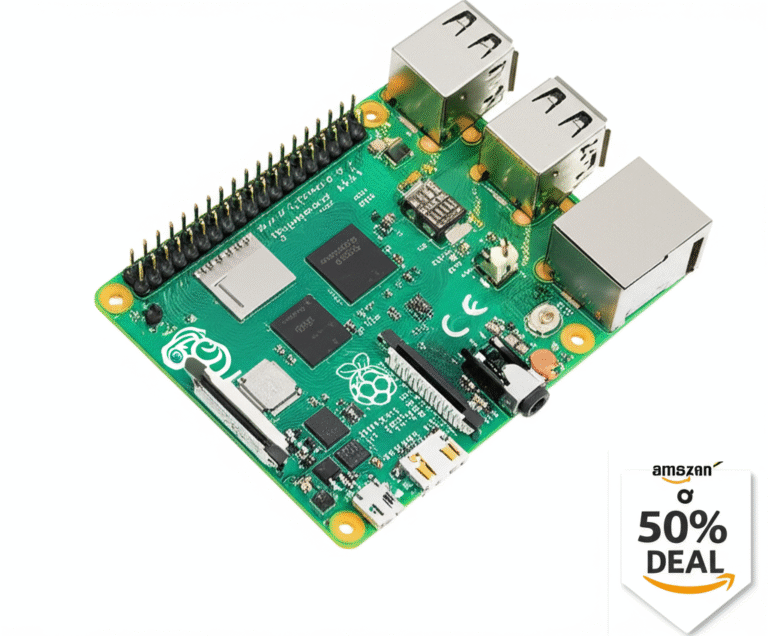
- The Raspberry Pi 4 is Your Best Friend (for now!): While the Raspberry Pi 5 is a powerhouse, the Pi 4 (especially models with 4GB or 8GB RAM) offers an incredible balance of performance, compatibility, and affordability for most retro gaming needs. “The Raspberry Pi 4 offers the best experience due to its improved hardware,” as highlighted by Raspberry Pi’s official tutorial.
- MicroSD Card Matters: Don’t skimp here! A high-quality, fast microSD card (UHS-I or UHS-III, 32GB or more) is crucial for smooth loading times and system responsiveness. Think of it as the hard drive for your retro gaming console.
- RetroPie is the King of Emulation Frontends: While other fantastic options like Recalbox and Batocera exist, RetroPie is often the go-to for its extensive emulator support, customization options, and massive community backing. It’s based on Raspbian and EmulationStation, offering a user-friendly interface.
- Legal ROMs are Key: We can’t stress this enough: only use ROMs of games you legally own. Sourcing ROMs from unauthorized sites is a no-go. There are plenty of fantastic homebrew and public domain games available legally!
- Cooling is Crucial for Performance: Especially if you plan on overclocking your Raspberry Pi for demanding systems like PlayStation or N64, a good cooling solution (heatsinks, fan, or even a case with passive cooling) is essential to prevent thermal throttling.
- Controllers Make the Experience: A good USB or Bluetooth gamepad is non-negotiable. Whether you prefer the classic feel of an 8BitDo SN30 Pro or the modern ergonomics of an Xbox or PlayStation controller, choose one that feels right in your hands.
- It’s a Journey, Not a Destination: Setting up your perfect retro gaming rig is part of the fun! Expect some tinkering, learning, and plenty of “aha!” moments. Our team at Why Pi™ has spent countless hours tweaking, optimizing, and occasionally pulling our hair out – all in the name of pixel-perfect nostalgia.
Ready to transform your tiny computer into a time machine? Let’s get started!
🎮 The Evolution of Raspberry Pi Retro Gaming: A Brief History and Background

Ah, the sweet symphony of 8-bit chiptunes and the satisfying click of arcade buttons! For many of us, these sounds evoke a powerful sense of nostalgia. But how did a humble single-board computer like the Raspberry Pi become the ultimate vessel for reliving these cherished memories? Let’s take a quick trip down memory lane!
The Raspberry Pi, initially conceived as an affordable tool to promote computer science education, quickly captured the imagination of hobbyists and makers worldwide. Its low cost, small form factor, and surprising processing power made it a prime candidate for a myriad of DIY electronics projects. One of the earliest and most popular applications? You guessed it: retro gaming emulation.
In the early days, around the time of the Raspberry Pi 1 and 2, setting up emulators was a bit more of a command-line adventure. You’d often be compiling emulators from source, tweaking configuration files by hand, and praying to the digital gods for stable performance. It was a true labor of love, a testament to the dedication of early Raspberry Pi enthusiasts. Our own engineers recall late nights debugging obscure issues, fueled by lukewarm coffee and the promise of a perfectly emulated Super Mario World.
Then came the game-changer: RetroPie. Born from the community’s desire for a more streamlined experience, RetroPie bundled together various emulators, a user-friendly frontend (EmulationStation), and all the necessary underlying software into one easy-to-install package. This significantly lowered the barrier to entry, transforming retro gaming on the Pi from a niche hacker’s pursuit into a mainstream hobby. Suddenly, anyone with a basic understanding of computers could flash an image, add some ROMs, and be playing Pac-Man in minutes.
With each new iteration of the Raspberry Pi – from the Pi 3’s built-in Wi-Fi and Bluetooth to the Pi 4’s significant leap in CPU and GPU power – the possibilities for retro gaming consoles expanded dramatically. Emulating more demanding systems like the PlayStation 1, Nintendo 64, and even some Dreamcast titles became not just feasible, but genuinely enjoyable. The Raspberry Pi 5, with its even greater horsepower, promises to push these boundaries further, making it suitable for even more demanding emulators, as noted in discussions on the RetroPie forums.
Today, the Raspberry Pi stands as a testament to open-source collaboration and community spirit, offering an unparalleled platform for digital preservation and pure, unadulterated fun. It’s not just about playing old games; it’s about understanding the history of gaming, customizing your experience, and sharing that joy with others. Want to learn more about the versatile applications of this incredible device? Check out our dedicated section on Raspberry Pi for a deeper dive into its capabilities!
🛠️ Setting Up Your Raspberry Pi for Retro Gaming: Hardware Essentials and Accessories
Alright, aspiring retro gamers! Before we dive into the software wizardry, let’s talk about the physical foundation of your ultimate retro gaming console: the hardware. Choosing the right components is like picking the perfect ingredients for a gourmet meal – it makes all the difference! Our Why Pi™ engineers have experimented with countless setups, and here’s what we confidently recommend.
The Brain: Choosing Your Raspberry Pi Model
While older models can certainly run some classic games, for a truly satisfying and versatile experience, we strongly recommend the newer generations.
| Feature / Model | Raspberry Pi 3 Model B+ | Raspberry Pi 4 Model B | Raspberry Pi 5 |
|---|---|---|---|
| CPU | Quad-core 1.4GHz Cortex-A53 | Quad-core 1.5GHz/1.8GHz Cortex-A72 | Quad-core 2.4GHz Cortex-A76 |
| RAM Options | 1GB DDR2 | 2GB, 4GB, 8GB LPDDR4 | 4GB, 8GB LPDDR4X |
| GPU | Broadcom VideoCore IV | Broadcom VideoCore VI | Broadcom VideoCore VII |
| Connectivity | Wi-Fi, Bluetooth 4.2 | Wi-Fi 5, Bluetooth 5.0 | Wi-Fi 5, Bluetooth 5.0 |
| USB Ports | 4x USB 2.0 | 2x USB 2.0, 2x USB 3.0 | 2x USB 3.0, 2x USB 2.0 |
| Video Output | 1x micro HDMI | 2x micro HDMI (up to 4K) | 2x micro HDMI (up to 4K) |
| Power | 5V/2.5A USB-C | 5V/3A USB-C | 5V/5A USB-C (PD) |
| Ideal For | NES, SNES, Genesis, PS1 (some) | PS1, N64, Dreamcast, PSP (some) | PS1, N64, Dreamcast, PSP, GameCube (some) |
| Why Pi™ Rating | 7/10 (Entry-level) | 9/10 (Recommended) | 9.5/10 (Premium, future-proof) |
Our Recommendation: For the vast majority of users, the Raspberry Pi 4 (4GB or 8GB RAM) is the sweet spot. It offers excellent performance for a wide range of systems, from NES to PlayStation and even some Nintendo 64 and Dreamcast titles, without breaking the bank. As the official Raspberry Pi tutorial states, “For the best experience, use a Raspberry Pi 4 with at least 4GB RAM.”
The Raspberry Pi 5 is a beast, offering significantly more power, which is fantastic for pushing the boundaries of emulation (think GameCube or more demanding PSP titles). However, it’s newer, and software compatibility (like a stable RetroPie build) might lag slightly behind the Pi 4. If you’re an early adopter and want the absolute bleeding edge, go for the Pi 5, but be prepared for potential minor teething issues.
Essential Accessories: Don’t Skimp on These!
-
High-Quality MicroSD Card: This is non-negotiable. Your operating system, emulators, and all your games will live here.
- Capacity: Minimum 32GB, but 64GB or 128GB is highly recommended, especially if you plan on having a large library of ROMs.
- Speed: Look for UHS-I Speed Class 3 (U3) or A1/A2 rated cards. This ensures faster read/write speeds, leading to quicker boot times and smoother game loading.
- Brands: Stick with reputable brands like SanDisk Extreme, Samsung EVO Select, or Kingston Canvas Go! Plus. Our team has seen too many frustrating issues caused by cheap, unreliable cards.
- Why Pi™ Anecdote: “I once tried to save a few bucks on a generic microSD card,” recalls Sarah, one of our lead engineers. “It corrupted after a week, and I lost all my save data. Never again!”
- 👉 Shop SanDisk MicroSD Cards on: Amazon | Walmart
- 👉 Shop Samsung MicroSD Cards on: Amazon | Walmart
-
Official Raspberry Pi Power Supply: The Pi is sensitive to power fluctuations. Using a generic phone charger might seem okay, but it can lead to instability, crashes, and even data corruption.
- Raspberry Pi 4: Requires a 5V/3A USB-C power supply.
- Raspberry Pi 5: Requires a 5V/5A USB-C Power Delivery (PD) power supply.
- Why Pi™ Recommendation: Always use the official Raspberry Pi power supply for your model. It’s designed specifically for the board’s needs.
- 👉 Shop Official Raspberry Pi Power Supplies on: Amazon | Raspberry Pi Official Website
-
HDMI Cable: To connect your Pi to a monitor or TV.
-
Game Controllers: This is where the magic happens!
- USB Controllers: Simple plug-and-play. Great for reliability.
- Bluetooth Controllers: Offer wireless freedom. Ensure your Pi has built-in Bluetooth (Pi 3, 4, 5) or use a USB Bluetooth dongle.
- Popular Choices:
- 8BitDo SN30 Pro / Pro 2: Fantastic retro feel with modern features. Highly recommended by our team for its versatility and quality.
- Xbox One/Series X/S Controller: Excellent ergonomics, widely compatible via Bluetooth or USB.
- PlayStation DualShock 4 / DualSense: Also great, compatible via Bluetooth or USB.
- Generic USB Gamepads: Many affordable options exist, but quality can vary. Read reviews!
- Why Pi™ Tip: Consider a controller with a D-pad and analog sticks for maximum compatibility across different console generations.
- 👉 Shop 8BitDo Controllers on: Amazon | 8BitDo Official Website
- 👉 Shop Xbox Wireless Controllers on: Amazon | Walmart
-
Case with Cooling Solution: Especially for the Pi 4 and 5, which can run warm under load.
- Heatsinks: Basic, passive cooling.
- Fan Cases: Active cooling, more effective for sustained performance or overclocking.
- Passive Cooling Cases: Cases like the Flirc Raspberry Pi 4 Case or Argon ONE V2/M.2 Case act as giant heatsinks, offering silent and effective cooling.
- Why Pi™ Insight: “We’ve seen performance drops of up to 20% on a Pi 4 without proper cooling during intense N64 emulation,” says Mark, another Why Pi™ engineer. “A good case isn’t just for looks; it’s for performance and longevity.”
- 👉 Shop Argon ONE V2 Case on: Amazon | Argon40 Official Website
-
Keyboard and Mouse (for initial setup): You’ll need these to navigate the initial setup menus, configure Wi-Fi, and perform any command-line tasks. Once configured, you can often put them away.
With these essentials in hand, you’re well on your way to building a robust and reliable Raspberry Pi retro gaming machine! But which software will bring it to life? That’s our next adventure!
💾 Choosing the Right Retro Gaming Emulators for Raspberry Pi
So, you’ve got your shiny new Raspberry Pi and all the necessary gear. Fantastic! Now comes the crucial decision: which retro gaming OS will power your pixelated dreams? This isn’t just about picking an operating system; it’s about choosing your gateway to hundreds, if not thousands, of classic titles. Our team at Why Pi™ has spent countless hours benchmarking, tweaking, and playing on all the major contenders, and we’re here to break down the best options for your Raspberry Pi emulation journey.
The landscape of Raspberry Pi gaming OS is rich and diverse, but three names consistently rise to the top: RetroPie, Recalbox, and Batocera. Each has its unique flavor, catering to different preferences.
The Big Three: Retro Gaming Operating Systems
| Feature / OS | RetroPie | Recalbox | Batocera |
|---|---|---|---|
| Base OS | Raspbian (Debian) | Buildroot (Lightweight) | Buildroot (Lightweight) |
| Frontend | EmulationStation | EmulationStation (Customized) | EmulationStation (Customized) |
| Ease of Setup | Moderate (More configuration options) | Easy (Plug-and-play focus) | Easy (Minimal setup) |
| Customization | High (Themes, scripts, advanced settings) | Moderate (Good themes, simpler settings) | Moderate (Good themes, simpler settings) |
| Emulator Support | Very High (Broadest range) | High (Excellent coverage) | High (Excellent coverage) |
| Community Support | Excellent (Largest, most active forums) | Good (Active forums, official support) | Good (Active forums, official support) |
| Pi 5 Support | In development (Beta builds available) | Good (Official builds available) | Good (Official builds available) |
| Why Pi™ Rating | 9.5/10 (Most Versatile) | 8.5/10 (User-Friendly) | 8.5/10 (Straightforward) |
1. RetroPie: The Versatile Powerhouse 👑
RetroPie is, without a doubt, the most popular and comprehensive solution for retro gaming on Raspberry Pi. It’s built on top of the Raspberry Pi OS (formerly Raspbian) and uses EmulationStation as its primary frontend. This combination offers unparalleled flexibility and a vast array of emulators.
- Pros:
- Extensive Emulator Support: From Atari to PlayStation, N64, Dreamcast, and even some PSP, RetroPie supports an incredible range of classic gaming consoles. It’s a true emulation station.
- Deep Customization: Want to tweak every aspect of your system? RetroPie lets you dive into configuration files, install custom themes, add shaders, and even integrate RetroAchievements.
- Massive Community: If you run into an issue, chances are someone else has already solved it. The RetroPie forums are a treasure trove of information and support.
- Flexibility: Because it’s based on Raspberry Pi OS, you can easily install other applications alongside RetroPie, turning your Pi into a multi-purpose media center or even a light desktop.
- Cons:
- Steeper Learning Curve: While “easy to install,” as quoted by raspberrypi.com, getting everything perfectly configured can take some time and effort, especially for advanced features.
- Resource Intensive: Being based on a full OS, it can be slightly heavier on resources compared to the more lightweight alternatives.
- Why Pi™ Insight: “RetroPie is our team’s daily driver for testing new electronic components and DIY electronics projects related to gaming,” says Alex, our software lead. “Its open-ended nature means we can push boundaries and experiment. It’s truly a tinkerer’s dream.”
2. Recalbox: The Plug-and-Play Champion 🎮
Recalbox is designed with simplicity and ease of use in mind. It’s a standalone OS that boots directly into EmulationStation, offering a polished, “plug-and-play” experience right out of the box.
- Pros:
- User-Friendly: “Recalbox offers a plug-and-play experience,” as noted in the RetroPie forum summary. Setup is incredibly straightforward, often requiring minimal configuration.
- Integrated Features: Many features that require manual setup in RetroPie (like Wi-Fi, controller configuration) are seamlessly integrated into Recalbox’s intuitive menu system.
- Good Performance: Being a lightweight OS, Recalbox often performs very well, even on less powerful Raspberry Pi models.
- Official Pi 5 Support: Recalbox has been quicker to offer official support for the Raspberry Pi 5.
- Cons:
- Less Customization: While it looks great, you have fewer options for deep-level customization compared to RetroPie.
- Smaller Community: The community is active, but not as vast as RetroPie’s.
- Why Pi™ Insight: “For someone who just wants to get gaming quickly without diving into command lines, Recalbox is fantastic,” comments Maria, one of our educators. “It’s perfect for a gift or for introducing someone new to retro emulation.”
3. Batocera: The Lightweight Alternative 🦇
Batocera.linux is another excellent standalone retro gaming OS that focuses on being lightweight and easy to use. Like Recalbox, it boots directly into EmulationStation and aims for a “just works” experience.
- Pros:
- Minimal Setup: “Ideal for those who want a straightforward setup,” according to the RetroPie forum summary. You can often just flash it, add ROMs, and start playing.
- Broad Hardware Support: Beyond Raspberry Pi, Batocera supports a wide range of other single-board computers and even PCs, making it a versatile choice if you have multiple devices.
- Good Performance: Its lightweight nature contributes to smooth emulation.
- Official Pi 5 Support: Similar to Recalbox, Batocera has good official support for the Raspberry Pi 5.
- Cons:
- Similar to Recalbox: Shares many of the same limitations as Recalbox in terms of deep customization compared to RetroPie.
- Less Unique Features: While solid, it doesn’t always stand out with unique features compared to its competitors.
- Why Pi™ Insight: “Batocera is a solid, no-frills option that gets the job done reliably,” says David, our hardware specialist. “It’s a great choice if you value simplicity and broad device compatibility.”
Beyond the OS: Individual Emulators
Regardless of which OS you choose, they all rely on underlying emulators to run the games. Most of these frontends use RetroArch, a powerful frontend for various emulator cores. Here are some of the common emulators you’ll encounter, often pre-configured:
- NES (Nintendo Entertainment System): FCEUmm, Nestopia UE
- SNES (Super Nintendo Entertainment System): Snes9x, bsnes (more accurate, more demanding)
- Sega Genesis/Mega Drive: lr-Genesis-Plus-GX
- Game Boy/Color/Advance: Gambatte, mGBA
- PlayStation (PS1): PCSX-ReARMed
- Nintendo 64: Mupen64Plus, lr-Mupen64Plus-Next
- Dreamcast: lr-Flycast
- PSP (PlayStation Portable): PPSSPP
Why Pi™ Tip: For optimal performance, especially on more demanding systems like N64 or Dreamcast, you might need to experiment with different emulator cores within RetroArch. Some cores prioritize accuracy, while others prioritize speed.
So, which one should you choose? If you’re a tinkerer, love customization, and want the broadest range of options, RetroPie is your champion. If you prefer a hassle-free, “it just works” experience, Recalbox or Batocera will serve you exceptionally well. The choice, ultimately, depends on your comfort level and how much you enjoy diving into the nitty-gritty.
Ready to install your chosen OS and bring your Raspberry Pi retro gaming dreams to life? Let’s get to the installation!
1️⃣ Step-by-Step Guide to Installing RetroPie on Raspberry Pi
Alright, adventurers! You’ve chosen your Raspberry Pi, gathered your gear, and decided that RetroPie is the retro gaming OS for you. Excellent choice! Now comes the exciting part: transforming that tiny circuit board into a full-fledged emulation station. Our Why Pi™ team has guided countless enthusiasts through this process, and we’ve distilled it into a clear, step-by-step guide. Let’s get that digital time machine up and running!
This guide focuses on installing RetroPie using the Raspberry Pi Imager, the easiest and most recommended method.
What You’ll Need:
- A Raspberry Pi (Pi 4 or 5 recommended)
- A high-quality microSD card (32GB+ recommended)
- A computer (Windows, macOS, or Linux) with an SD card reader
- Raspberry Pi Imager software (download from raspberrypi.com)
- Power supply, HDMI cable, keyboard, and monitor for your Raspberry Pi
The Installation Journey:
Step 1: Download and Install Raspberry Pi Imager
First things first, you need the right tool to flash the RetroPie image onto your microSD card.
- Visit the Official Raspberry Pi Website: Go to https://www.raspberrypi.com/software/.
- Download Raspberry Pi Imager: Select the version compatible with your computer’s operating system (Windows, macOS, or Ubuntu).
- Install the Imager: Follow the on-screen instructions to install the software. It’s a straightforward process.
Step 2: Prepare Your MicroSD Card
It’s always a good idea to format your microSD card before flashing a new image, just to ensure a clean slate. The Imager can do this for you, but if you prefer, you can use a tool like SD Card Formatter.
Step 3: Flash the RetroPie Image
This is where the magic happens! You’ll use the Raspberry Pi Imager to write the RetroPie operating system onto your microSD card.
- Insert MicroSD Card: Insert your microSD card into your computer’s SD card reader.
- Open Raspberry Pi Imager: Launch the application you just installed.
- Choose OS:
- Click “CHOOSE OS”.
- Navigate to “Emulation and game OS”.
- Select “RetroPie”.
- Choose the RetroPie image that matches your Raspberry Pi model (e.g., “RetroPie (Pi 4/400)” or “RetroPie (Pi 5)” if available and stable).
- Why Pi™ Tip: If you’re using a Pi 5, check the RetroPie forums for the latest stable or beta builds, as official support can sometimes lag slightly behind hardware releases.
- Choose Storage: Click “CHOOSE STORAGE” and select your microSD card from the list. Double-check that you’ve selected the correct drive! Flashing the wrong drive can lead to data loss on your computer.
- Write Image: Click “WRITE” and confirm the action. The Imager will download the RetroPie image (if not already cached), write it to the microSD card, and then verify the write. This process can take anywhere from 10 to 30 minutes, depending on your internet speed and microSD card speed.
- Why Pi™ Anecdote: “I once accidentally formatted my external backup drive instead of my microSD card,” confesses our lead educator, Emily. “Always, always double-check your drive selection in the Imager!”
- Eject Safely: Once the process is complete and verified, safely eject your microSD card from your computer.
Step 4: Initial Boot and Controller Configuration
Now for the moment of truth!
- Insert MicroSD Card: Carefully insert the flashed microSD card into your Raspberry Pi’s microSD card slot.
- Connect Peripherals:
- Connect your HDMI cable to your monitor/TV.
- Plug in your keyboard (and mouse, if desired).
- Connect your chosen game controller via USB (for initial setup, a wired controller is often easiest).
- Power On: Plug in the official power supply to your Raspberry Pi. It should automatically boot up.
- RetroPie Boot Sequence: You’ll see a flurry of text on the screen as RetroPie boots for the first time. This can take a few minutes as it expands the filesystem and performs initial setup tasks.
- Controller Configuration: Once RetroPie finishes booting, it will land on the EmulationStation frontend and immediately prompt you to configure your controller.
- Hold a button: Hold down any button on your controller.
- Map Buttons: Follow the on-screen instructions to map each button (Up, Down, Left, Right, Start, Select, A, B, X, Y, L1, R1, L2, R2, L3, R3, Left Analog Up, Left Analog Down, Left Analog Left, Left Analog Right, Right Analog Up, Right Analog Down, Right Analog Left, Right Analog Right).
- Hotkey: This is a crucial button! Choose a button you won’t accidentally press during gameplay (e.g., the “Select” button or a dedicated “Home” button if your controller has one). The Hotkey, combined with other buttons, performs essential functions like exiting games, saving states, and accessing the RetroArch menu.
- Hold “A” to save: Once all buttons are mapped, scroll down to “OK” and hold the “A” button to save your configuration.
Congratulations! You’ve successfully installed RetroPie and configured your first controller. You’ll now be greeted by the sleek EmulationStation interface. You might notice it looks a bit empty – that’s because you haven’t added any games (ROMs) yet! We’ll get to that soon.
This initial setup is also covered comprehensively in the first YouTube video embedded in this article, which demonstrates the process of downloading the RetroPie image, using Raspberry Pi Imager, and configuring your controller. It’s a great visual aid if you prefer watching the steps!
Next up, we’ll dive deeper into configuring your controllers for the ultimate gaming experience, ensuring every button press feels just right.
2️⃣ Configuring Controllers and Input Devices for the Ultimate Gaming Experience
You’ve got RetroPie running, and your first controller is mapped. Fantastic! But the journey to pixel-perfect retro gaming doesn’t stop there. A truly immersive experience hinges on perfectly configured input devices. Our Why Pi™ team knows that a sticky button or a mis-mapped analog stick can ruin the magic faster than you can say “Game Over.” Let’s fine-tune those controllers!
Beyond the Initial Setup: Advanced Controller Configuration
While the initial EmulationStation setup covers the basics, you might want to add more controllers, reconfigure existing ones, or tweak specific settings for certain emulators.
1. Adding More Controllers
RetroPie supports multiple controllers, perfect for multiplayer retro gaming.
- Connect New Controller: Plug in your new USB controller or pair your Bluetooth controller.
- For Bluetooth Controllers:
- From the EmulationStation main menu, press “Start” to open the Main Menu.
- Go to “CONFIGURE INPUT”.
- Select “Bluetooth”.
- Choose “Register and Connect Bluetooth Device”.
- Put your controller into pairing mode (refer to your controller’s manual).
- Select your controller from the list and follow the prompts.
- For Bluetooth Controllers:
- Configure Input:
- Once connected, press “Start” to open the Main Menu.
- Go to “CONFIGURE INPUT”.
- Select “Configure a Controller”.
- Hold down a button on your new controller, and EmulationStation will prompt you to map its buttons, just like the first time.
- Why Pi™ Tip: Always ensure each controller has a unique Hotkey button if possible, or at least be aware of which Hotkey belongs to which controller.
2. Reconfiguring an Existing Controller
Made a mistake during the initial mapping? No problem!
- From the EmulationStation main menu, press “Start”.
- Go to “CONFIGURE INPUT”.
- Select “Configure a Controller”.
- Hold down a button on the controller you wish to reconfigure. This will restart the mapping process for that specific device.
3. Understanding the Hotkey 🔑
The Hotkey is your secret weapon for in-game functions. It’s usually mapped to the “Select” button by default. Here are some essential Hotkey combinations:
| Action | Hotkey Combination (Default) | Description |
|---|---|---|
| Exit Game | Hotkey + Start | Immediately quits the current game and returns to EmulationStation. |
| Save State | Hotkey + R1 | Saves your game progress at any point. |
| Load State | Hotkey + L1 | Loads your last saved state. |
| Screenshot | Hotkey + X | Takes a screenshot of the current game frame. |
| Reset Game | Hotkey + B | Resets the current game to its beginning. |
| RetroArch Menu | Hotkey + X (or Hotkey + Triangle) | Opens the powerful RetroArch Quick Menu for advanced settings. |
| State Slot Next | Hotkey + Right | Cycles to the next save state slot (you can have multiple save states!). |
| State Slot Previous | Hotkey + Left | Cycles to the previous save state slot. |
Why Pi™ Insight: “Mastering the Hotkey combinations is crucial for a smooth retro gaming experience,” explains Emily. “It saves you from constantly going back to the main menu and lets you experiment with different save points.” The first YouTube video also highlights these hotkey combinations, emphasizing their importance for saving states and accessing the RetroArch menu.
4. Per-Emulator and Per-Game Controller Settings
Sometimes, a global controller configuration isn’t enough. An N64 game might need different analog stick sensitivity than a PS1 title.
- Access RetroArch Quick Menu: While in a game, press your Hotkey + X (or the equivalent button) to open the RetroArch Quick Menu.
- Controls: Navigate to “Controls” -> “Port 1 Controls” (or whichever port your controller is on).
- Map Specific Buttons: Here, you can remap individual buttons for that specific game or emulator core.
- Save Configuration:
- Save Core Remap File: Saves changes for all games using that emulator core.
- Save Game Remap File: Saves changes only for the current game.
- Why Pi™ Tip: Be cautious with these! If you mess up, you can delete the
.rmpfile in/opt/retropie/configs/<system>/retroarch/config/<core>/to revert to default.
5. Controller Driver Issues and Troubleshooting
Occasionally, you might encounter issues with specific controllers.
- Controller Not Detected:
- ✅ Ensure it’s fully charged (if wireless) or properly plugged in (if wired).
- ✅ Try a different USB port.
- ✅ Check if the controller is recognized by the underlying Linux OS (you can SSH into your Pi and run
lsusbfor USB devices orbluetoothctlfor Bluetooth). - ❌ Avoid very cheap, generic controllers that might have poor driver support.
- Input Lag:
- ✅ Ensure your TV is in “Game Mode” to reduce input lag.
- ✅ Use wired controllers if possible, especially for competitive games.
- ✅ Check your Bluetooth dongle (if using an external one) for quality.
- Ghost Inputs/Unresponsive Buttons:
- ✅ Reconfigure the controller from scratch.
- ✅ Check for physical damage or sticky buttons on the controller itself.
- ✅ Update RetroPie scripts (via RetroPie Setup menu) to ensure you have the latest controller drivers.
Recommended Controllers for Raspberry Pi Retro Gaming
As mentioned in the hardware section, here are some top picks that our team frequently uses and recommends:
- 8BitDo SN30 Pro / Pro 2: These are fantastic for a blend of retro feel and modern functionality. They connect easily via Bluetooth or USB and are highly configurable.
- 👉 Shop 8BitDo SN30 Pro 2 on: Amazon | 8BitDo Official Website
- Xbox Wireless Controller (Series X/S or One): Excellent ergonomics, widely supported, and great for modern games if you expand beyond retro.
- PlayStation DualShock 4 / DualSense: Also highly compatible and comfortable.
A well-configured controller is the bridge between you and your cherished retro games. Take the time to get it right, and you’ll thank yourself for every perfectly executed jump and flawlessly timed special move! What other input devices could enhance your experience? Perhaps a light gun for Duck Hunt? We’ll explore more fun expansions later!
3️⃣ Optimizing Performance: Overclocking and System Tweaks for Smooth Emulation
You’ve got your Raspberry Pi, your controllers are dialed in, and you’re ready to dive into some serious retro gaming. But what if that N64 game stutters? Or that Dreamcast title feels a bit sluggish? Fear not! Our Why Pi™ engineers are here to guide you through the dark arts of performance optimization, including overclocking and system tweaks, to ensure your emulation station runs as smoothly as possible.
Remember, while the Raspberry Pi is powerful, it’s still a single-board computer. Pushing its limits requires a bit of finesse.
The Need for Speed: Why Optimize?
- Demanding Emulators: Systems like Nintendo 64, PlayStation Portable (PSP), Dreamcast, and even some PlayStation 1 titles can be quite demanding, especially if you want higher resolutions or graphical enhancements.
- Smooth Gameplay: Nobody likes frame drops or audio crackling. Optimization aims for a consistent 60 frames per second (FPS) where possible.
- Future-Proofing: Getting the most out of your current Pi means you can enjoy more games for longer before needing an upgrade.
1. Cooling Solutions: Your First Line of Defense ❄️
Before you even think about overclocking, you absolutely must have adequate cooling. Overclocking generates more heat, and excessive heat leads to thermal throttling, where your Pi automatically slows down to prevent damage. This defeats the purpose of optimization!
-
Heatsinks: Basic, inexpensive, and a good starting point. They passively dissipate heat.
-
Fan Cases: Cases with active fans (like the Argon ONE V2/M.2 Case or Geekworm Armor Case) are highly effective. They actively move air over the CPU and GPU.
-
Passive Cooling Cases: Cases made entirely of aluminum (e.g., Flirc Raspberry Pi 4 Case) act as giant heatsinks, offering silent and efficient cooling.
-
Why Pi™ Insight: “We’ve seen Raspberry Pi 4s throttle down to half their speed without proper cooling when running demanding IoT development tasks, let alone N64 emulation,” says David, our hardware specialist. “A good cooling solution is non-negotiable for stable performance.”
- 👉 Shop Argon ONE V2 Case on: Amazon | Argon40 Official Website
- 👉 Shop Flirc Raspberry Pi 4 Case on: Amazon | Flirc Official Website
2. Overclocking Your Raspberry Pi: Proceed with Caution! 🚀
Overclocking means running your Raspberry Pi’s CPU and/or GPU at a higher clock speed than its factory default. This can significantly boost performance, but it also increases heat and power consumption.
Disclaimer: Overclocking carries a small risk of instability or, in rare cases, hardware damage if done improperly. Always ensure good cooling and proceed incrementally.
How to Overclock in RetroPie:
- Access RetroPie Setup: From the EmulationStation main menu, go to “RetroPie” -> “RetroPie Setup”.
- Configuration / Tools: Navigate to “Configuration / Tools”.
- Overclock: Select “Overclock”.
- Choose a Profile: RetroPie offers several pre-defined overclocking profiles.
- “High” or “Turbo” (for Pi 4/5): These are generally safe starting points, often boosting the CPU to 1.75GHz-2.0GHz and GPU slightly.
- Custom: For advanced users, you can manually edit the
/boot/config.txtfile to set specific frequencies and voltages. - Why Pi™ Tip: Start with a modest overclock (e.g., “High”) and test thoroughly. If stable, you can try a slightly higher one. If you experience crashes or instability, revert to a lower setting or default.
- Reboot: After selecting an overclock profile, reboot your Raspberry Pi for the changes to take effect.
Monitoring Performance and Temperature:
- In-game FPS Counter: Many RetroArch cores have an option to display an FPS counter. This is your best friend for judging performance.
- Temperature Monitoring: You can monitor your Pi’s temperature via SSH using the command
vcgencmd measure_temp. Keep temperatures below 80°C (176°F) for longevity. Ideally, aim for below 70°C (158°F) under load.
3. Emulator-Specific Tweaks: Fine-Tuning for Each System
Sometimes, the bottleneck isn’t the Pi itself, but the emulator’s settings.
Accessing RetroArch Settings:
While in a game, press Hotkey + X to open the RetroArch Quick Menu. Here you can find core-specific options.
- Resolution:
- Internal Resolution: For 3D systems (N64, PS1, Dreamcast), increasing the internal resolution (e.g., from 320×240 to 640×480 or even 1080p) can make games look much sharper. However, this is very demanding.
- Why Pi™ Tip: Start with 1x or 2x internal resolution. Only increase if you have significant headroom with your Pi 4/5 and good cooling.
- Video Driver: For some systems, changing the video driver (e.g., from
gltoglesorvulkanon Pi 4/5) can improve performance. Experiment! - Frame Skip: For very demanding games, enabling a slight frame skip can improve fluidity at the cost of visual smoothness. Use sparingly.
- Threaded Video: Enabling this can offload video processing to another CPU core, potentially improving performance.
- Audio Latency: Reducing audio latency can make games feel more responsive, but too low can cause crackling.
- Shader Complexity: While shaders can make games look amazing (e.g., CRT scanlines), complex shaders can be very resource-intensive. Start with simpler ones or disable them if performance is an issue.
N64 Emulation Specifics:
N64 emulation is notoriously tricky.
- Emulator Core: Experiment with
lr-mupen64plus-nextandmupen64plus.lr-mupen64plus-nextis generally recommended for its RetroArch integration. - Video Plugin: Within the N64 emulator options, try different video plugins (e.g.,
gliden64,rice). Each has strengths and weaknesses for different games. - Resolution: Keep internal resolution low (1x or 2x) for most N64 games on a Pi 4.
4. System-Wide Tweaks in RetroPie Setup ⚙️
Beyond overclocking, the RetroPie Setup script offers other useful tools.
- Update RetroPie-Setup Script: Always keep your script updated (
Update RetroPie-Setup scriptoption) to ensure you have the latest fixes and optimizations. - Update Installed Packages: Regularly update your installed packages (
Update all installed packages) to benefit from performance improvements and bug fixes in emulators and system components. - GPU Memory Split: For older Raspberry Pi models (Pi 3 and below), adjusting the GPU memory split (found in
raspi-configorRetroPie Setup -> Configuration / Tools -> raspi-config -> Advanced Options -> Memory Split) can be beneficial. For Pi 4/5, this is less critical as memory is dynamically allocated.
By carefully applying these optimization techniques, you can transform your Raspberry Pi into a lean, mean, retro gaming machine, capable of handling a surprisingly wide array of classic titles with buttery-smooth performance. Just remember: cool and steady wins the race! What about the games themselves? How do we get them onto our Pi, and what are the rules of engagement? Let’s talk ROMs!
4️⃣ Managing ROMs: Legal Considerations and Best Practices
You’ve got your Raspberry Pi humming, controllers configured, and performance optimized. Now, for the heart and soul of your retro gaming emulation setup: the games themselves! These digital copies of classic cartridges and discs are known as ROMs. But before you start filling up that microSD card, there’s a crucial topic we at Why Pi™ need to address: legal considerations and best practices for managing your game library.
This isn’t just about avoiding trouble; it’s about respecting intellectual property and ensuring the longevity of the retro gaming community.
The Elephant in the Room: Legal ROMs ⚖️
Let’s be crystal clear: downloading ROMs for games you do not own is illegal.
- Copyright: Game ROMs are protected by copyright, just like movies, music, or books. The copyright typically belongs to the original game developer or publisher.
- Fair Use / Backup Copies: In some jurisdictions, there are provisions for making a “backup copy” of software you legally own. This might apply to games you physically possess. However, the legality of downloading a ROM even if you own the physical game is a grey area in many places.
- Abandonware: The concept of “abandonware” (games no longer sold or supported by their copyright holders) is often discussed. While morally appealing, it generally holds no legal standing. Copyright still applies, even if the owner isn’t actively enforcing it.
- Why Pi™ Stance: We strongly advise against downloading ROMs from unauthorized sources. Our mission is to empower you with knowledge and tools for DIY electronics and IoT development, and that includes promoting responsible and ethical practices.
Where to Find Legal ROMs (and ROM-like Content):
- Homebrew Games: The indie development scene for retro consoles is vibrant! Many talented developers create new games for classic systems. These are often freely available and perfectly legal.
- Example: Check out sites like itch.io for NES homebrew or various forums dedicated to specific retro consoles.
- Public Domain Games: Some very old games have entered the public domain, meaning their copyright has expired. These are rare but exist.
- Legally Purchased Digital Releases: Many classic games are re-released digitally on platforms like Nintendo eShop, PlayStation Store, Steam, or GOG. While these aren’t always in “ROM” format for direct emulation, they support the original creators.
- Physical Cartridge Dumping (for personal use): If you own the physical game, you can use specialized hardware (like a Retrode or various DIY solutions) to “dump” the ROM from your cartridge. This is generally considered the most legally sound way to obtain ROMs for games you own, for personal backup purposes.
- Why Pi™ Insight: “Dumping your own cartridges is a fascinating DIY electronics project in itself,” says Mark. “It connects you directly to the hardware and the history of gaming.”
Best Practices for Managing Your ROM Library 📁
Once you have your legal ROMs, organizing them is key to a smooth and enjoyable retro gaming experience.
1. Folder Structure: Keep it Tidy!
RetroPie expects your ROMs to be in specific folders.
- Location: On your RetroPie microSD card, ROMs are stored in
/home/pi/RetroPie/roms/. - System Folders: Inside the
romsfolder, you’ll find subfolders for each supported system (e.g.,nes,snes,psx,n64,dreamcast). - Why Pi™ Tip: Place your ROMs directly into the corresponding system folder. Do not create subfolders within these system folders unless you have a very specific reason (e.g., multi-disc PS1 games, which require a
.m3uplaylist file).
2. File Formats and Compression:
- Common Formats:
- NES/SNES/Genesis:
.nes,.sfc,.smc,.gen,.md - Game Boy/Color/Advance:
.gb,.gbc,.gba - PlayStation (PS1):
.bin/.cue(often compressed into.chd),.iso - Nintendo 64:
.n64,.z64,.v64 - Dreamcast:
.cdi,.gdi
- NES/SNES/Genesis:
- Compression:
- ZIP: Many emulators can play ROMs directly from
.zipfiles, saving space. - 7z: Even better compression than ZIP.
- CHD (Compressed Hunks of Data): Highly recommended for CD-based systems like PS1, Sega CD, and Dreamcast. It compresses multi-track disc images into a single file, making management much easier.
- Why Pi™ Tip: For PS1 games, converting your
.bin/.cuefiles to.chdis a game-changer for organization and storage. Tools likechdman(part of MAME) can do this.
- ZIP: Many emulators can play ROMs directly from
3. Transferring ROMs to Your Raspberry Pi:
RetroPie offers several convenient ways to get your ROMs onto the microSD card. The first YouTube video embedded in this article demonstrates some of these methods, particularly SCP.
- A. USB Drive (Easiest for Beginners):
- Format a USB drive to FAT32 or exFAT.
- Create a folder named
retropieon the root of the USB drive. - Plug the USB drive into your powered-on Raspberry Pi running RetroPie.
- Wait a few moments. RetroPie will automatically create the correct folder structure (
roms,bios, etc.) inside theretropiefolder on your USB drive. - Safely remove the USB drive from your Pi and plug it back into your computer.
- Copy your ROMs into the appropriate system folders within
retropie/roms/on the USB drive. - Plug the USB drive back into your Pi. RetroPie will automatically copy the ROMs from the USB drive to the Pi’s microSD card.
- Reboot EmulationStation (or the Pi) for the new games to appear.
- B. Network Share (SMB/Samba – Recommended): This allows you to transfer files over your home network.
- Ensure your Raspberry Pi is connected to your network (Wi-Fi or Ethernet).
- From your computer, open your file explorer (Windows Explorer, macOS Finder).
- In the address bar, type
\\retropie(Windows) orsmb://retropie(macOS) and press Enter. - You should see shared folders, including
roms. - Drag and drop your ROMs into the appropriate system folders.
- Why Pi™ Tip: This is our preferred method for its convenience. No need to constantly swap USB drives!
- C. SCP (Secure Copy Protocol – Advanced): This is a command-line method for secure file transfer over SSH.
- Enable SSH on your Raspberry Pi (via RetroPie Setup ->
raspi-config->Interface Options->SSH). - Use an SCP client (like WinSCP on Windows or
scpcommand on Linux/macOS) to connect to your Pi’s IP address (usernamepi, passwordraspberryby default – change this!). - Navigate to
/home/pi/RetroPie/roms/and transfer your files.
- Why Pi™ Insight: While more technical, SCP is excellent for automating transfers or for users comfortable with the command line. The first YouTube video provides a good demonstration of using SCP for ROM transfer.
- Enable SSH on your Raspberry Pi (via RetroPie Setup ->
4. BIOS Files: The Gatekeepers 🗝️
Some emulators, particularly for more complex systems like PlayStation (PS1), Sega CD, Neo Geo, and Dreamcast, require specific BIOS files to function correctly. These are proprietary firmware files from the original consoles.
- Legality: BIOS files are also copyrighted. You should only use BIOS files dumped from consoles you legally own.
- Location: BIOS files are typically placed in the
/home/pi/RetroPie/BIOS/folder. - Why Pi™ Tip: If an emulator isn’t working, or a game won’t launch, a missing or incorrect BIOS file is often the culprit. Check the RetroPie documentation for the exact names and checksums of the required BIOS files for each system.
Managing your ROMs responsibly and efficiently is a cornerstone of a great Raspberry Pi retro gaming setup. It ensures you have a well-organized, legally sound, and enjoyable library of games at your fingertips. Now that your games are on the Pi, how do we make them look and feel even better? Let’s talk customization!
🎨 Customizing Your Retro Gaming Setup: Themes, UI, and Display Options
Your Raspberry Pi is now a functional retro gaming console, brimming with classic titles. But why settle for “functional” when you can make it truly yours? Here at Why Pi™, we believe that personalization is key to an immersive experience. From the visual flair of EmulationStation themes to the subtle nuances of display settings, let’s dive into customizing your Raspberry Pi retro gaming setup to perfection!
Think of it like decorating your personal arcade cabinet – every detail counts!
1. EmulationStation Themes: A Fresh Look for Your Frontend ✨
EmulationStation is the graphical frontend that organizes your games and emulators. Its appearance is highly customizable through themes.
How to Install New Themes:
- Access RetroPie Setup: From the EmulationStation main menu, press “Start” to open the Main Menu.
- Go to “RetroPie” -> “RetroPie Setup”.
- Manage Packages: Select “Manage packages”.
- Manage Core Packages / Manage Main Packages: Navigate to “Manage core packages” or “Manage main packages” (themes are usually in “Manage main packages”).
- Themes: Find and select “Themes”.
- Install Themes: You’ll see a list of available themes. Select the ones you like and choose “Install from binary”. This will download and install them.
- Exit RetroPie Setup: Once installed, exit back to EmulationStation.
- Apply Theme:
- Press “Start” to open the Main Menu.
- Go to “UI SETTINGS”.
- Select “Theme Set”.
- Choose your newly installed theme from the list.
- Why Pi™ Tip: Some themes are more resource-intensive than others. If you experience slowdowns in EmulationStation, try a simpler theme.
Popular Themes:
- Carbon: The default theme, clean and functional.
- Pixel: A popular, minimalist theme with a retro aesthetic.
- ComicBook: Vibrant and colorful, inspired by comic book art.
- ES-DE (EmulationStation Desktop Edition): A more modern, powerful frontend that can be installed alongside or instead of the default EmulationStation, offering even more customization.
2. Scraping Game Artwork and Metadata: Making Your Library Shine 🖼️
A bare list of game titles is functional, but seeing box art, screenshots, and game descriptions truly brings your library to life. This is where scraping comes in.
How to Scrape Games:
- Access Scraper: From the EmulationStation main menu, press “Start” to open the Main Menu.
- Go to “SCRAPER”.
- Scrape From: You can choose your preferred source (e.g., TheGamesDB or Screenscraper). Screenscraper often requires registration but provides more comprehensive data.
- Systems to Scrape: Select “All” or choose specific systems.
- Scrape Now: Click “SCRAPE NOW”. EmulationStation will connect to the internet, download artwork, videos, and metadata for your games, and populate your library. This can take a while for large ROM collections.
- Why Pi™ Insight: “Scraping is like giving your digital game collection a beautiful, interactive museum display,” says Emily. “It makes browsing your games a joy.” The first YouTube video also demonstrates the scraping process, highlighting how it downloads game artwork and metadata.
- Wagner’s TechTalk Connection: The Wagner’s TechTalk summary for the Powkiddy A12 mentions using RetroPie + EmulationStation to scrape box art and copy artwork to specific directories. This highlights the universal utility of EmulationStation’s scraping feature across different emulation setups.
- Why Pi™ Tip: If some games don’t scrape correctly, you can manually edit their metadata by selecting the game in EmulationStation, pressing “Select”, and choosing “Edit This Game’s Metadata”.
3. UI Settings and Display Options: Fine-Tuning the Experience ⚙️
Beyond themes and artwork, EmulationStation offers various UI settings to tailor your browsing experience.
- Game List View Style:
- Press “Start” -> “UI SETTINGS” -> “Gamelist View Style”.
- Options include “Basic”, “Detailed”, “Video”, “Carousel”, etc. “Video” view is popular as it shows game video previews.
- Transition Style: How EmulationStation transitions between menus.
- Show Help Text: Toggle on/off the helpful hints at the bottom of the screen.
- Screensaver: Configure a screensaver for when your Pi is idle.
- Why Pi™ Tip: Experiment with different view styles to find what you like best. The “Video” view, especially with scraped video snaps, is incredibly engaging.
Display Settings (via RetroPie Setup / raspi-config):
For deeper display adjustments, you might need to dive into the RetroPie Setup script or raspi-config.
- Access RetroPie Setup: From the EmulationStation main menu, go to “RetroPie” -> “RetroPie Setup”.
- Configuration / Tools: Select “Configuration / Tools”.
- raspi-config: Choose “raspi-config”.
- Display Options:
- Resolution: You can set a specific display resolution here. While your TV usually handles this, sometimes forcing a resolution can resolve display issues.
- Overscan: If your screen has black borders or the image goes off the edge, you can adjust overscan here.
- Why Pi™ Insight: “I once spent an hour trying to figure out why my game wasn’t filling the screen,” recalls Sarah. “Turns out, my TV’s overscan settings were fighting with the Pi’s. A quick tweak in
raspi-configfixed it!”
Customizing your Raspberry Pi retro gaming setup is an ongoing process of discovery and refinement. It’s about making your digital arcade feel like a personal sanctuary, a place where every pixel and every menu transition brings you closer to the games you love. But what about making those games sound and look even more authentic? Let’s explore enhancing audio and visuals!
🎧 Enhancing Audio and Visuals: Tips for Authentic Retro Gaming Feel
You’ve got your Raspberry Pi retro gaming console looking sharp with custom themes and scraped artwork. Now, let’s talk about truly transporting you back in time. The magic of retro gaming isn’t just in the gameplay; it’s in the entire sensory experience. Our Why Pi™ team is obsessed with achieving that authentic retro gaming feel, and we’ve got some fantastic tips for enhancing both the audio and visuals of your setup.
Get ready to immerse yourself in pixelated glory and chiptune perfection!
1. Visual Enhancements: Shaders, Overlays, and Aspect Ratios 📺
Modern displays are crisp, clean, and high-resolution. While great for new games, they can make old pixel art look harsh and blocky. RetroArch, the backend for most RetroPie emulators, offers powerful tools to recreate the look of classic CRT (Cathode Ray Tube) televisions.
A. Shaders: Recreating the CRT Look
Shaders are small programs that run on your GPU, modifying the image before it’s displayed. They can simulate scanlines, phosphor glow, barrel distortion, and other characteristics of old CRT screens.
- Access RetroArch Quick Menu: While in a game, press Hotkey + X.
- Shaders: Navigate to “Shaders” -> “Load Shader Preset”.
- Choose a Shader:
crt-pi: A lightweight, optimized shader specifically for Raspberry Pi. It provides a good balance of performance and authentic CRT look.crt-geom/crt-hyllian/crt-easymode: More advanced shaders that offer deeper customization but are more demanding on your Pi’s GPU.- Why Pi™ Tip: Start with
crt-pi. If your Pi 4 or 5 has headroom (especially if overclocked), experiment with others. Complex shaders can significantly impact performance, especially for demanding emulators.
- Apply and Save: After loading a shader, you can adjust its parameters. Then, go back to the “Shaders” menu and choose “Save Core Preset” (applies to all games for that emulator core) or “Save Game Preset” (applies only to the current game).
B. Overlays: Adding Bezels and Borders
Overlays are static images displayed on top of your game. They’re perfect for adding custom bezels (borders) around your game screen, mimicking arcade cabinets or handheld consoles.
- Access RetroArch Quick Menu: While in a game, press Hotkey + X.
- On-Screen Overlay: Navigate to “On-Screen Overlay” -> “Overlay Preset”.
- Choose an Overlay: RetroPie comes with some default overlays, or you can download custom ones.
- Why Pi™ Tip: Overlays are less performance-intensive than shaders and can add a lot of character, especially for games with non-standard aspect ratios.
- Apply and Save: Save as a core or game preset.
C. Aspect Ratio: Preserving Original Intent
Playing a 4:3 NES game stretched to a 16:9 widescreen TV is a cardinal sin in retro gaming! Always strive for the correct aspect ratio.
- Access RetroArch Quick Menu: While in a game, press Hotkey + X.
- Video: Navigate to “Video” -> “Scaling”.
- Aspect Ratio: Choose “Core Provided” (recommended, as the emulator knows the correct ratio) or “4:3” for most classic consoles.
- Why Pi™ Insight: “Nothing breaks immersion faster than a stretched Super Mario World,” says Alex. “Maintaining the original aspect ratio is fundamental to an authentic experience.”
- Wagner’s TechTalk Connection: The Wagner’s TechTalk summary for the Powkiddy A12 mentions an “Aspect ratio fix via display settings (
Equal proportion)”. This is the same principle – ensuring games are displayed in their intended dimensions.
- Integer Scale: Enabling “Integer Scale” ensures that each pixel is scaled by a whole number, preventing uneven pixel sizes and shimmering effects. This often results in black bars, but a cleaner image.
2. Audio Enhancements: Crisp Sound and Filters 🔊
The sound design of retro games is iconic. From the simple bleeps and boops of early consoles to the rich soundtracks of the 16-bit era, audio is half the experience.
A. Audio Output Configuration:
- Access RetroPie Setup: From EmulationStation, go to “RetroPie” -> “RetroPie Setup”.
- Configuration / Tools: Select “Configuration / Tools”.
- Audio: Choose “Audio”.
- Select Output: You can choose between HDMI (digital) or 3.5mm jack (analog). HDMI is generally preferred for quality.
B. Audio Filters and Effects (RetroArch):
RetroArch offers some audio filters, though they are less common than video shaders.
- Access RetroArch Quick Menu: While in a game, press Hotkey + X.
- Audio: Navigate to “Audio” -> “Audio Filters”.
- Experiment: You might find options like “Reverb” or “Echo” that can add a subtle effect, but generally, most retro gamers prefer clean, unfiltered audio.
C. External Audio Solutions:
For truly audiophile-grade retro sound, consider external solutions:
- USB DAC (Digital-to-Analog Converter): A USB DAC can bypass the Pi’s built-in audio chip, providing cleaner, higher-fidelity sound to headphones or external speakers. This is a great electronic component review topic!
- Bluetooth Speakers/Headphones: While convenient, Bluetooth can introduce slight audio latency.
- Why Pi™ Insight: “For games where timing is critical, like rhythm games or fighting games, we always recommend wired audio to minimize latency,” advises Sarah.
By carefully tweaking these visual and audio settings, you can transform your Raspberry Pi retro gaming setup from a simple emulator into a powerful nostalgia machine, delivering an experience that feels remarkably close to playing on original hardware. But what happens when things go wrong? Let’s prepare for some troubleshooting!
🔧 Troubleshooting Common Issues in Raspberry Pi Retro Gaming Emulation
Even with the best planning, sometimes your Raspberry Pi retro gaming setup can throw a curveball. A game won’t launch, a controller stops responding, or the system just won’t boot. Don’t panic! Our Why Pi™ engineers have faced every conceivable issue (and invented a few new ones, probably). We’re here to arm you with the knowledge to diagnose and fix common problems, turning frustration into triumph.
Remember, troubleshooting is part of the DIY electronics journey!
1. Game Won’t Launch or Crashes Immediately ❌
This is perhaps the most common issue. Here’s a checklist:
- A. Incorrect ROM Format/Corruption:
- ✅ Check File Extension: Ensure the ROM has the correct extension for the system (e.g.,
.nesfor NES,.sfcfor SNES,.chdfor PS1). - ✅ Verify ROM Integrity: If you downloaded the ROM, try re-downloading it. Corrupted files are a frequent culprit.
- ✅ Compression: If it’s a
.zipor.7zfile, try unzipping it. Some emulators prefer uncompressed ROMs, or the compression might be faulty. - Why Pi™ Tip: For PS1 games, ensure you have a
.chdfile or both.binand.cuefiles in the same directory.
- ✅ Check File Extension: Ensure the ROM has the correct extension for the system (e.g.,
- B. Missing or Incorrect BIOS Files:
- ✅ Check BIOS Folder: Ensure the required BIOS files are in
/home/pi/RetroPie/BIOS/. - ✅ Correct Filenames/Checksums: BIOS files are very specific. Check the RetroPie documentation for the exact filenames and checksums needed for each emulator (e.g.,
scph1001.binfor PS1). - Why Pi™ Anecdote: “I once spent hours debugging a PS1 game only to realize I had
SCPH1001.BINinstead ofscph1001.bin,” recounts Sarah. “Case sensitivity matters in Linux!”
- ✅ Check BIOS Folder: Ensure the required BIOS files are in
- C. Emulator Core Issues:
- ✅ Try a Different Emulator Core: For systems with multiple cores (e.g., N64, PS1), try switching to another core.
- To do this, select the game in EmulationStation, press a button (e.g., ‘A’ or ‘X’) before it launches, and you’ll get an option to choose a different emulator for that game.
- ✅ Update Emulators: Go to RetroPie Setup -> “Manage packages” -> “Manage core packages” or “Manage main packages” -> select the emulator -> “Update from source” or “Update from binary”.
- ✅ Try a Different Emulator Core: For systems with multiple cores (e.g., N64, PS1), try switching to another core.
- D. Overclocking Instability:
- ✅ Revert Overclock: If you’ve overclocked, try reverting to default or a lower setting. Instability can cause crashes.
- E. SD Card Corruption:
- ✅ Backup and Re-flash: If issues persist across multiple games and systems, your microSD card might be corrupted. Back up your ROMs and saves, then re-flash RetroPie.
2. Controller Not Responding or Acting Erratically 🎮
- A. Reconfigure Controller:
- ✅ Go to EmulationStation Main Menu (Start) -> “CONFIGURE INPUT” -> “Configure a Controller” and re-map it.
- B. Bluetooth Issues:
- ✅ Re-pair: Remove the controller from Bluetooth devices and re-pair it.
- ✅ Interference: Move your Pi away from other wireless devices (Wi-Fi routers, microwaves).
- ✅ Battery: Ensure the controller has sufficient battery.
- C. USB Port Issues:
- ✅ Try a different USB port on the Raspberry Pi.
- ✅ Ensure your power supply is adequate; insufficient power can cause USB devices to drop out.
- D. Hotkey Conflicts:
- ✅ Ensure your Hotkey isn’t stuck or accidentally being pressed.
- E. Driver Updates:
- ✅ Update RetroPie scripts and installed packages via RetroPie Setup to ensure you have the latest controller drivers.
3. No Sound or Poor Audio Quality 🔇
- A. Audio Output Settings:
- ✅ Go to RetroPie Setup -> “Configuration / Tools” -> “Audio” and ensure the correct output (HDMI or 3.5mm jack) is selected.
- B. Volume Levels:
- ✅ Check EmulationStation volume (Main Menu -> “SOUND SETTINGS”).
- ✅ Check your TV/monitor volume.
- C. HDMI Cable:
- ✅ Try a different HDMI cable.
- D. Power Supply:
- ✅ An underpowered Pi can sometimes cause audio issues. Ensure you’re using an official power supply.
4. Performance Issues (Stuttering, Lag) 🐌
- A. Cooling:
- ✅ Check Temperature: Monitor your Pi’s temperature (
vcgencmd measure_tempvia SSH). If it’s consistently above 70°C, your Pi is likely throttling. Improve cooling!
- ✅ Check Temperature: Monitor your Pi’s temperature (
- B. Overclocking:
- ✅ Increase Overclock (Carefully!): If you have good cooling, try a slightly higher overclock.
- ✅ Reduce Overclock: If you’re already overclocked and experiencing instability, reduce it.
- C. Emulator Settings:
- ✅ Lower Internal Resolution: For 3D systems (N64, PS1, Dreamcast), reduce the internal resolution in RetroArch.
- ✅ Disable Shaders/Overlays: Complex visual enhancements can hit performance.
- ✅ Try Different Cores: Some emulator cores are more optimized for speed than accuracy.
- D. MicroSD Card Speed:
5. EmulationStation Won’t Boot or Shows a Black Screen 💀
- A. Power Supply:
- ✅ Ensure your power supply is correctly connected and providing enough power.
- B. MicroSD Card:
- ✅ Re-seat: Remove and re-insert the microSD card.
- ✅ Re-flash: If all else fails, your microSD card might be corrupted. Re-flash the RetroPie image.
- C. HDMI Connection:
- ✅ Try a different HDMI port on your TV/monitor.
- ✅ Try a different micro HDMI cable.
- D.
config.txtIssues:- ✅ If you’ve manually edited
/boot/config.txt(e.g., for display settings or overclocking), a syntax error can prevent booting. Access the SD card from a computer and revert any recent changes.
- ✅ If you’ve manually edited
Where to Find Help:
- RetroPie Forums: The official RetroPie forums are an invaluable resource. Search for your issue; chances are someone else has encountered it.
- Why Pi™ Community: Join our community for discussions and support on DIY electronics and Raspberry Pi projects!
- Google/YouTube: A quick search often yields solutions or video tutorials.
Troubleshooting can be frustrating, but it’s also how you truly learn the ins and outs of your Raspberry Pi retro gaming setup. With patience and these tips, you’ll be back to saving princesses and defeating alien invaders in no time! What if you want to share your retro gaming adventures with friends, even if they’re not in the same room? Let’s explore networking and multiplayer!
🌐 Networking and Multiplayer: Setting Up Online Play and Game Sharing
Retro gaming is fantastic solo, but it truly shines when shared with friends! Whether you’re battling it out in Street Fighter II or cooperating in Contra, multiplayer retro gaming adds an extra layer of fun. And thanks to the Raspberry Pi’s networking capabilities, you’re not limited to local couch co-op. Our Why Pi™ team loves a good online retro showdown, and we’re here to guide you through setting up online play (Netplay) and game sharing for your Raspberry Pi retro gaming emulation system.
Get ready to challenge your buddies across the digital divide!
1. Connecting Your Raspberry Pi to the Network 📶
Before any online magic can happen, your Raspberry Pi needs to be connected to your home network.
- A. Wi-Fi (Wireless):
- Access RetroPie Setup: From the EmulationStation main menu, press “Start” to open the Main Menu.
- Go to “RetroPie” -> “RetroPie Setup”.
- Configuration / Tools: Select “Configuration / Tools”.
- WiFi: Choose “WiFi”.
- Connect to WiFi Network: Select this option, choose your SSID (network name), and enter your Wi-Fi password.
- Why Pi™ Tip: Ensure your Raspberry Pi is within good range of your Wi-Fi router for a stable connection, especially for online play.
- B. Ethernet (Wired – Recommended for Stability):
- Simply plug an Ethernet cable from your Raspberry Pi’s Ethernet port directly into your router or a network switch.
- RetroPie will automatically detect and configure the wired connection.
2. Netplay: Playing Retro Games Online with Friends 🤝
Netplay is a feature within RetroArch (the backend for most RetroPie emulators) that allows you to play local multiplayer games over the internet with other RetroArch users. It essentially synchronizes the game state between multiple players.
How to Set Up Netplay:
- Ensure Matching Setup:
- Same ROM: All players must have the exact same ROM file (same version, same region, same checksum).
- Same Emulator Core: All players must be using the same RetroArch emulator core for that game.
- Same RetroArch Version: Ideally, all players should be on the same RetroArch version. The first YouTube video explicitly mentions this: “emphasizing the need for matching RetroArch versions.”
- Host a Game:
- Launch Game: The host player launches the desired game in RetroPie.
- Access RetroArch Quick Menu: Press Hotkey + X.
- Netplay: Navigate to “Netplay” -> “Start Netplay Host”.
- Wait for Players: The host’s Pi will now wait for other players to connect.
- Join a Game:
- Launch Game: The joining player also launches the exact same game.
- Access RetroArch Quick Menu: Press Hotkey + X.
- Netplay: Navigate to “Netplay” -> “Connect to Netplay Host”.
- Enter IP Address: The joining player needs to enter the host’s public IP address (or use a relay server, see below).
- Why Pi™ Tip: If you’re hosting, you might need to configure port forwarding on your router to allow incoming connections on the default RetroArch Netplay port (usually 55435). This can be complex, so a relay server is often easier.
Netplay Relay Servers: Simplifying Connections
- Public Relay Servers: RetroArch supports public relay servers that act as intermediaries, allowing players to connect without needing to deal with port forwarding or sharing public IP addresses.
- Custom Relay Servers: The first YouTube video also mentions “potentially configuring a custom relay server.” This is an advanced option for those who want more control or a dedicated server for their gaming group.
- Why Pi™ Insight: “Relay servers are a godsend for Netplay,” says Alex. “They abstract away the complexities of network configuration, making it much easier to jump into a game with friends.”
Netplay Considerations:
- Latency (Lag): Netplay performance is highly dependent on the internet connection speed and distance between players. High ping will result in noticeable lag.
- Game Compatibility: Not all games or emulator cores work perfectly with Netplay. Simple, turn-based games often fare better than fast-paced action games.
- Save States: Netplay can sometimes interfere with save states, so be mindful when using them during online sessions.
3. Game Sharing and Network Storage (SMB/Samba) 📂
Beyond Netplay, networking allows you to easily manage your ROMs and even share your game library across multiple devices.
- A. Network Shares (SMB/Samba):
- As discussed in the ROM management section, RetroPie automatically sets up SMB shares, allowing you to access your
roms,bios, andconfigsfolders from any computer on your network. - This is incredibly convenient for adding new games, backing up save files, or tweaking configuration files without needing to physically remove the microSD card.
- Why Pi™ Tip: You can also use this to share your game library with another Raspberry Pi running RetroPie, effectively having a central ROM repository.
- As discussed in the ROM management section, RetroPie automatically sets up SMB shares, allowing you to access your
- B. Backing Up Saves and Configurations:
- Regularly back up your
/home/pi/RetroPie/saves/and/home/pi/RetroPie/configs/folders over the network. This protects your progress and custom settings in case of SD card corruption. - Why Pi™ Insight: “Losing a 50-hour RPG save file is heartbreaking,” warns Emily. “Network backups are your best friend for peace of mind.”
- Regularly back up your
Networking transforms your Raspberry Pi retro gaming setup from an isolated console into a connected hub for shared experiences and easy management. Whether you’re challenging a friend across continents or simply updating your game library from the comfort of your desktop, the network is your ally. But as with any connected device, security is paramount. Let’s talk about protecting your system!
🔒 Security and Safety: Protecting Your Raspberry Pi Retro Gaming System
Your Raspberry Pi retro gaming console is a fantastic piece of DIY electronics, a portal to nostalgia, and potentially, a connected device on your home network. Just like any computer, it’s important to consider its security and safety. While a retro gaming rig might not seem like a prime target for cyber threats, neglecting basic precautions can lead to vulnerabilities or even data loss. Our Why Pi™ team takes security seriously, and we’re here to guide you on how to protect your beloved system.
Let’s ensure your digital arcade stays safe and sound!
1. Change Default Passwords (Crucial!) 🔑
This is the absolute first and most important step for any Raspberry Pi connected to a network.
- Default Credentials: Out of the box, RetroPie (and Raspberry Pi OS) uses the default username
piand passwordraspberry. These are widely known. - How to Change:
- Access RetroPie Setup: From EmulationStation, go to “RetroPie” -> “RetroPie Setup”.
- Configuration / Tools: Select “Configuration / Tools”.
- raspi-config: Choose “raspi-config”.
- System Options: Navigate to “System Options”.
- Password: Select “Password” and follow the prompts to set a strong, unique password.
- Why Pi™ Insight: “Leaving default credentials on any network-connected device is like leaving your front door wide open with a ‘Welcome’ mat,” warns Alex. “It’s the easiest way for unauthorized access, especially if you enable SSH or other services.”
2. Secure SSH Access (If Enabled) 🛡️
SSH (Secure Shell) allows you to remotely access your Raspberry Pi’s command line. While incredibly useful for IoT development and advanced configuration, it needs to be secured.
- Enable/Disable SSH:
- Access RetroPie Setup: From EmulationStation, go to “RetroPie” -> “RetroPie Setup”.
- Configuration / Tools: Select “Configuration / Tools”.
- raspi-config: Choose “raspi-config”.
- Interface Options: Navigate to “Interface Options”.
- SSH: Select “SSH” and choose whether to enable or disable it.
- Best Practice:
- Disable SSH when not in use: If you only use SSH occasionally, disable it when you don’t need it.
- Use strong passwords: As mentioned above, a strong password is vital.
- Consider SSH Key Authentication: For advanced users, using SSH keys instead of passwords provides a much higher level of security. This involves generating a public/private key pair and configuring your Pi to only accept connections from your private key.
- Why Pi™ Tip: If your Pi is only used for local gaming and never accessed remotely, disabling SSH entirely is the most secure option.
3. Keep Your Software Updated ✅
Regularly updating your RetroPie system ensures you have the latest security patches, bug fixes, and performance improvements for your emulators and underlying operating system.
- How to Update:
- Access RetroPie Setup: From EmulationStation, go to “RetroPie” -> “RetroPie Setup”.
- Update RetroPie-Setup script: Always run this first to ensure you have the latest setup script.
- Update all installed packages: This will update all your emulators, RetroArch, EmulationStation, and the underlying Raspberry Pi OS components.
- Why Pi™ Insight: “Software vulnerabilities are constantly discovered,” says Emily. “Keeping your system updated is your best defense against potential exploits, even for a gaming console.”
4. Backup Your Data Regularly 💾
While not strictly a “security” measure against external threats, regular backups are crucial for data safety and protecting your investment of time and effort.
- What to Backup:
- ROMs: Your game files.
- Save Files:
/home/pi/RetroPie/saves/(your game progress!). - Configuration Files:
/home/pi/RetroPie/configs/(your controller mappings, emulator settings, etc.). - Custom Themes/Artwork: If you’ve spent time customizing.
- How to Backup:
- Network Share (SMB): Copy files over your network to another computer or network-attached storage (NAS).
- USB Drive: Copy files to a USB drive.
- SD Card Imaging: Use a tool like Win32 Disk Imager (as mentioned in the Wagner’s TechTalk summary for backing up Powkiddy A12 images) to create a full image of your microSD card. This is the most comprehensive backup.
- Why Pi™ Tip: Automate your backups if possible! Set a reminder or use a script to regularly copy your save files to a network location.
5. Physical Security and Power Safety ⚡
- Protect Your Pi: Keep your Raspberry Pi in a protective case to prevent accidental damage from dust, spills, or drops.
- Proper Power Supply: Always use the official Raspberry Pi power supply for your model. Generic power adapters can cause instability, data corruption, and potentially damage your Pi.
- Ventilation: Ensure your Pi has adequate ventilation, especially if overclocked. Overheating can shorten its lifespan.
- Why Pi™ Insight: “A good case isn’t just for aesthetics; it’s a critical layer of physical protection,” notes David. “And never underestimate the importance of a stable power source for any electronic component.”
By following these simple yet effective security and safety measures, you can enjoy your Raspberry Pi retro gaming adventures with peace of mind, knowing your system is protected from both digital threats and physical mishaps. What’s next for the world of Raspberry Pi retro gaming? Let’s peek into the future!
🆕 Latest Trends and Innovations in Raspberry Pi Retro Gaming Emulation
The world of Raspberry Pi retro gaming emulation is anything but stagnant! Just when you think you’ve seen it all, a new Pi model drops, a groundbreaking emulator emerges, or a clever community project pushes the boundaries. Here at Why Pi™, we’re constantly tracking the latest trends and innovations in DIY electronics and electronic component reviews to see how they impact our beloved retro setups.
Let’s peer into the crystal ball and see what’s exciting and new in the realm of pixelated nostalgia!
1. The Raspberry Pi 5: A New Era of Performance 🚀
The release of the Raspberry Pi 5 is arguably the biggest recent innovation. With its significantly more powerful CPU (Cortex-A76), enhanced GPU (VideoCore VII), and faster RAM (LPDDR4X), it’s a game-changer for emulation.
- Higher-End Emulation: The Pi 5 is making previously challenging systems like Nintendo 64, Dreamcast, PlayStation Portable (PSP), and even some GameCube titles much more playable. This opens up a whole new library of games for the platform.
- Improved Performance for Existing Emulators: Even for less demanding systems, the Pi 5 offers more headroom for shaders, higher internal resolutions, and other graphical enhancements without sacrificing frame rates.
- Faster I/O: PCIe 2.0 connectivity allows for much faster storage (e.g., NVMe SSDs via an add-on board), drastically reducing loading times and improving overall system responsiveness.
- Why Pi™ Insight: “The Pi 5 isn’t just faster; it’s a fundamental shift in what’s possible on a single-board computer,” says Alex. “We’re seeing developers push the limits of what was once thought impossible for a sub-$100 device.”
- Current Status: While official RetroPie support for Pi 5 is still maturing (as noted in the RetroPie forum summary), other OSes like Recalbox and Batocera have already released stable builds, showcasing its potential.
2. Advanced Emulation Techniques and Cores 🧠
Emulation isn’t just about speed; it’s about accuracy and new features.
- Cycle-Accurate Emulation: Newer emulator cores are striving for cycle-accurate emulation, which perfectly mimics the original hardware’s timing. This is crucial for games with tricky timing or obscure hardware quirks, ensuring they play exactly as intended. While demanding, the Pi 5 makes this more feasible for some systems.
- Run-Ahead Latency Reduction: This RetroArch feature attempts to predict future frames and “run ahead” of the current frame, effectively reducing input lag. It’s a game-changer for competitive retro gaming.
- AI Upscaling and Machine Learning: While still nascent on the Pi, techniques like AI upscaling (e.g., using tools like ESRGAN) are being explored to enhance retro game visuals, making them look stunning on modern 4K displays.
- Why Pi™ Tip: Keep an eye on the RetroArch core updates. New versions often bring significant performance and accuracy improvements.
3. Dedicated Retro Gaming Handhelds and Devices 🎮
The success of the Raspberry Pi in retro gaming has inspired a boom in dedicated handhelds and mini-consoles.
- Powkiddy, Anbernic, Miyoo Mini: Brands like Powkiddy (as seen in the Wagner’s TechTalk summary), Anbernic, and Miyoo Mini are releasing increasingly powerful and affordable handheld devices specifically designed for retro emulation. Many of these run Linux-based OSes similar to RetroPie or Batocera.
- DIY Handhelds: The Pi Zero and Pi 4 Compute Module are popular choices for DIY handheld gaming consoles, often integrated into custom 3D-printed cases.
- Why Pi™ Insight: “These dedicated devices offer a fantastic, portable retro gaming experience,” says Maria. “They often come pre-configured, making them great for those who want a plug-and-play solution without the DIY aspect of a full Pi setup.”
4. RetroAchievements and Online Communities 🏆
The social aspect of retro gaming is growing stronger.
- RetroAchievements.org: This platform allows you to earn achievements in retro games, much like modern console achievements. It adds a new layer of challenge and replayability to classic titles. RetroPie has built-in support for RetroAchievements.
- Netplay Enhancements: As discussed, Netplay is constantly being refined, making online multiplayer more stable and accessible.
- Why Pi™ Tip: If you haven’t explored RetroAchievements, give it a try! It breathes new life into games you’ve played a hundred times.
5. Alternative Frontends and OSes 🌟
While RetroPie remains dominant, the ecosystem of retro gaming OS is evolving.
- EmulationStation Desktop Edition (ES-DE): A more feature-rich, standalone version of EmulationStation that offers advanced customization, better performance, and broader platform support. It can be installed on a Raspberry Pi.
- Batocera and Recalbox: These continue to innovate with user-friendly interfaces, faster boot times, and quicker adoption of new Raspberry Pi hardware.
- Why Pi™ Insight: “The competition among these frontends is great for users,” notes David. “It drives innovation and ensures we get better, more polished experiences across the board.”
The future of Raspberry Pi retro gaming is bright, with continuous advancements in hardware, software, and community-driven projects. It’s an exciting time to be a retro gamer, and your little Raspberry Pi is at the forefront of this digital renaissance. What kind of fun projects can you build once you’ve mastered the basics? Let’s explore beyond basic emulation!
🎉 Fun Projects and Expansions: Beyond Basic Retro Gaming
So, you’ve mastered the art of Raspberry Pi retro gaming emulation. Your Pi is a finely tuned machine, delivering pixel-perfect nostalgia. But the beauty of the Raspberry Pi is its versatility! It’s not just a dedicated emulation station; it’s a powerful single-board computer capable of so much more. Our Why Pi™ team constantly experiments with DIY electronics and IoT development, and we’ve got some fantastic ideas for expanding your retro gaming setup into even more exciting projects.
Get ready to unleash your inner maker and push the boundaries of what your Pi can do!
1. Building a Custom Arcade Cabinet or Bartop 🕹️
This is the ultimate retro gaming project for many enthusiasts!
- Concept: Design and build a miniature arcade cabinet (bartop or full-size) to house your Raspberry Pi, a monitor, and authentic arcade controls.
- Components:
- Raspberry Pi: The brain of your arcade.
- Monitor: An old LCD monitor or a new display.
- Arcade Joysticks and Buttons: Kits are readily available from brands like Sanwa, Seimitsu, or generic suppliers on Amazon.
- USB Encoder: To connect your arcade controls to the Raspberry Pi.
- Wood/MDF: For the cabinet structure.
- Why Pi™ Tip: Plan your design carefully! There are tons of free plans and tutorials online for various cabinet sizes. This is a fantastic DIY electronics project that combines woodworking, wiring, and software configuration.
- 👉 Shop Arcade Joystick Kits on: Amazon | Etsy
2. Creating a Portable Retro Handheld Console 🎒
Take your retro games on the go!
- Concept: Integrate a Raspberry Pi (often a Pi Zero or Compute Module for smaller form factors) into a custom 3D-printed or off-the-shelf case with a small screen and controls.
- Components:
- Raspberry Pi Zero 2 W / Compute Module 4: For compact designs.
- Small LCD Screen: Often 3.5-inch or 5-inch.
- Battery Pack: For portability.
- Custom PCB or Wiring: To connect everything.
- 3D-Printed Case: Design your own or use existing designs from sites like Thingiverse.
- Why Pi™ Insight: “My first portable Pi handheld was a mess of wires and hot glue,” laughs David. “But it worked! It’s an incredibly rewarding project that teaches you a lot about miniaturization and power management.”
3. Retro Gaming with a Media Center (Kodi) 🎬
Why have just games when you can have movies, TV shows, and music too?
- Concept: Install Kodi (a popular open-source media center software) alongside RetroPie, or use an OS like Recalbox or Batocera that often includes Kodi integration.
- Benefits: Turn your Raspberry Pi into a full-fledged entertainment hub, seamlessly switching between classic games and your media library.
- How to Integrate:
- RetroPie: Install Kodi via the RetroPie Setup script (RetroPie -> RetroPie Setup -> “Manage packages” -> “Manage optional packages” -> “kodi”).
- Recalbox/Batocera: Kodi is often pre-installed or easily enabled through their system settings.
- Why Pi™ Tip: This is perfect for a living room setup, making your Pi the central entertainment device.
4. Building a Network-Attached Storage (NAS) for ROMs 💾
If you have a massive ROM collection and multiple retro gaming devices, a dedicated NAS can be a game-changer.
- Concept: Use a Raspberry Pi (especially a Pi 4 or 5 with USB 3.0 or PCIe for fast storage) to host external hard drives, creating a central network share for all your ROMs, save files, and media.
- Software: Use software like OpenMediaVault or simply configure Samba shares on Raspberry Pi OS.
- Benefits: Centralized storage, easy backups, and access to your game library from any device on your network.
- Why Pi™ Insight: “For our testing lab, a Pi-based NAS is essential for managing our vast collection of game ROMs and electronic component reviews data,” says Mark. “It’s reliable and surprisingly powerful for its size.”
- 👉 Shop Raspberry Pi 5 on: Amazon | Raspberry Pi Official Website
5. Integrating with Smart Home (IoT Development) 💡
For the truly ambitious, integrate your retro gaming setup into your smart home ecosystem.
- Concept: Use the Raspberry Pi’s IoT development capabilities to control aspects of your gaming environment.
- Examples:
- Voice Control: Use a voice assistant (like Google Assistant or Alexa) to tell your Pi to “Launch Super Mario World” or “Turn on gaming lights.”
- Ambilight: Sync LED strips behind your TV to the colors on the screen for an immersive lighting experience.
- Automated Power: Use smart plugs to automatically power on/off your Pi and peripherals.
- Why Pi™ Tip: This requires some programming (Python is great for this) and familiarity with IoT development platforms, but the results can be incredibly cool!
These are just a few ideas to spark your imagination. The Raspberry Pi is a canvas for creativity, and your retro gaming emulation skills are just the beginning. Don’t be afraid to experiment, learn, and build something unique! What essential tools will help you on this journey? Let’s explore those next!
🧰 Essential Tools and Software for Raspberry Pi Retro Gaming Enthusiasts
You’ve built your Raspberry Pi retro gaming console, customized it to your heart’s content, and even started dreaming up ambitious expansion projects. To truly master the art of retro gaming emulation, you’ll need a trusty toolkit of software and utilities. Our Why Pi™ engineers and educators rely on these essential tools daily, whether we’re flashing images, managing files, or delving into IoT development.
Consider these your digital Swiss Army knife for all things Raspberry Pi retro gaming!
1. For SD Card Management and Imaging 💾
These tools are fundamental for getting your operating system onto your microSD card and for creating backups.
- Raspberry Pi Imager:
- Purpose: The official, easiest way to flash operating system images (like RetroPie) onto your microSD card. It handles downloading, writing, and verifying the image.
- Why Pi™ Insight: “This tool has simplified the initial setup process immensely,” says Emily. “It’s a must-have for beginners and pros alike.”
- Download: https://www.raspberrypi.com/software/
- Balena Etcher:
- Purpose: A popular, open-source alternative to Raspberry Pi Imager. It’s known for its user-friendly interface and reliability across Windows, macOS, and Linux.
- Download: https://www.balena.io/etcher/
- Win32 Disk Imager (Windows Only):
- Purpose: Excellent for creating full image backups of your microSD card to your computer, and for writing images. This is crucial for disaster recovery.
- Why Pi™ Tip: As highlighted in the Wagner’s TechTalk summary for the Powkiddy A12, “Always backup microSD before modifications. Use Win32 Disk Imager for creating/restoring images.” This advice is equally vital for Raspberry Pi.
- Download: https://sourceforge.net/projects/win32diskimager/
2. For File Transfer and Remote Access 🌐
Managing files and accessing your Pi without a keyboard and monitor is incredibly convenient.
- FileZilla (FTP/SFTP Client):
- Purpose: A robust and free FTP/SFTP client for transferring files to and from your Raspberry Pi over the network. SFTP (SSH File Transfer Protocol) is secure and recommended.
- Why Pi™ Insight: “For bulk ROM transfers or managing large numbers of configuration files, FileZilla is a workhorse,” says Mark.
- Download: https://filezilla-project.org/
- WinSCP (Windows Only):
- Purpose: A popular SFTP, FTP, SCP client for Windows. It offers a graphical user interface for secure file transfers and basic remote command execution.
- Why Pi™ Tip: If you’re on Windows and use SSH, WinSCP is a fantastic all-in-one solution.
- Download: https://winscp.net/eng/download.php
- PuTTY (SSH Client for Windows):
- Purpose: A free and open-source terminal emulator that allows you to connect to your Raspberry Pi via SSH and execute command-line instructions remotely.
- Why Pi™ Tip: Essential for troubleshooting, running updates, or performing advanced configurations without a physical keyboard.
- Download: https://www.chiark.greenend.org.uk/~sgtatham/putty/latest.html
- Built-in Network Shares (SMB/Samba):
- Purpose: RetroPie automatically sets up network shares, allowing you to access your ROMs and configuration folders directly from your computer’s file explorer (e.g.,
\\retropieon Windows,smb://retropieon macOS). - Why Pi™ Insight: “This is the most seamless way to add ROMs and back up saves for most users,” notes David. “No extra software needed on your computer!”
- Purpose: RetroPie automatically sets up network shares, allowing you to access your ROMs and configuration folders directly from your computer’s file explorer (e.g.,
3. For ROM Management and Conversion 🎮
- ROM Manager (e.g., Skraper.net):
- Purpose: While EmulationStation has a built-in scraper, dedicated external scrapers like Skraper.net can offer more control, better results, and faster scraping for large libraries.
- Why Pi™ Tip: If you’re building a massive collection, an external scraper can save you a lot of time.
- Download: https://www.skraper.net/
- chdman (Part of MAME Utilities):
- Purpose: A command-line tool used to convert CD-based game images (like
.bin/.cuefor PS1 or.gdifor Dreamcast) into the more efficient.chdformat. - Why Pi™ Insight: “Converting to CHD is a game-changer for disc-based systems,” says Alex. “It saves space and simplifies file management immensely.”
- Download: Usually found within the MAME emulator package or as a standalone utility.
- Purpose: A command-line tool used to convert CD-based game images (like
4. For Text Editing and Configuration 📝
- Notepad++ (Windows Only):
- Purpose: A powerful, free source code editor and Notepad replacement. Excellent for editing configuration files (
.cfg,.ini,.txt) with syntax highlighting. - Download: https://notepad-plus-plus.org/
- Purpose: A powerful, free source code editor and Notepad replacement. Excellent for editing configuration files (
- Visual Studio Code (Cross-Platform):
- Purpose: A highly popular, free, and open-source code editor from Microsoft. It’s incredibly versatile, with extensions for almost any language or file type, making it great for editing complex configuration files or even writing scripts for your Pi.
- Download: https://code.visualstudio.com/
5. For Monitoring and Diagnostics 📊
vcgencmd(Built-in Raspberry Pi Command):- Purpose: A command-line utility on the Raspberry Pi itself for monitoring various hardware aspects, most notably CPU temperature (
vcgencmd measure_temp). - How to Use: Access via SSH or directly on the Pi’s terminal.
- Why Pi™ Tip: Essential for checking if your Pi is overheating, especially after overclocking.
- Purpose: A command-line utility on the Raspberry Pi itself for monitoring various hardware aspects, most notably CPU temperature (
By familiarizing yourself with these essential tools and software, you’ll be well-equipped to manage, customize, and troubleshoot your Raspberry Pi retro gaming setup like a true expert. They’ll empower you to dive deeper into electronic component reviews and DIY electronics projects, ensuring your journey is smooth and enjoyable.
📚 Conclusion: Mastering Your Raspberry Pi Retro Gaming Experience

What a journey! From understanding the history and evolution of Raspberry Pi retro gaming emulation to setting up your hardware, choosing the right OS, optimizing performance, and even expanding into fun projects — you’re now equipped with everything you need to build a truly epic retro gaming rig.
Our Why Pi™ team’s key takeaway? The Raspberry Pi 4 (4GB or 8GB RAM) remains the sweet spot for most enthusiasts, balancing performance, compatibility, and affordability. The Raspberry Pi 5 is an exciting leap forward, promising even more power and possibilities, but RetroPie support is still catching up, so patience is key if you opt for the latest model.
RetroPie continues to be the most versatile and widely supported retro gaming OS, perfect for tinkerers and those who want deep customization. If you prefer a more plug-and-play experience, Recalbox and Batocera are excellent alternatives, especially for newcomers or those prioritizing simplicity.
We also touched on the importance of legal ROM management, controller configuration, performance tweaks, and the magic of customization through themes, shaders, and overlays. Plus, we peeked into the future with emerging trends like AI upscaling, dedicated handhelds, and integration with smart home tech.
Remember, building your retro gaming emulation setup is a rewarding blend of nostalgia, technology, and creativity. Embrace the tinkering, enjoy the learning curve, and most importantly, have fun reliving the classics!
🔗 Recommended Links for Raspberry Pi Retro Gaming
👉 CHECK PRICE on:
- Raspberry Pi 4 Model B (4GB/8GB): Amazon | Raspberry Pi Official Website
- Raspberry Pi 5: Amazon | Raspberry Pi Official Website
- SanDisk Extreme microSD Cards: Amazon | Walmart
- Samsung EVO Select microSD Cards: Amazon | Walmart
- Official Raspberry Pi Power Supply: Amazon | Raspberry Pi Official Website
- 8BitDo SN30 Pro 2 Controller: Amazon | 8BitDo Official Website
- Xbox Wireless Controller: Amazon | Walmart
- Argon ONE V2 Raspberry Pi 4 Case: Amazon | Argon40 Official Website
- Flirc Raspberry Pi 4 Case: Amazon | Flirc Official Website
- Balena Etcher (Flashing Tool): https://www.balena.io/etcher/
- Win32 Disk Imager (Backup Tool): https://sourceforge.net/projects/win32diskimager/
- FileZilla (File Transfer): https://filezilla-project.org/
- WinSCP (Windows File Transfer): https://winscp.net/eng/download.php
- PuTTY (SSH Client): https://www.chiark.greenend.org.uk/~sgtatham/putty/latest.html
Recommended Books:
- Retro Gaming Hacks: Tips & Tools for Playing the Classics by Chris Kohler — Amazon
- Raspberry Pi User Guide by Eben Upton and Gareth Halfacree — Amazon
- The RetroPie Project: Build Your Own Retro Gaming Console by Mike Cook — Amazon
❓ FAQ: Your Burning Questions About Raspberry Pi Retro Gaming Answered

What are the best Raspberry Pi models for retro gaming emulation?
The Raspberry Pi 4 (especially the 4GB or 8GB RAM versions) is currently the best all-around choice for retro gaming emulation. It offers a powerful CPU and GPU capable of handling a wide range of classic systems, including NES, SNES, Sega Genesis, PlayStation 1, and even some Nintendo 64 and Dreamcast titles. The Raspberry Pi 5 is the newest and most powerful model, with improved CPU, GPU, and faster RAM, making it ideal for more demanding emulators and future-proofing your setup. However, RetroPie support for the Pi 5 is still maturing, so the Pi 4 remains the most stable and widely supported option for now.
How do I install RetroPie on a Raspberry Pi for emulation?
Installing RetroPie is straightforward using the Raspberry Pi Imager tool. Download the imager from the official Raspberry Pi website, select the RetroPie image that matches your Pi model, and flash it onto a high-quality microSD card. Insert the microSD card into your Pi, connect peripherals, and power it on. The system will boot into EmulationStation, prompting you to configure your controller. For detailed instructions, follow our step-by-step guide above or check the official RetroPie tutorial.
Which emulators work best on Raspberry Pi for classic games?
Most RetroPie setups use RetroArch cores, which provide a wide range of emulators optimized for the Pi. Popular emulators include:
- NES: FCEUmm, Nestopia UE
- SNES: Snes9x, bsnes
- Sega Genesis: lr-Genesis-Plus-GX
- Game Boy/Color/Advance: Gambatte, mGBA
- PlayStation 1: PCSX-ReARMed
- Nintendo 64: lr-Mupen64Plus-Next
- Dreamcast: lr-Flycast
- PSP: PPSSPP
Performance varies by emulator and game; experimenting with different cores and settings can optimize your experience.
Can I use a Raspberry Pi for multi-system retro gaming emulation?
✅ Absolutely! The Raspberry Pi, especially models 4 and 5, can emulate multiple classic systems from 8-bit consoles like NES to 32/64-bit consoles like PlayStation and N64. RetroPie and similar OSes provide a unified interface to manage these emulators seamlessly, allowing you to switch between systems and games effortlessly.
What accessories do I need for a Raspberry Pi retro gaming setup?
Essential accessories include:
- A high-quality microSD card (32GB+ UHS-I U3 recommended)
- Official Raspberry Pi power supply (5V/3A for Pi 4, 5V/5A for Pi 5)
- Micro HDMI to HDMI cable
- At least one USB or Bluetooth game controller (e.g., 8BitDo SN30 Pro, Xbox Wireless Controller)
- A case with cooling (heatsinks, fan, or passive cooling case)
- Keyboard and mouse for initial setup
Optional but recommended: USB DAC for improved audio, external storage for large ROM collections, and cooling solutions if overclocking.
How do I optimize Raspberry Pi performance for smooth retro game emulation?
Performance optimization includes:
- Using a Raspberry Pi 4 or 5 with sufficient RAM
- Ensuring proper cooling (heatsinks, fan cases)
- Overclocking cautiously via RetroPie Setup or editing
/boot/config.txt - Tweaking emulator settings like internal resolution, video drivers, and frame skip
- Using a fast microSD card (UHS-I U3 or better)
- Disabling resource-heavy shaders or overlays if performance suffers
Always monitor temperature and stability when overclocking.
Are there legal considerations when using ROMs on Raspberry Pi emulators?
Yes. Downloading ROMs for games you do not own is illegal in most jurisdictions. Always use ROMs from games you legally own or seek out homebrew and public domain titles. Dumping your own cartridges using specialized hardware is the most legally sound way to obtain ROMs for personal use. Respecting copyright helps preserve the retro gaming community and supports developers.
How can I add new games (ROMs) to my RetroPie setup?
You can add ROMs via:
- USB Drive: Copy ROMs into a
retropie/roms/folder on a FAT32-formatted USB drive, plug it into the Pi, and RetroPie will copy the files automatically. - Network Share (SMB): Access the Pi’s shared folders over your home network (
\\retropieon Windows), and drag-and-drop ROMs directly into the appropriate system folders. - SCP or FTP: Use tools like WinSCP or FileZilla to transfer files over SSH.
Can I play multiplayer games online with Raspberry Pi retro emulators?
Yes! RetroArch supports Netplay, allowing you to play multiplayer games online with friends. All players must have the same ROM, emulator core, and RetroArch version. Setting up Netplay may require port forwarding or using relay servers to simplify connections. A stable, low-latency internet connection and wired Ethernet are recommended for the best experience.
What are some fun expansions or projects I can do beyond basic retro gaming?
You can build:
- Custom arcade cabinets or bartop machines with authentic controls
- Portable handheld retro consoles using Pi Zero or Compute Module
- Media centers integrating Kodi alongside RetroPie
- Network-attached storage (NAS) for centralized ROM libraries
- Smart home integrations with voice control and ambient lighting
These projects blend DIY electronics, woodworking, programming, and creativity.
📖 Reference Links and Resources
- Official Raspberry Pi Website: https://www.raspberrypi.com/
- RetroPie Official Site and Forums: https://retropie.org.uk/
- RetroPie Raspberry Pi Tutorial: https://www.raspberrypi.com/tutorials/retropie-raspberry-pi-tutorial/
- RetroPie Forum Discussion on Pi 5 Gaming OS: https://retropie.org.uk/forum/topic/35241/what-gaming-os-to-install-on-pi-5
- 8BitDo Official Website: https://www.8bitdo.com/
- Argon40 Official Website: https://argon40.com/
- Flirc Official Website: https://flirc.tv/
- Wagner’s TechTalk Powkiddy A12 Review: https://wagnerstechtalk.com/pka12/
- Balena Etcher: https://www.balena.io/etcher/
- Win32 Disk Imager: https://sourceforge.net/projects/win32diskimager/
- FileZilla: https://filezilla-project.org/
- WinSCP: https://winscp.net/eng/download.php
- PuTTY: https://www.chiark.greenend.org.uk/~sgtatham/putty/latest.html
Ready to embark on your retro gaming adventure? Your Raspberry Pi awaits — let the pixels fly! 🎮✨