Support our educational content for free when you purchase through links on our site. Learn more
🚀 Microcontroller Programming: The Ultimate 2026 Guide to Building Smart Devices
Ever wonder how your smart thermostat knows to turn on the heat before you even wake up, or how a tiny robot can navigate a maze without a human hand? The secret lies in microcontroller programming, the invisible art of whispering instructions to silicon brains. At Why Pi™, we’ve seen countless students go from staring blankly at a breadboard to building complex IoT ecosystems in just a few weeks. But here’s the twist: the barrier to entry has never been lower, yet the potential for innovation has never been higher.
In this comprehensive guide, we’re not just listing code snippets; we’re taking you on a journey from the 4-bit wonders of the 1970s to the AI-ready powerhouses of 2026. We’ll dissect the ESP32, Raspberry Pi Pico, and Arduino ecosystems, revealing why one might be perfect for your next project while the other is a trap for beginners. You’ll discover the 10 fundamental concepts that separate hobbyists from engineers, learn how to debug like a pro without tearing your hair out, and uncover the power management secrets that let your devices run for years on a single coin cell.
By the end of this article, you’ll have a clear roadmap to choose your first board, write your first firmware, and understand the communication protocols that make the Internet of Things tick. Whether you want to build a weather station, a home automation hub, or a custom robot, the foundation starts here. Ready to stop guessing and start building? Let’s dive in.
Key Takeaways
- Microcontrollers vs. Microprocessors: Understand the critical difference; microcontrollers are self-contained “computers on a chip” perfect for dedicated, low-power tasks, while microprocessors require external components for general computing.
- Choosing the Right Board: The ESP32 is the top pick for IoT and wireless projects, the Raspberry Pi Pico excels in speed and custom I/O, and the Arduino Uno remains the gold standard for absolute beginners.
- Master the Fundamentals: Success hinges on grasping GPIO, interrupts, PWM, and communication protocols (I2C, SPI, UART) before tackling complex firmware.
- Language Matters: C/C++ offers maximum performance and control, while MicroPython provides a faster, more accessible path for protyping and education.
- Power & Security: Modern embedded design demands low-power sleep modes for battery life and secure boot mechanisms to protect your intellectual property.
Recommended Starting Kits:
- Arduino Starter Kit: Amazon | Adafruit | Arduino Official
- ESP32 Development Board: Amazon | SparkFun | Espressif
- Raspberry Pi Pico W: Amazon | Adafruit | Raspberry Pi Official
Table of Contents
- ⚡️ Quick Tips and Facts
- 🕰️ A Brief History of Microcontroller Evolution: From 4-Bit Wonders to 32-Bit Powerhouses
- 🧠 Demystifying the Core: What Exactly is a Microcontroller and How Does It Differ from a Microprocessor?
- 🛠️ The Essential Toolkit: Choosing Your First Development Board and Hardware
- 💻 Software Ecosystem Deep Dive: IDEs, Compilers, and Programming Languages Explained
- 🚀 10 Fundamental Concepts Every Beginner Must Master in Embedded Systems
- 📝 Writing Your First Firmware: From “Hello World” to Blinking LEDs
- 🔌 Mastering Peripherals: GPIO, Timers, ADCs, and Communication Protocols
- 🐞 Debuging Like a Pro: Common Pitfalls, Tools, and Strategies for Troubleshooting Code
- ⚡️ Power Management and Low-Power Design Techniques for Battery-Operated Projects
- 🌐 Connecting the World: IoT Integration, Wi-Fi, Bluetooth, and Cloud Connectivity
- 🏆 Top 7 Microcontroller Families Compared: Arduino vs. ESP32 vs. STM32 vs. PIC vs. AVR vs. Raspberry Pi Pico vs. Teensy
- 🎓 Advanced Topics: Real-Time Operating Systems (RTOS), Interrupts, and Memory Management
- 🛡️ Security in Embedded Systems: Protecting Your Firmware from Hacks and Tampering
- 📚 Recommended Learning Resources, Books, and Online Courses
- ❓ Frequently Asked Questions About Microcontroller Programming
- 🔗 Reference Links and Further Reading
- 🏁 Conclusion: Your Journey from Novice to Embedded Engineer Starts Now
⚡️ Quick Tips and Facts
Before we dive into the deep end of the silicon ocean, let’s grab a life preserver. Here are some golden nugets from our engineers at Why Pi™ that will save you hours of frustration:
- Microcontrollers are not Microprocessors: A microcontroller (MCU) is a “computer on a chip” containing the CPU, memory, and I/O peripherals all in one. A microprocessor (like in your laptop) needs external chips for memory and I/O. Learn more about the difference here.
- The “Blink” is the “Hello World”: If you can’t make an LED blink, you can’t make a robot walk. It’s the universal rite of passage.
- Voltage Matters: Never feed 5V into a 3.3V pin without a level shifter. We’ve seen more fried chips than burnt toast in our lab! 🔥
- C is King, but Python is the Prince: While C/C++ offers raw speed and control, MicroPython is revolutionizing how beginners learn by letting you write code that looks like standard Python.
- Interrupts are Magic: Instead of constantly checking if a button is pressed (polling), let the microcontroller pause your code and handle the event instantly via interrupts.
For those eager to jump straight into the action, check out our guide on DIY Electronics to see how these concepts come to life in real projects.
🕰️ A Brief History of Microcontroller Evolution: From 4-Bit Wonders to 32-Bit Powerhouses

You might think microcontrollers are a modern invention, but their roots go back further than you’d expect. The story begins in the early 1970s, a time when computers filled entire rooms.
The Birth of the “Single-Chip Computer”
In 1971, Intel released the 404, the first commercially available microprocessor. But it wasn’t until 1976 that Intel introduced the 8048, widely considered the first true microcontroller. It integrated the CPU, RAM, ROM, and I/O on a single chip, designed specifically for keyboards and appliances.
“A microcontroller does not know what to do by itself. It’s your job to tell it what you want it to do.” — Build Electronic Circuits
The Rise of the 8-Bit Era
The 1980s saw the explosion of the 8-bit era. Microchip Technology (formerly Atmel) introduced the PIC series, and Atmel (now part of Microchip) launched the AVR architecture. These chips were cheap, reliable, and perfect for everything from washing machines to car engine controllers.
The 32-Bit Revolution
Fast forward to the 20s and 2010s. As IoT (Internet of Things) took off, the need for more processing power grew. ARM architecture took the stage, bringing 32-bit power to the masses. Chips like the STM32 and the ESP32 brought Wi-Fi, Bluetooth, and massive processing speeds to hobbyists and professionals alike.
Today, we are seeing the rise of RISC-V, an open-source architecture that promises to disrupt the industry just as ARM did decades ago. If you’re curious about how this evolution impacts current IoT Development, the shift to 32-bit has been the single biggest game-changer.
🧠 Demystifying the Core: What Exactly is a Microcontroller and How Does It Differ from a Microprocessor?
Let’s clear up the confusion once and for all. If you’ve ever stood in an electronics store staring at a shelf of chips wondering, “Which one do I buy?”, this section is for you.
The Analogy: The Chef vs. The Kitchen
Think of a Microprocessor (like the one in your PC) as a Master Chef. They are incredibly talented and fast, but they need a fully equipped kitchen (RAM, Hard Drive, Graphics Card) to do their job. Without these external components, the chef is useless.
A Microcontroller, on the other hand, is a Swiss Army Knife Chef. They come with their own tiny kitchen (RAM, Flash Memory, I/O ports) built right into their pocket. They can’t cook a 5-course banquet as fast as the Master Chef, but they can make a perfect sandwich (control a motor, read a sensor) anywhere, anytime, using very little power.
Comparison Table: Microcontroller vs. Microprocessor
| Feature | Microcontroller (MCU) | Microprocessor (MPU) |
|---|---|---|
| Integration | CPU, RAM, ROM, I/O one chip | CPU only; requires external chips |
| Power Consumption | Very Low (mW range) | High (W range) |
| Cost | Low ($0.50 – $10) | Higher ($5 – $50+) |
| Complexity | Simple, dedicated tasks | Complex, general-purpose computing |
| Real-Time Capability | Excellent (Deterministic) | Poor (OS overhead) |
| Best Use Case | Appliances, Sensors, Robotics | Laptops, Servers, Smartphones |
Why This Matters for You
If you are building a smart thermostat, you need a microcontroller. It needs to run for years on batteries and react instantly to a temperature change. If you are building a weather station that streams data to a cloud server and displays a graphical map, you might need a microprocessor (like the Raspberry Pi).
However, the line is blurring! Devices like the ESP32 are so powerful they can handle tasks that used to require a microprocessor, while still running on a coin cell battery.
🛠️ The Essential Toolkit: Choosing Your First Development Board and Hardware
So, you’ve decided to dive in. But wait! Do you buy an Arduino, an ESP32, or a Raspberry Pi Pico? The market is flooded with options, and choosing the wrong one can lead to a lot of “why isn’t this working?” moments.
The “Big Three” for Beginners
1. Arduino Uno R3 (The Classic)
The Arduino Uno is the Toyota Camry of the microcontroller world. Reliable, everywhere, and easy to fix. It uses the ATmega328P chip.
- Pros: Massive community, thousands of libraries, simple IDE.
- Cons: Limited memory, no built-in Wi-Fi/Bluetooth (needs shields), 8-bit architecture.
- Best For: Absolute beginners, simple sensors, LEDs.
2. ESP32 (The Powerhouse)
The ESP32 is the superhero of the hobbyist world. It has built-in Wi-Fi and Bluetooth, dual-core processing, and is incredibly cheap.
- Pros: Wireless connectivity, high speed, low power modes, supports MicroPython.
- Cons: Slightly steeper learning curve than Arduino, 3.3V logic (be careful with 5V sensors).
- Best For: IoT projects, smart home devices, complex sensors.
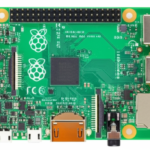
3. Raspberry Pi Pico (The New Kid)
Powered by the RP2040 chip (designed by Raspberry Pi themselves), this board is a beast. It has programmable I/O (PIO) which allows for custom hardware protocols.
- Pros: Dual-core ARM Cortex-M0+, 2MB SRAM, MicroPython support, very fast.
- Cons: No built-in Wi-Fi (unless you get the Pico W), newer ecosystem.
- Best For: High-speed data logging, complex timing, learning C/C++ and MicroPython.
Hardware Checklist
Before you start coding, ensure you have:
- USB Cable: Make sure it’s a data cable, not just a charging cable!
- Breadboard: For protyping without soldering.
- Jumper Wires: Male-to-male, male-to-female, and female-to-female.
- Multimeter: To check voltage and continuity.
- Logic Analyzer: (Optional but recommended) To see what’s happening on the wires.
Pro Tip: If you are looking for a specific board, check our Electronic Component Reviews for detailed breakdowns of the latest kits.
Where to Buy
- Arduino Uno R3: Amazon | Adafruit | Arduino Official
- ESP32 DevKit: Amazon | SparkFun | Espressif
- Raspberry Pi Pico: Amazon | Adafruit | Raspberry Pi Official
💻 Software Ecosystem Deep Dive: IDEs, Compilers, and Programming Languages Explained
You have the hardware, but now you need the brain. This is where the magic happens: writing code. But unlike writing a document in Word, microcontroller programming requires a specific workflow.
The Three-Step Process
As noted by experts at Build Electronic Circuits, the process is always:
- Write code on your computer.
- Compile the code into machine language (0s and 1s).
- Upload the binary file to the microcontroller.
Popular IDEs (Integrated Development Environments)
Arduino IDE
The most user-friendly option. It hides the complexity of the compiler and uploader.
- Best For: Beginners, rapid protyping.
- Language: C/C++ (simplified with Arduino libraries).
PlatformIO (for VS Code)
The professional’s choice. It runs inside Visual Studio Code and offers advanced features like debugging, version control, and multi-project management.
- Best For: Serious developers, large projects, multiple board support.
- Language: C/C++, MicroPython, Rust.
STM32CubeIDE
Specific to STMicroelectronics chips. It includes a graphical configuration tool that generates code for you.
- Best For: STM32 users, complex peripheral configuration.
MicroPython / Thony
If you prefer Python, Thony is a fantastic IDE that comes with MicroPython pre-installed. It allows you to write and run code directly on the chip.
- Best For: Python lovers, educational purposes.
Languages: C/C++ vs. Python vs. Assembly
| Language | Speed | Ease of Use | Memory Usage | Best Use Case |
|---|---|---|---|---|
| C/C++ | ⚡️⚡️⚡️ (Fastest) | 🧠 Hard | Low | Performance-critical, low-level hardware |
| MicroPython | 🐢 Moderate | 😊 Easy | High | Protyping, IoT, education |
| Assembly | ⚡️⚡️⚡️ (Fastest) | 🤯 Very Hard | Lowest | Legacy chips, extreme optimization |
Why Pi™ Insight: We recommend starting with C++ on Arduino or MicroPython on ESP32/Pico. C++ gives you the control you need to understand how the machine works, while MicroPython lets you build cool stuff quickly.
🚀 10 Fundamental Concepts Every Beginner Must Master in Embedded Systems
Before you write a single line of code, you need to understand the building blocks. These are the concepts that separate the “copy-pasters” from the true engineers.
- Variables and Data Types: Understanding
int,float,char, andbool. Why useintwhenbytesaves memory? - Control Flow:
if,else,switchstatements. Making decisions based on sensor data. - Lops:
forandwhileloops. Repeating actions without writing the same code 10 times. - Functions: Breaking code into reusable blocks. “Don’t Repeat Yourself” (DRY) is the golden rule.
- GPIO (General Purpose Input/Output): The pins that talk to the outside world. Setting them as
INPUTorOUTPUT. - Digital vs. Analog: Reading a button (digital) vs. reading a temperature sensor (analog).
- PWM (Pulse Width Modulation): Simulating analog output with digital signals (e.g., diming an LED).
- Interrupts: Handling events asynchronously. Why you shouldn’t use
delay()for critical tasks. - Communication Protocols: How chips talk to each other (UART, I2C, SPI).
- Memory Management: Understanding Flash (program storage) vs. RAM (data storage). Running out of memory is a common crash cause!
Curiosity Gap: You might wonder, “Why can’t I just use
delay()for everything?” We’ll reveal the dark side ofdelay()in the Interrupts section later. Spoiler: It makes your robot unresponsive!
📝 Writing Your First Firmware: From “Hello World” to Blinking LEDs
Let’s get our hands dirty. We are going to write the “Hello World” of the hardware world: Blinking an LED.
Step 1: The Setup
Connect your LED to a digital pin (e.g., Pin 13 on Arduino, which has a built-in LED) and the other leg to Ground (GND) via a 20-ohm resistor.
Step 2: The Code (C++ for Arduino)
void setup() {
 // Initialize the LED pin as an output
 pinMode(LED_BUILTIN, OUTPUT);
}

void loop() {
 digitalWrite(LED_BUILTIN, HIGH); // Turn the LED on
 delay(10); // Wait for 1 second
 digitalWrite(LED_BUILTIN, LOW); // Turn the LED off
 delay(10); // Wait for 1 second
}
Step 3: Compile and Upload
- Select your board in the IDE.
- Select the correct COM port.
- Click the Upload button (the right arrow).
What’s Happening?
setup(): Runs once when the board powers up. We tell the chip, “Hey, Pin 13 is an output!”loop(): Runs forever. We turn the light on, wait, turn it off, and wait again.
Why Pi™ Tip: If you are using an ESP32, the pin numbers are different, and you might need to install the board support first. Check out our IoT Development section for a guide on setting up the ESP32 in the Arduino IDE.
🔌 Mastering Peripherals: GPIO, Timers, ADCs, and Communication Protocols
Now that you can blink an LED, let’s make it do something useful. This is where peripherals come in.
GPIO (General Purpose Input/Output)
These are your digital hands. You can read a button press (Input) or turn on a motor (Output).
- Pull-up/Pull-down Resistors: Crucial for reading buttons. Without them, the pin “floats” and reads random values. Most MCUs have internal pull-ups you can enable in code.
ADC (Analog-to-Digital Converter)
Microcontrollers speak binary, but the world is analog. An ADC converts a voltage (0-3.3V or 0-5V) into a number (0-1023 or 0-4095).
- Use Case: Reading a temperature sensor or a potentiometer.
Timers and Counters
Timers allow you to measure time precisely without using delay().
- Use Case: Measuring how long a button was pressed, or generating a precise PWM signal.
Communication Protocols: The Language of Chips
- UART (Universal Asynchronous Receiver/Transmitter): Two wires (TX and RX). Used for talking to computers or GPS modules. Simple but slow.
- I2C (Inter-Integrated Circuit): Two wires (SDA and SCL). Great for connecting multiple sensors (like temperature, humidity, OLEDs) with just two wires.
- SPI (Serial Peripheral Interface): Four wires. Very fast, used for SD cards and displays.
Real-World Example: Imagine a weather station. It uses I2C to read a temperature sensor, SPI to write data to an SD card, and UART to send the data to a computer.
🐞 Debuging Like a Pro: Common Pitfalls, Tools, and Strategies for Troubleshooting Code
Nothing is more frustrating than code that doesn’t work. But debugging is where you learn the most.
Common Pitfalls
- The
delay()Trap: Usingdelay()blocks the entire processor. If you want to blink an LED and read a sensor at the same time,delay()will fail. Solution: Usemillis()for non-blocking timing. - Floating Pins: Forgetting to set a pin as
INPUT_PULLUPresults in erratic readings. - Voltage Mismatch: Connecting a 5V sensor to a 3.3V pin without a level shifter.
- Power Issues: Not providing enough current to motors or Wi-Fi modules, causing the board to reset.
Tools for Debuging
- Serial Monitor: The easiest tool. Print variables to your computer to see what’s happening.
- Logic Analyzer: A cheap USB device that visualizes signals on wires. You can see exactly when a button is pressed or when data is sent.
- Debugger (JTAG/SWD): Advanced tools that let you pause the code, step through line by line, and inspect variables in real-time.
Pro Tip: If your code compiles but the board does nothing, check your power supply first. 80% of “ghost” bugs are power-related!
⚡️ Power Management and Low-Power Design Techniques for Battery-Operated Projects
One of the biggest advantages of microcontrollers is their low power consumption. But if you want your device to run for years on a coin cell, you need to be smart.
Sleep Modes
Most MCUs have deep sleep modes where they consume microamps (µA) instead of milliamps (mA).
- Arduino: Use
LowPowerlibrary. - ESP32: Use
esp_sleep_enable_timer_wakeup(). - Raspberry Pi Pico: Use
sleep_ms().
Strategies
- Wake on Interrupt: Put the chip to sleep and wake it up only when a button is pressed or a sensor detects motion.
- Turn Off Peripherals: Disable Wi-Fi, Bluetooth, and unused sensors when not in use.
- Optimize Code: Run the code as fast as possible and go back to sleep.
Case Study: A smart door sensor that wakes up, checks if the door is open, sends a signal, and goes back to sleep in 10ms can last for 2 years on a CR2032 battery.
🌐 Connecting the World: IoT Integration, Wi-Fi, Bluetooth, and Cloud Connectivity
This is the era of the Internet of Things (IoT). Your microcontroller can now talk to the cloud, your phone, and other devices.
Wi-Fi and Bluetooth
- ESP32: The king of IoT. Built-in Wi-Fi and Bluetooth (Classic + BLE).
- Raspberry Pi Pico W: Added Wi-Fi to the Pico family.
- Arduino: Requires external modules like the ESP826 or WiFi101 shield.
Cloud Platforms
- Blynk: Great for mobile apps and quick protyping.
- AWS IoT / Google Cloud: For enterprise-grade projects.
- ThingSpeak: Excellent for data logging and visualization.
MQTT Protocol
The standard for IoT communication. It’s lightweight and perfect for unreliable networks.
- How it works: Devices “publish” data to a topic, and others “subscribe” to that topic.
Why Pi™ Insight: We love using MQTT with ESP32 for home automation. It’s fast, reliable, and works even if your internet flickers. Check out our IoT Development category for full tutorials on setting up an MQTT broker.
🏆 Top 7 Microcontroller Families Compared: Arduino vs. ESP32 vs. STM32 vs. PIC vs. AVR vs. Raspberry Pi Pico vs. Teensy
Let’s settle the debate once and for all. Which board should you choose?
Comparison Table
| Board | Chip | Architecture | Speed | RAM | Flash | Wi-Fi/BT | Best For |
|---|---|---|---|---|---|---|---|
| Arduino Uno | ATmega328P | 8-bit AVR | 16 MHz | 2 KB | 32 KB | No | Beginners, Simple Projects |
| ESP32 | ESP32 | 32-bit Xtensa | 160/240 MHz | 520 KB | 4 MB | Yes (Wi-Fi/BT) | IoT, Smart Home, AI |
| STM32 | STM32F103 | 32-bit ARM | 72 MHz | 20-64 KB | 64-512 KB | No (usually) | Industrial, Robotics |
| PIC | PIC16/18 | 8-bit | 20 MHz | 256 B – 4 KB | 2 KB – 128 KB | No | Legacy, Automotive |
| AVR | ATmega2560 | 8-bit AVR | 16 MHz | 8 KB | 256 KB | No | Complex Arduino projects |
| Raspberry Pi Pico | RP2040 | 32-bit ARM | 13 MHz | 264 KB | 2 MB | No (Pico W has Wi-Fi) | High-speed, Custom I/O |
| Tensy 4.1 | i.MX RT1062 | 32-bit ARM | 60 MHz | 512 KB | 8 MB | No | Audio, High-speed Data |
Detailed Analysis
Arduino (AVR)
- Pros: Unbeatable community support, huge library ecosystem.
- Cons: Limited performance, no native wireless.
- Verdict: Stick with this if you are just starting or need a simple, reliable controller.
ESP32
- Pros: Wireless built-in, powerful, cheap, supports MicroPython.
- Cons: 3.3V logic, slightly complex setup for beginners.
- Verdict: The best all-rounder for modern projects.
STM32
- Pros: Professional grade, huge range of chips, powerful.
- Cons: Steper learning curve, complex IDE (STM32CubeIDE).
- Verdict: For engineers building commercial products.
Raspberry Pi Pico
- Pros: Dual-core, programmable I/O (PIO), great MicroPython support.
- Cons: No Wi-Fi on the base model (get the Pico W).
- Verdict: The future of hobbyist microcontrollers.
🎓 Advanced Topics: Real-Time Operating Systems (RTOS), Interrupts, and Memory Management
Ready to level up? Let’s talk about RTOS.
What is an RTOS?
A Real-Time Operating System allows you to run multiple “tasks” simultaneously. Instead of writing one giant loop(), you create separate functions that run independently.
- FreeRTOS: The most popular open-source RTOS, supported by ESP32, STM32, and Teensy.
- Use Case: Running a motor control loop at 1kHz while simultaneously reading a sensor and updating a display.
Interrupts: The Secret Sauce
Interrupts allow the microcontroller to pause its current task to handle an urgent event.
- Example: A button press. Instead of checking the button in a loop, you set an interrupt. When the button is pressed, the code jumps to a special function, handles the event, and returns.
- Why it matters: It makes your system responsive.
Memory Management
- Stack vs. Heap: The stack is for local variables and function calls. The heap is for dynamic memory allocation (
malloc). - Memory Leaks: If you allocate memory and never free it, your program will eventually crash. This is a common bug in long-running IoT devices.
🛡️ Security in Embedded Systems: Protecting Your Firmware from Hacks and Tampering
As devices connect to the internet, security becomes critical.
Common Threats
- Firmware Extraction: Hackers reading your code from the chip.
- Man-in-the-Middle: Intercepting data between your device and the cloud.
- Physical Tampering: Modifying the hardware.
Protection Strategies
- Secure Boot: Ensures only signed, trusted firmware runs on the chip.
- Encryption: Encrypt data at rest and in transit (TLS/SSL).
- Read Protection: Lock the chip so no one can read the memory.
- Secure Elements: Use dedicated chips (like ATECC608A) for storing cryptographic keys.
Did you know? The ESP32 has built-in hardware encryption and secure boot capabilities, making it a great choice for secure IoT projects.
📚 Recommended Learning Resources, Books, and Online Courses
You don’t have to learn everything alone. Here are the best resources to accelerate your journey.
Books
- “Make: Getting Started with Arduino” by Massimo Banzi: The classic starter guide.
- “Mastering Microcontroller with Embedded C” by various authors: Deep dive into C programming.
- “Programming Embedded Systems” by Michael Barr: The bible for professional embedded engineers.
Online Courses
- Coursera: “Embedded Systems” by University of Texas.
- Udemy: “Mastering MicroPython” or “ESP32 IoT”.
- Arduino Project Hub: Free tutorials for every skill level.
Communities
- Reddit: r/arduino, r/embeded, r/esp32.
- Stack Overflow: For specific coding questions.
- Hackster.io: For project inspiration.
Why Pi™ Tip: Don’t just read—build! Join our DIY Electronics community to share your projects and get feedback.
❓ Frequently Asked Questions About Microcontroller Programming
What are common projects for microcontroller programming with Raspberry Pi?
While the Raspberry Pi is technically a microcomputer, it can run microcontroller-like tasks. Common projects include home automation hubs, media centers, and retro gaming consoles. However, for pure microcontroller tasks (like reading a sensor and controlling a motor), the Raspberry Pi Pico is often a better, more power-efficient choice.
How do I interface sensors with a microcontroller using Raspberry Pi?
If you are using the Raspberry Pi (the full computer), you can connect sensors via GPIO pins using Python libraries like RPi.GPIO or gpiozero. For the Pico, use MicroPython or C++ with the machine library. Always check the voltage levels!
What tools and software are needed for microcontroller programming on Raspberry Pi?
For the Pico, you need the Thony IDE (for MicroPython) or VS Code with the Pico SDK (for C++). For the full Raspberry Pi, you can use VS Code, Thony, or even C++ with gcc.
Can I use Python for microcontroller programming with Raspberry Pi?
Yes! MicroPython is a lean implementation of Python 3 that runs on microcontrollers. It is perfect for the Raspberry Pi Pico and ESP32. It’s easier to learn than C++ but slightly slower.
What are the differences between microcontroller programming and Raspberry Pi programming?
Microcontroller programming (C/C++/MicroPython) is low-level, real-time, and power-efficient. Raspberry Pi programming (Python/C++/Linux) is high-level, runs an OS, and is great for complex tasks like image processing or web servers.
How do I get started with microcontroller programming on a Raspberry Pi?
Buy a Raspberry Pi Pico or Pico W. Download Thony IDE, install the MicroPython firmware, and start writing simple scripts like blinking an LED.
What programming languages are best for microcontroller programming?
C/C++ is the industry standard for performance and control. MicroPython is excellent for beginners and rapid protyping. Assembly is used for extreme optimization but is rarely needed for hobbyists.
How do I program a microcontroller on Raspberry Pi?
You can use the Raspberry Pi as a programmer for other microcontrollers (like Arduino) via USB, or you can program the Pico directly using its USB bootloader.
What is the difference between Raspberry Pi and microcontroller programming?
The Raspberry Pi (full version) is a computer running Linux. Microcontroller programming is about writing firmware for chips that run a single task without an OS. The Pico bridges this gap.
Can I use MicroPython for microcontroller programming on Raspberry Pi?
Absolutely! The Raspberry Pi Pico was designed with MicroPython in mind. It’s one of the best platforms to learn MicroPython.
Which microcontrollers are best compatible with Raspberry Pi projects?
The ESP32 and Raspberry Pi Pico are the most popular. They can communicate with the full Raspberry Pi via UART, I2C, or SPI to handle real-time tasks while the Pi handles the heavy lifting.
How to interface an Arduino with Raspberry Pi for microcontroller programming?
Connect the Arduino’s TX to the Pi’s RX and vice versa (UART). Use Python on the Pi to send commands to the Arduino, which acts as a sensor hub or motor controller.
What are the best IDEs for microcontroller programming with Raspberry Pi?
Thony is the best for MicroPython. VS Code with the PlatformIO extension is the best for C/C++.
How to learn microcontroller programming using Raspberry Pi GPIO pins?
Start with the Raspberry Pi Pico. Use the MicroPython REPL in Thony to control GPIO pins directly. Try blinking an LED, reading a button, and then move on to sensors.
🔗 Reference Links and Further Reading
- Microcontroller Programming: Mastering the Foundation of Embedded Systems – Wevolver
- Arduino Official Website – Arduino.cc
- Espressif Systems (ESP32) – Espressif.com
- Raspberry Pi Foundation – Raspberrypi.com
- STMicroelectronics (STM32) – St.com
- Microchip Technology – Microchip.com
- Build Electronic Circuits – Build-electronic-circuits.com
- MicroPython Documentation – Micropython.org
🏁 Conclusion: Your Journey from Novice to Embedded Engineer Starts Now

We started this journey by asking a simple question: Can you really learn to program a microcontroller? The answer is a resounding YES.
From the humble 4-bit chips of the 70s to the powerful, Wi-Fi-enabled ESP32 and Raspberry Pi Pico of today, the world of microcontrollers has never been more accessible. You don’t need a degree in electrical engineering to blink an LED, control a motor, or build a smart home device. You just need curiosity, the right tools, and a willingness to learn from your mistakes.
Our Final Recommendation:
- For Absolute Beginners: Start with an Arduino Uno. It’s forgiving, has endless tutorials, and teaches you the basics without the headache of complex setup.
- For IoT Enthusiasts: Grab an ESP32. The built-in Wi-Fi and Bluetooth open up a world of possibilities, and the community support is incredible.
- For the Future-Proof Learner: Get a Raspberry Pi Pico W. It combines the power of ARM with the ease of MicroPython and the unique programmable I/O features.
Remember, the best way to learn is by doing. Don’t just read about it—build it. Break it. Fix it. Repeat.
And if you ever get stuck, remember the words of the experts: “A microcontroller does not know what to do by itself. It’s your job to tell it what you want it to do.” So, what will you tell it to do first?
Happy coding, and welcome to the world of embedded systems! 🚀🤖