Support our educational content for free when you purchase through links on our site. Learn more
🚀 How to Set Up a Raspberry Pi for Beginners: The Ultimate 2026 Guide
Remember the first time you tried to build a computer from scratch? For many of us at Why Pi™, it started with a $35 credit-card-sized board that promised to teach the world to code. But let’s be honest: the initial setup can feel like trying to assemble IKEA furniture without the instructions. You plug it in, nothing happens. You check the power, it’s fine. You scream at the black screen. Sound familiar?
Don’t worry, you’re not alone. In fact, we’ve seen thousands of beginners hit this exact wall. The good news? Setting up a Raspberry Pi in 2026 is easier than ever, thanks tools like the Raspberry Pi Imager that handle the heavy lifting for you. Whether you want to build a retro gaming console, a home server, or just learn Python, this guide walks you through every single step—from unboxing your first board to logging in remotely without a monitor. We’ll even reveal the “magic trick” that lets you configure Wi-Fi and SSH before the Pi even boots, saving you hours of troubleshooting.
Ready to turn that little green board into your new favorite toy? Let’s get started.
Key Takeaways
- Power is Critical: Always use a 5V/5A USB-C PD power supply for the Pi 5 to avoid performance throttling and under-voltage warnings.
- Speed Matters: Choose a Class 10, A2-rated MicroSD card (32GB or 64GB) to ensure a smooth, responsive operating system.
- Headless Setup is Easy: You can configure Wi-Fi and SSH directly in the Raspberry Pi Imager, allowing you to control your Pi without a monitor from the very first boot.
- Start with the Right OS: Raspberry Pi OS (64-bit) is the recommended starting point for beginners due to its pre-installed tools and stability.
- Security First: Immediately change the default password and disable default credentials to protect your device from network threats.
👉 Shop Essential Starter Kits on:
- Official Raspberry Pi Kits: Amazon | Raspberry Pi Official Store
- Canakit Raspberry Pi 5 Kits: Amazon | Canakit Official
- SanDisk Extreme MicroSD Cards: Amazon | SanDisk Official
Table of Contents
- ⚡️ Quick Tips and Facts
- 📜 From Silicon Valley to Your Desk: A Brief History of the Raspberry Pi
- 🛒 The Ultimate Beginner’s Shopping List: What You Actually Need to Get Started
-
- Choosing the Right Model: Pi 4 vs. Pi 5 vs. Zero 2 W
-
- Power Supply Essentials: Why Your Phone Charger Might Fail
-
- MicroSD Cards: Speed Classes and Capacity Explained
-
- Case Selection: Cooling, Aesthetics, and Protection
-
- Peripherals: Keyboard, Mouse, and Monitor Compatibility
- 💾 Installing the Operating System: The Raspberry Pi Imager Guide
-
- Downloading and Launching the Raspberry Pi Imager
-
- Selecting Your OS: Raspberry Pi OS vs. Ubuntu vs. RetroPie
-
- Writing the Image to Your MicroSD Card
-
- Advanced Configuration: Enabling SSH and Wi-Fi Before Booting
- 🚀 First Boot and Initial Configuration: Getting Your Pi Online
-
- Connecting to Your Network: Wi-Fi vs. Ethernet
-
- Updating Your System: The
sudo apt updateRitual
- Updating Your System: The
-
- Changing Your Password and Username
-
- Expanding the Filesystem: Making Room for More Projects
- 🖥️ Desktop Environment vs. Command Line: Navigating Your New OS
- 🔒 Securing Your Raspberry Pi: Essential Safety First Steps
-
- Disabling Default Credentials
-
- Setting Up SSH Keys for Passwordless Login
-
- Configuring the Firewall (UFW)
-
- Keeping Your System Updated Automatically
- 🌐 Setting Up Headless Access: Controlling Your Pi Without a Monitor
-
- What is Headless Mode and Why Use It?
-
- Configuring Wi-Fi and SSH via the Imager
-
- Finding Your Pi’s IP Address on the Network
-
- Connecting via Terminal (Mac/Linux) and PowerShell (Windows)
- 🛠️ Essential Software and Tools Every Beginner Should Install
-
- Text Editors: Nano, Vim, and VS Code Remote
-
- Package Managers: Understanding
aptandpip
- Package Managers: Understanding
-
- Remote Desktop: VNC and RDP Setup
-
- Media Centers: Installing Kodi or Plex
- 🏗️ Your First Projects: From Blinking LEDs to Home Automation
-
- GPIO Basics: Lighting Up an LED with Python
-
- Building a Simple Weather Station
-
- Creating a Retro Gaming Console with RetroPie
-
- Setting Up a Home Server (Pi-hole or Nextcloud)
- ❓ Troubleshooting Common Beginner Pitfalls
-
- “No Signal” on Your Monitor: Cable and Resolution Checks
-
- Power Issues: Brownouts and Under-voltage Warnings
-
- SD Card Corruption: How to Recover and Prevent It
-
- Wi-Fi Connection Drops and IP Conflicts
- 🧠 Quick Tips and Facts: The Insider Secrets
- 🏁 Conclusion: Your Journey into the World of Single-Board Computers Begins Now
- 🔗 Recommended Links
- ❓ FAQ: Frequently Asked Questions
- 📚 Reference Links
⚡️ Quick Tips and Facts
Before we dive into the deep end of the Raspberry Pi pool, let’s splash around with some critical facts that will save you hours of frustration. We’ve seen too many beginners plug in a phone charger, scream at a black screen, and wonder why their $35 computer won’t turn on. Don’t be that person.
Here is the Why Pi™ cheat sheet for your first setup:
| Fact | Why It Matters |
|---|---|
| Power is King | ❌ Your old phone charger is likely not enough. The Pi 5 needs a 5V/5A USB-C PD supply. Using a weak supply causes “under-voltage” warnings (a little lightning bolt icon) and throttles performance. |
| SD Card Speed | ❌ A cheap, slow card will make your OS feel like it’s running on dial-up. Look for A2 rated cards (Application Performance Class 2). |
| The “Last” Step | ✅ Always connect the power cable last. Connecting peripherals first prevents boot loops and HDMI handshake issues. |
| OS Choice | ✅ Raspberry Pi OS is the gold standard for beginners. It’s pre-configured, stable, and has the best support. |
| Headless is Easy | ✅ You don’t need a monitor! You can set up Wi-Fi and SSH before the Pi even boots using the Imager. |
Pro Tip: If you see a lightning bolt icon in the top right corner of your screen, your power supply is insufficient. Swap it immediately!
For a deeper dive into the ecosystem, check out our comprehensive guide on Raspberry Pi at Why Pi™.
📜 From Silicon Valley to Your Desk: A Brief History of the Raspberry Pi

You might think the Raspberry Pi is just a trendy gadget for techies, but its origins are deeply rooted in education. In the early 20s, the founders of the Raspberry Pi Foundation noticed a worrying trend: students were arriving at university with zero coding experience. They were used to playing games, not creating them.
The goal was simple but ambitious: create a $25 computer that was so affordable and accessible that schools could buy them by the dozen, and kids could experiment without fear of breaking expensive hardware.
The Evolution of the Board
- 2012: The original Raspberry Pi 1 Model B launched. It was the size of a credit card, had 256MB of RAM, and changed the world of DIY electronics forever.
- 2014: The Pi 2 arrived with a quad-core processor, finally making it viable for basic desktop tasks.
- 2016: The Pi 3 introduced built-in Wi-Fi and Bluetooth, eliminating the need for dongles.
- 2019: The Pi 4 brought USB 3.0 and dual 4K display support, effectively turning it into a legitimate desktop replacement.
- 2023: The Pi 5 shattered performance barriers, offering a 2-3x speed increase over the Pi 4, making it a powerhouse for home servers and retro gaming.
Did you know? The name “Raspberry” was chosen to honor the tradition of naming computers after fruits (like the Acorn Apple, Commodore, and Tangerine). The “Pi” stands for the Python programming language, which was the primary language the founders wanted to promote.
If you’re curious about the latest shifts in the industry, read our latest Electronics Industry News to see how the Pi is influencing global tech trends.
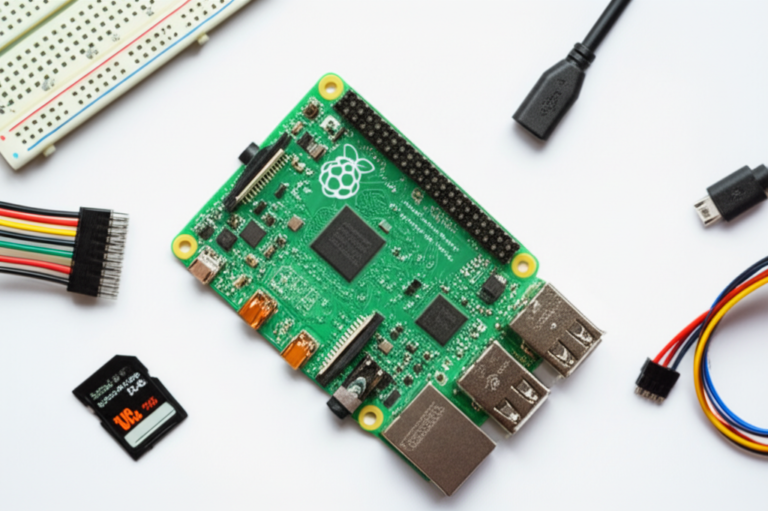
🛒 The Ultimate Beginner’s Shopping List: What You Actually Need to Get Started
So, you’ve decided to jump in. But wait! Do you have everything? A common mistake is buying the board and forgetting the power supply, only to realize your “computer” is just a brick.
Let’s break down exactly what you need. We’ve rated the critical components based on our engineering team’s experience.
Component Rating Table
| Component | Importance (1-10) | Why It Matters |
|---|---|---|
| Raspberry Pi Board | 10 | The brain. Choose wisely based on your project. |
| Power Supply | 10 | Critical. The wrong one kills performance. |
| MicroSD Card | 9 | The hard drive. Speed determines OS smoothness. |
| Case & Cooling | 8 | Prevents overheating, especially on Pi 5. |
| HDMI Cable | 7 | Needs to be Micro-HDMI for Pi 4/5, Standard for older models. |
| Keyboard/Mouse | 6 | USB is standard; Bluetooth works but needs setup. |
| Monitor | 6 | Any HDMI monitor works. |
1. Choosing the Right Model: Pi 4 vs. Pi 5 vs. Zero 2 W
The first decision is the most important. As noted in our analysis of the “first video” perspective, you can’t add more memory later, so choose the RAM that fits your future needs.
- Raspberry Pi 5 (8GB or 4GB): The current flagship. If you want a desktop replacement, a media center, or a serious home server, get this. It’s fast, but it runs hot and needs a fan.
- Raspberry Pi 4 (4GB or 8GB): Still a beast. If you find one at a good price, it’s perfect for 90% of beginner projects. It’s slightly slower than the Pi 5 but runs cooler.
- Raspberry Pi Zero 2 W: Tiny, cheap, and surprisingly capable. Great for headless projects (no monitor), robotics, or portable devices. Not recommended for a full desktop experience.
Why Pi™ Insight: We recommend the Pi 5 4GB as the sweet spot. It handles web browsing and coding comfortably without the premium price of the 8GB model, which is often overkill for beginners.
2. Power Supply Essentials: Why Your Phone Charger Might Fail
This is where most beginners fail. The Raspberry Pi 5 requires a USB-C Power Delivery (PD) supply capable of delivering 5V/5A (27W).
- ❌ The Trap: Using a standard 5V/2A phone charger. The Pi will boot, but you’ll see the lightning bolt icon, and the CPU will throttle to 60MHz. It will feel sluggish.
- ✅ The Fix: Buy the official Raspberry Pi 27W USB-C Power Supply or a high-quality third-party PD charger (like Anker or UGREEN) that explicitly supports 5A.
👉 Shop Power Supplies on:
- Official Power Supply: Amazon | Raspberry Pi Official Store
- Anker 51 (PD): Amazon | Anker Official
3. MicroSD Cards: Speed Classes and Capacity Explained
The OS runs directly off the SD card. If the card is slow, the whole system is slow.
- Capacity: 16GB is the minimum, but 32GB or 64GB is recommended for future-proofing.
- Speed Class: Look for Class 10 and A2 rating. A2 means the card is optimized for running applications, not just storing files.
- Brands: SanDisk, Samsung, and Kingston are reliable. Avoid no-name brands found at gas stations.
👉 Shop MicroSD Cards on:
- SanDisk Extreme A2: Amazon | SanDisk Official
- Samsung EVO Select: Amazon | Samsung Official
4. Case Selection: Cooling, Aesthetics, and Protection
The Pi 5 runs significantly hotter than its predecessors. A case isn’t just for looks; it’s for thermal management.
- Passive Cases: Aluminum cases that act as heatsinks. Good for Pi 4, risky for Pi 5 under load.
- Active Cases: Cases with built-in fans (like the Argon ONE or Flirc cases). Essential for Pi 5 if you plan on heavy usage.
👉 Shop Cases on:
- Argon ONE M.2 Case: Amazon | Argon40 Official
- Flirc Raspberry Pi 5 Case: Amazon | Flirc Official
5. Peripherals: Keyboard, Mouse, and Monitor Compatibility
- HDMI Cables: The Pi 4 and 5 use Micro-HDMI ports. You need a Micro-HDMI to HDMI cable. Don’t try to use a standard HDMI cable; it won’t fit!
- USB vs. Bluetooth: For the absolute first boot, use USB keyboard and mouse. Bluetooth requires a driver setup that can be tricky for a fresh install.
💾 Installing the Operating System: The Raspberry Pi Imager Guide
Okay, you have your hardware. Now, how do we make it a computer? We need an Operating System (OS). While you could use a traditional installer, the Raspberry Pi community has developed a tool that makes this incredibly easy: Raspberry Pi Imager.
1. Downloading and Launching the Raspberry Pi Imager
Head over to the official Raspberry Pi website and download the Raspberry Pi Imager. It’s free and available for Windows, macOS, and Linux.
- Why it’s great: It automatically detects your SD card, downloads the correct OS, writes it, and even lets you configure settings before you write.
2. Selecting Your OS: Raspberry Pi OS vs. Ubuntu vs. RetroPie
When you click “Choose OS,” you’ll see a list.
- Raspberry Pi OS (Recommended): This is the official OS. It comes with a desktop, web browser, and coding tools pre-installed. Start here.
- Raspberry Pi OS (Lite): No desktop. Just a command line. Great for servers, but not for beginners learning to code visually.
- Ubuntu: A popular Linux distro. Good if you want to learn standard Ubuntu commands, but less optimized for Pi hardware out of the box.
- RetroPie: Specialized for retro gaming. Only choose this if your only goal is gaming.
3. Writing the Image to Your MicroSD Card
- Insert your SD card into your computer.
- Open Imager and click Choose Storage. Select your SD card. ⚠️ WARNING: Double-check you selected the SD card, not your computer’s hard drive!
- Click Choose OS and select Raspberry Pi OS (64-bit).
- Click WRITE.
4. Advanced Configuration: Enabling SSH and Wi-Fi Before Booting
This is the magic trick that saves time. Before you click “Write,” click the Settings (Gear Icon) in the bottom right.
- Set Hostname: Name your Pi (e.g.,
mypitv). - Set Username/Password: Create a secure user account.
- Configure Wi-Fi: Enter your SSID and password.
- Enable SSH: This allows you to control the Pi remotely later.
- Set Locale: Choose your keyboard layout and timezone.
Once configured, click Write. The tool will download the OS, apply your settings, and verify the write.
Curiosity Check: You might wonder, “Why configure Wi-Fi before booting?” If you don’t, you’ll have to connect a monitor and keyboard just to type in your Wi-Fi password. By doing it in the Imager, you can plug the Pi in, and it will connect to the internet automatically. We’ll explain how to access it without a monitor in the “Headless” section later!
🚀 First Boot and Initial Configuration: Getting Your Pi Online
The moment of truth. You’ve flashed the card, inserted it into the slot on the underside of the Pi, and connected your peripherals.
1. Connecting to Your Network: Wi-Fi vs. Ethernet
- Ethernet: Plug in a cable. It just works.
- Wi-Fi: If you configured it in the Imager, wait 2-3 minutes. The Pi will connect automatically. If you didn’t, you’ll need to connect a monitor to set it up via the desktop wizard.
2. Updating Your System: The sudo apt update Ritual
Once you see the desktop (or log in via terminal), the first thing you should do is update the software. The OS on the SD card might be weeks old.
Open the Terminal (the black icon with >_) and type:
sudo apt update && sudo apt full-upgrade -y
sudo: Run as administrator.apt update: Check for new software versions.full-upgrade: Install the updates.-y: Automatically say “yes” to prompts.
This process might take 10-20 minutes. Grab a coffee! ☕
3. Changing Your Password and Username
If you didn’t set a custom user in the Imager, the default is pi with the password raspberry. Change this immediately!
- Why? It’s a security nightmare. Anyone on your network can guess these defaults.
- How? Run
sudo raspi-config, go to System Options > Password, and set a strong one.
4. Expanding the Filesystem: Making Room for More Projects
Sometimes, the OS doesn’t automatically use the full capacity of your SD card.
- Check: Run
df -hin the terminal. If your root partition (/) is smaller than your card size, you need to expand it. - Fix: In
sudo raspi-config, go to System Options > Expansion > Expand Filesystem. Reboot, and you’ll have all your space back.
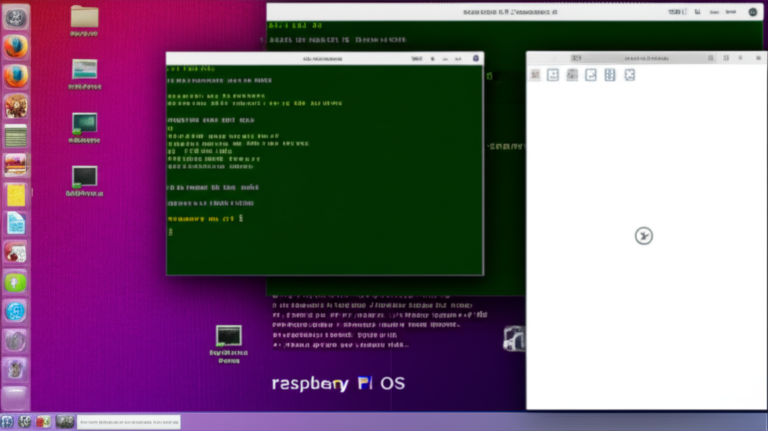
🖥️ Desktop Environment vs. Command Line: Navigating Your New OS
Welcome to Linux! You might be intimidated by the black screen with white text, but don’t worry.
The Desktop Experience
Raspberry Pi OS comes with a desktop environment that looks surprisingly like Windows or macOS.
- The Menu: Click the Raspberry icon (top left) to find apps like the Web Browser (Chromium), Terminal, Text Editor, and Scratch (for coding).
- File Manager: Just like Windows Explorer, you can drag and drop files.
- Settings: Use the Control Panel to change Wi-Fi, Bluetooth, and display settings.
The Command Line (Terminal)
The terminal is where the real power lies. It’s not scary; it’s just a different way to talk to the computer.
ls: List files in the current folder.cd: Change directory (e.g.,cd Documents).sudo: Run a command with superuser privileges.nano: A simple text editor to write code or config files.
Why learn the command line? Even if you use the desktop, you’ll need the terminal for advanced tasks like installing server software, managing GPIO pins, or troubleshooting. It’s the universal language of Linux.
🔒 Securing Your Raspberry Pi: Essential Safety First Steps
You wouldn’t leave your front door unlocked, right? Don’t leave your Pi exposed.
1. Disabling Default Credentials
As mentioned, change the pi user and raspberry password. If you enabled SSH, this is non-negotiable.
2. Setting Up SSH Keys for Passwordless Login
If you plan to access your Pi remotely, SSH keys are safer than passwords.
- How: Generate a key pair on your main computer (
ssh-keygen) and copy the public key to the Pi (ssh-copy-id pi@your-pi-ip). - Benefit: You can log in without typing a password, and it’s immune to brute-force attacks.
3. Configuring the Firewall (UFW)
Linux has a built-in firewall called UFW (Uncomplicated Firewall).
- Enable it:
sudo ufw enable - Allow SSH:
sudo ufw allow ssh - Status:
sudo ufw status
This blocks all incoming connections except the ones you explicitly allow.
4. Keeping Your System Updated Automatically
Set up unattended-upgrades to automatically install security patches.
- Run
sudo apt install unattended-upgrades - Configure it in
/etc/apt.conf.d/50unattended-upgrades.
🌐 Setting Up Headless Access: Controlling Your Pi Without a Monitor
This is the section many beginners dread, but it’s actually the colest part. “Headless” means running the Pi without a monitor, keyboard, or mouse. You control it from your laptop or phone.
1. What is Headless Mode and Why Use It?
- Space Saving: Perfect for media centers, servers, or robotics where you don’t need a screen.
- Cost: Save money on a monitor and cables.
- Convenience: Access your Pi from anywhere on your network.
2. Configuring Wi-Fi and SSH via the Imager
We touched on this earlier, but let’s be precise.
- Open Raspberry Pi Imager.
- Click the Gear Icon (Settings).
- Hostname: Set a name (e.g.,
myserver). - Wi-Fi: Enter your SSID and password. Crucial: Ensure the country code matches your location.
- Enable SSH: Check the box. Select “Use password authentication” for now.
- Write the image.
3. Finding Your Pi’s IP Address on the Network
Once the Pi boots, you need its IP address to connect.
- Method A (Router): Log into your router’s admin page (usually
192.168.1.1) and look for “Connected Devices.” Find your Pi by the hostname. - Method B (mDNS): If you set the hostname to
myserver, you can often just typemyserver.localin your terminal.
4. Connecting via Terminal (Mac/Linux) and PowerShell (Windows)
- Mac/Linux: Open Terminal and type:
ssh [email protected](replace with your actual hostname). - Windows: Open PowerShell and type:
ssh [email protected]. - First Login: It will ask “Are you sure you want to continue connecting?” Type
yes. Then enter your password. - Success: You are now inside your Pi, with no monitor attached! 🎉
Troubleshooting Tip: If
myserver.localdoesn’t work, try finding the IP address via your router and usessh [email protected].
🛠️ Essential Software and Tools Every Beginner Should Install
Your Pi is ready, but it’s a bit bare. Let’s install the tools that make it a powerhouse.
1. Text Editors: Nano, Vim, and VS Code Remote
- Nano: Built-in, simple, perfect for quick edits.
- Vim: Powerful but has a steep learning curve.
- VS Code Remote: The game changer. Install the “Remote – SSH” extension on your main computer’s VS Code. You can edit files on your Pi as if they were on your desktop, with syntax highlighting and auto-complete.
2. Package Managers: Understanding apt and pip
apt: The Linux package manager. Usesudo apt install [package-name]to install software (e.g.,sudo apt install python3-pip).pip: The Python package manager. Usepip3 install [package-name]to install Python libraries.
3. Remote Desktop: VNC and RDP Setup
If you prefer a graphical interface over the command line, enable VNC.
- Run
sudo raspi-config. - Go to Interface Options > VNC > Enable.
- Download RealVNC Viewer on your computer.
- Connect to
myserver.local. You’ll see the Pi’s desktop on your screen!
4. Media Centers: Installing Kodi or Plex
Turn your Pi into a streaming beast.
- Kodi: Pre-installed on LibreELEC (a specialized OS), or install via
sudo apt install kodi. - Plex: Install the Plex Media Server on your Pi and stream your movies to your TV.
🏗️ Your First Projects: From Blinking LEDs to Home Automation
You’ve set it up. Now, what do you do with it?
1. GPIO Basics: Lighting Up an LED with Python
The GPIO (General Purpose Input/Output) pins are the magic interface for electronics.
- What you need: An LED, a 30-ohm resistor, and jumper wires.
- The Code:
import RPi.GPIO as GPIO
import time

GPIO.setmode(GPIO.BCM)
GPIO.setup(18, GPIO.OUT)

while True:
GPIO.output(18, GPIO.HIGH)
time.sleep(1)
GPIO.output(18, GPIO.LOW)
time.sleep(1)
- Result: Your LED blinks! This is the “Hello World” of hardware.
2. Building a Simple Weather Station
Connect a DHT1 or DHT2 sensor to the GPIO pins. Write a Python script to read temperature and humidity, then display it on a small LCD screen or send it to a web dashboard.
3. Creating a Retro Gaming Console with RetroPie
Install RetroPie (a specialized OS image). Connect a USB controller, and you can play games from the NES, SNES, Sega Genesis, and more. It’s the ultimate nostalgia machine.
4. Setting Up a Home Server (Pi-hole or Nextcloud)
- Pi-hole: Blocks ads on your entire network. It’s like a firewall for ads.
- Nextcloud: Your own private cloud storage. No more Google Drive or Dropbox!
❓ Troubleshooting Common Beginner Pitfalls
Even the best engineers hit snags. Here’s how to fix the most common issues.
1. “No Signal” on Your Monitor: Cable and Resolution Checks
- Check the cable: Are you using Micro-HDMI for Pi 4/5?
- Check the port: Pi 4/5 has two HDMI ports. Try HDMI0 (the one closer to the USB ports).
- Resolution: If the monitor doesn’t support the default resolution, edit the
config.txtfile in the boot partition (on your computer) to force a lower resolution.
2. Power Issues: Brownouts and Under-voltage Warnings
- Symptom: Lightning bolt icon in the corner.
- Fix: Unplug and use a 5V/5A power supply. Do not use a long, thin USB cable; use a short, thick one.
3. SD Card Corruption: How to Recover and Prevent It
- Cause: Pulling the power without shutting down properly.
- Prevention: Always run
sudo shutdown -h nowbefore unplugging. - Recovery: If the Pi won’t boot, re-flash the SD card. If you need data, use a card reader on another computer to recover files from the
bootpartition (the only one visible on Windows/Mac).
4. Wi-Fi Connection Drops and IP Conflicts
- Fix: Assign a Static IP to your Pi in your router settings so it always has the same address.
- Driver issues: Rare on Raspberry Pi OS, but if Wi-Fi is flaky, check for firmware updates:
sudo rpi-eprom-update -a.
🧠 Quick Tips and Facts: The Insider Secrets
We’ve saved the best for last. Here are some pro secrets from the Why Pi™ team:
- The “Boot” Partition: When you plug the SD card into your computer, you’ll see a small partition called
boot. This is where you can editconfig.txtto change settings like overclocking or enabling cameras without booting the Pi. - Overclocking: You can make your Pi 5 faster by editing
config.txt. But be careful! It generates more heat. Only do this if you have a good cooling solution. - Backup Images: Once you have a Pi set up perfectly, use Win32 Disk Imager or
ddto create a backup image of the SD card. If it corrupts later, you can restore it in minutes. - Community is Key: If you get stuck, the Raspberry Pi Forums are your best friend. Search before you ask!
Final Thought: The Raspberry Pi is more than a computer; it’s a gateway to understanding how the digital world works. Whether you’re building a robot, a server, or just learning to code, the journey is the reward.
🏁 Conclusion: Your Journey into the World of Single-Board Computers Begins Now

You’ve made it! From unboxing your Raspberry Pi to configuring it headlessly and lighting up your first LED, you’ve taken the first steps into a world of infinite possibilities.
The Verdict:
The Raspberry Pi is unbeatable for beginners. It’s affordable, powerful, and supported by a massive community. While the Pi 5 offers incredible speed, the Pi 4 remains a fantastic value for most users. The key to success isn’t just the hardware; it’s the power supply and the SD card. Don’t skimp on those!
Our Recommendation:
Start with the Raspberry Pi 5 (4GB) if you want a desktop experience, or the Pi 4 (4GB) if you’re on a budget. Pair it with an official 27W power supply, a SanDisk Extreme A2 64GB card, and a case with a fan. Install Raspberry Pi OS, enable SSH, and start exploring.
You might have wondered earlier: “Can I really do this without a monitor?” The answer is a resounding yes. With the Imager’s pre-configuration, you can have a fully functional, headless server up and running in under 15 minutes.
The only thing left to do is start your first project. Whether it’s a weather station, a retro gaming console, or a smart home hub, the Pi is ready. What will you build?
🔗 Recommended Links
Ready to get your hands dirty? Here are the essential tools and resources we recommend.
👉 Shop Raspberry Pi Kits on:
- Official Raspberry Pi Starter Kit: Amazon | Raspberry Pi Official Store
- Canakit Raspberry Pi 5 Kit: Amazon | Canakit Official
👉 Shop Essential Accessories:
- SanDisk Extreme MicroSD Cards: Amazon | SanDisk Official
- Anker 27W USB-C Power Supply: Amazon | Anker Official
- Argon ONE Case (Pi 5): Amazon | Argon40 Official
Books to Master Your Pi:
- “Raspberry Pi for Beginners” by Gareth Halfacree: Amazon
- “The Raspberry Pi Cookbook” by Simon Monk: Amazon
❓ FAQ: Frequently Asked Questions

What is the best Raspberry Pi model for beginners?
H3: What is the best Raspberry Pi model for beginners?
For most beginners, the Raspberry Pi 5 (4GB) is the best choice. It offers the latest performance, supports dual 4K displays, and has enough power for desktop use, coding, and home servers. If you are on a tight budget or just want to learn electronics, the Raspberry Pi 4 (4GB) is still an excellent, cost-effective alternative. Avoid the Pi Zero 2 W for your first desktop setup, as it lacks the power for a smooth graphical experience.
Read more about “🚀 8 Raspberry Pi Projects to Master in 2026”
How do I install Raspberry Pi OS on a new SD card?
H3: How do I install Raspberry Pi OS on a new SD card?
- Download the Raspberry Pi Imager from the official website.
- Insert your MicroSD card into your computer.
- Open Imager, select Raspberry Pi OS as the OS, and your SD card as the storage.
- Click the Settings (Gear) icon to configure Wi-Fi, SSH, and user credentials.
- Click Write and wait for the process to finish.
- Insert the card into the Pi and power it on.
Read more about “🚀 The Ultimate Raspberry Pi Setup Guide (2026): From Zero to Hero”
What accessories do I need to start using a Raspberry Pi?
H3: What accessories do I need to start using a Raspberry Pi?
You need:
- Raspberry Pi Board (Pi 4 or 5 recommended).
- Power Supply: 5V/5A USB-C for Pi 5; 5V/3A Micro-USB for Pi 4.
- MicroSD Card: 32GB+ A2 rated.
- Case: With active cooling for Pi 5.
- HDMI Cable: Micro-HDMI for Pi 4/5.
- Keyboard and Mouse: USB for initial setup.
- Monitor: Any HDMI-compatible display.
Read more about “🍓 Why Are Raspberry Pis So Rare? The 10 Truths (2026)”
How do I connect my Raspberry Pi to Wi-Fi without a monitor?
H3: How do I connect my Raspberry Pi to Wi-Fi without a monitor?
Use the Raspberry Pi Imager. Before writing the OS, click the Settings (Gear) icon. Enter your Wi-Fi SSID and password there. When the Pi boots, it will automatically connect to your network. You can then access it via SSH using ssh [email protected].
Read more about “🚀 10 Best Raspberry Pi Operating Systems for 2026: Dual Boot & Beyond”
Can I use a Raspberry Pi as a desktop computer for daily tasks?
H3: Can I use a Raspberry Pi as a desktop computer for daily tasks?
Yes, but with caveats. The Pi 5 is powerful enough for web browsing, document editing, and light media consumption. However, it is not a replacement for a high-end PC for heavy video editing, gaming, or complex multitasking. It’s perfect for a secondary machine, a kiosk, or a learning environment.
Read more about “Can I Use Raspberry Pi Pico as a PC? The Surprising Truth! 🖥️ (2026)”
What are some easy first projects for Raspberry Pi beginners?
H3: What are some easy first projects for Raspberry Pi beginners?
- Blinking LED: Learn GPIO basics.
- Retro Gaming Console: Install RetroPie.
- Pi-hole: Block ads on your network.
- Weather Station: Read sensor data.
- Home Automation Hub: Control smart lights with Home Assistant.
Read more about “🐍 12+ Languages You Can Code With on Raspberry Pi (2026)”
How do I update the software on my Raspberry Pi?
H3: How do I update the software on my Raspberry Pi?
Open the terminal and run:
sudo apt update && sudo apt full-upgrade -y
This checks for updates and installs them. For automatic updates, enable unattended-upgrades.
Read more about “🤖 25+ Amazing Things You Can Do with a Raspberry Pi (2026)”
📚 Reference Links
- Raspberry Pi Official Documentation: Getting Started
- Raspberry Pi Imager Download: Download Page
- Raspberry Pi Forums: How to set it up headlessly the first time???
- Raspberry Pi Projects: Beginer Projects
- Linux Command Line Basics: Linux.org
- Python Documentation: Python.org
- Why Pi™ – Electronics Industry News: Category
- Why Pi™ – Electronic Component Reviews: Category
- Why Pi™ – DIY Electronics: Category