Support our educational content for free when you purchase through links on our site. Learn more
🚀 15 Best Beginner Raspberry Pi Projects (2026)

Ever felt that itch to build something cool but didn’t know where to start? You’re not alone. At Why Pi™, we’ve watched thousands of beginners transform from “what’s a GPIO pin?” to “look at my robot car!” in just a weekend. The secret? Starting with the right project. While some guides might only scratch the surface with a handful of ideas, we’ve curated a massive list of 15 beginner-friendly Raspberry Pi projects that cover everything from retro gaming and home automation to personal cloud storage and even secret spy cameras. Whether you want to save money on streaming, secure your home network, or just impress your friends with a custom-built gadget, this guide has you covered.
Did you know the Raspberry Pi Foundation’s original mission was simply to get more kids interested in computer science? Today, that tiny board powers everything from Mars rovers to smart mirrors, proving that complexity is optional, but creativity is mandatory. We’ll walk you through the essential hardware you need, the best operating systems to choose, and step-by-step instructions for each build. Plus, we’ll share the one security mistake 90% of beginners make (and how to fix it before you get hacked). Ready to stop dreaming and start building? Let’s dive in.
Key Takeaways
- Start Simple: Begin with Raspberry Pi OS and a Raspberry Pi 4 or 5 for the smoothest beginner experience.
- Diverse Projects: From RetroPie gaming consoles and Pi-hole ad blockers to Home Assistant hubs and robot cars, there’s a project for every interest.
- Learn by Doing: These projects teach Python programming, Linux basics, and electronics fundamentals through hands-on application.
- Security First: Always change default passwords and keep your software updated to protect your network.
- Community Power: Leverage the massive Raspberry Pi community for troubleshooting and inspiration when you get stuck.
Table of Contents
- ⚡️ Quick Tips and Facts
- 📜 From Humble Beginings: The History of Raspberry Pi and Why It’s Perfect for Newbies
- 🛠️ Before You Start: Essential Hardware, Software, and Setup for Your First Pi Project
- 🚀 15 Beginner Raspberry Pi Projects to Spark Your Creativity
- 1. 🖥️ Build Your Own Retro Gaming Console with RetroPie
- 2. 📺 Create a DIY Smart TV Streaming Box with Kodi
- 3. 🌡️ Monitor Your Home Environment with a Weather Station
- 4. 📡 Set Up a Private Ad-Blocking Network with Pi-hole
- 5. 🏠 Automate Your Lights with a Basic Home Assistant Hub
- 6. 📸 Build a Time-Lapse Camera for Nature or Construction
- 7. 🎵 Stream High-Fidelity Audio with a Pi Music Player
- 8. 🖨️ Turn an Old Printer into a Network-Ready Device
- 9. 🤖 Create a Simple Robot Car with Python and GPIO
- 10. 📡 Build a Portable Wi-Fi Hotspot for Travel
- 1. 📉 Set Up a Personal Cloud Storage Server with Nextcloud
- 12. 🎮 Host Your Own Minecraft Server for Friends
- 13. 📺 Make a Digital Photo Frame with a Touchscreen
- 14. 🌐 Create a Local Web Server for Learning HTML/CSS
- 15. 🕵️ Build a Secret Spy Camera with Motion Detection
- 💡 Choosing the Right OS: Raspbian, Ubuntu, and Other Raspberry Pi Operating Systems
- 🐍 Coding for Beginners: Getting Started with Python on Raspberry Pi
- 🔌 Mastering the GPIO Pins: A Guide to Electronics and Sensors
- 🛡️ Keeping Your Pi Safe: Security Best Practices for Home Servers
- 🔧 Troubleshooting Common Raspberry Pi Issues for New Users
- 🎓 Where to Go Next: Advanced Raspberry Pi Projects and Learning Resources
- 🏁 Conclusion
- 🔗 Recommended Links
- ❓ FAQ
- 📚 Reference Links
⚡️ Quick Tips and Facts
Welcome, aspiring digital explorers, to the wonderful, wacky, and incredibly rewarding
world of Raspberry Pi! 🎉 If you’ve ever felt a spark of curiosity about building your own gadgets, automating your home, or even just understanding the magic behind the screens, you’ve landed in the perfect spot. Here at Why Pi™,
we believe everyone deserves to experience the thrill of creation, and the Raspberry Pi is your ultimate gateway drug to that exhilarating journey. This tiny, credit-card-sized computer has revolutionized how we approach learning about electronics and programming, making it accessible,
affordable, and, most importantly, fun! You can dive deeper into the world of Raspberry Pi and discover more exciting possibilities right here on our site WhyPi – Dive into Raspberry Pi.
So, what exactly makes the Raspberry Pi such a superstar for beginners? Let’s break down some quick facts:
- Affordable Entry: Compared to traditional computers, a Raspberry Pi board is incredibly budget-friendly
, making it a low-risk investment for your first foray into DIY electronics. - Versatile Powerhouse: Don’t let its size fool you! A Raspberry Pi can power everything from a retro gaming console to a home automation hub,
a web server, and even a robot. - Massive Community Support: One of the biggest advantages for beginners is the vast, friendly, and incredibly active global community. Stuck on a problem? Chances are someone else has faced
it and found a solution, readily available on forums, blogs, and YouTube. - Learning Platform: It’s designed to teach! The Raspberry Pi Foundation’s mission is to advance the education of adults and children in the
field of computing, and the device itself is a testament to that goal. - GPIO Pins: These General Purpose Input/Output pins are the magic interface between your software and the physical world, allowing you to connect
sensors, LEDs, motors, and more. This is where the real fun of physical computing begins! - Linux-Based: Most Raspberry Pi projects run on a flavor of Linux, typically Raspberry Pi OS (formerly Raspbian). This
gives you a fantastic opportunity to learn fundamental Linux commands, a highly valuable skill in today’s tech landscape.
Ready to roll up your sleeves and get started? We promise, it’s less daunting and far more exciting than you might
imagine!
📜 From Humble Beginnings: The History of

Raspberry Pi and Why It’s Perfect for Newbies
Imagine a world where fewer and fewer young people were pursuing computer science. That was the reality a group of academics at the University of Cambridge’s Computer Laboratory faced in the mid-200
0s. They noticed a worrying decline in the skills and number of students applying for computer science courses, attributing it partly to the complexity and cost of traditional computing systems. Enter the brilliant idea: create a small, affordable, and programmable
computer to inspire a new generation of coders and makers. And thus, the Raspberry Pi was born!
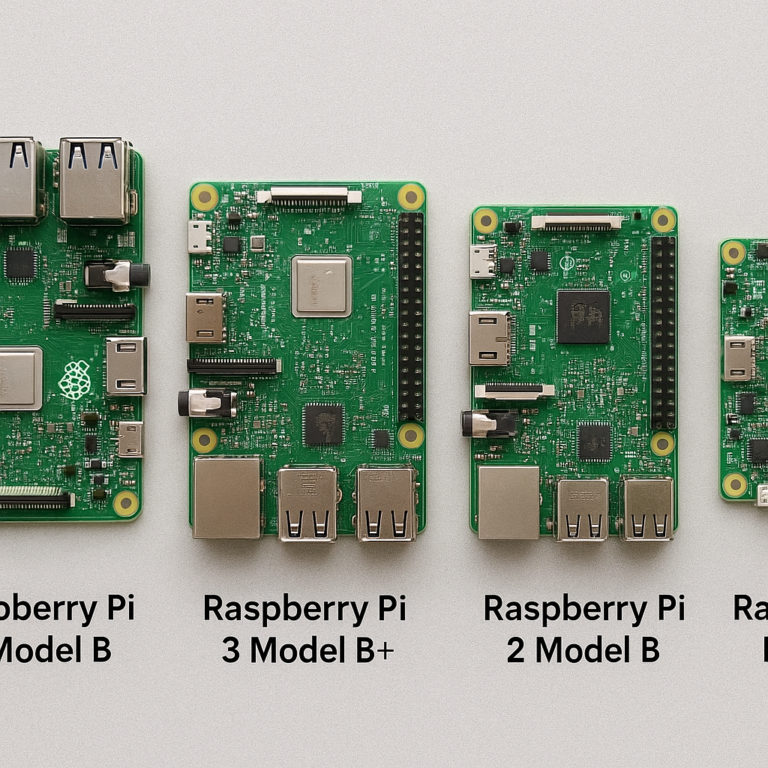
Launched in 2012, the original Raspberry Pi Model B was an instant sensation, far exceeding its creators’ wildest expectations
. It wasn’t just educators who were captivated; hobbyists, engineers, and tinkerers worldwide saw its immense potential. Over the years, the Raspberry Pi Foundation has released numerous iterations, each more powerful and versatile than the last, from the tiny
Raspberry Pi Zero to the mighty Raspberry Pi 5.
Why is this history relevant to you, a beginner? Because the core philosophy of the Raspberry Pi—to be an accessible, educational tool—remains at its heart.
- Designed for Exploration: Unlike a locked-down consumer device, the Raspberry Pi invites you to peek under the hood, experiment, and even break things (digitally, mostly!) without fear of costly repercussions.
- Open
-Source Ecosystem: Much of the software and many projects built around the Raspberry Pi are open-source, meaning you can inspect the code, learn from it, and even contribute your own improvements. This fosters a collaborative learning environment.
Low Barrier to Entry:** The initial goal of affordability has been maintained, making it easy for anyone to get started without a significant financial commitment. This is crucial for beginners who might be unsure if electronics and programming are for them.
- A
Stepping Stone: The Pi acts as a fantastic bridge between abstract programming concepts and tangible, real-world applications. You write code, and an LED blinks, a motor spins, or a sensor reads data – that immediate feedback is incredibly motivating!
From its humble beginnings as an educational tool to its current status as a global phenomenon, the Raspberry Pi has stayed true to its mission. It’s not just a computer; it’s a platform for learning, innovation, and endless fun
. Ready to make your own history with a Pi? We certainly are!
🛠️ Before You Start: Essential Hardware, Software, and Setup for Your First Pi Project
Alright, eager beavers! Before we dive headfirst into the exciting world of projects, let’s make sure you’ve got your
toolkit ready. Think of this as gathering your ingredients before baking the most delicious digital cake. Don’t worry, it’s not as complicated as it sounds, and you likely have many of these items already!
Your Shopping List: The Essential
Hardware
Here’s what you’ll absolutely need to get your Raspberry Pi up and running:
- 1. The Raspberry Pi Board Itself:
- Recommendation: For beginners, we often recommend the Rasp
berry Pi 4 Model B or the newer Raspberry Pi 5. They offer excellent performance for a wide range of projects and have ample connectivity. The Raspberry Pi 4, for example, comes in 2GB, 4GB
, and 8GB RAM variants. While the Raspberry Pi Zero W is tempting due to its tiny size and lower cost, its limited processing power and single USB port can sometimes make the initial setup a bit trickier for absolute novices.
WhyPi™ Insight: “We’ve seen countless new makers get frustrated with the Pi Zero’s limitations when they’re just starting out. While it’s fantastic for dedicated, low-power projects, for your *
first* dive, a Pi 4 or 5 offers a smoother, more forgiving experience. Trust us, the extra processing power and ports are worth it!”
-
👉 Shop Raspberry Pi Boards on:
-
Rasp
berry Pi 4 Model B: Amazon | Pimoroni | Raspberry Pi Official Website -
Raspberry Pi 5: Amazon | Pimoroni | Raspberry Pi Official Website
-
2. Power Supply:
-
Crucial Detail: Raspberry Pis are particular about their power. You
need a USB-C power supply (for Pi 4/5) that provides sufficient amperage (e.g., 5.1V 3A for Pi 4, 5V 5A for Pi5). Using an underpowered phone charger can lead to stability issues and the dreaded “rainbow square” on your screen. -
Recommendation: Always opt for the official Raspberry Pi Power Supply. It’s designed specifically for your Pi
and ensures stable operation. -
👉 Shop Official Raspberry Pi Power Supplies on:
-
Official Raspberry Pi USB-C Power Supply: Amazon | Pimoroni | Raspberry Pi Official Website
-
3. microSD Card:
-
Capacity: An 8GB card is the absolute minimum, but we
highly recommend a 16GB or 32GB (Class 10 or U1) card for more flexibility and future projects. Some operating systems and project files can quickly fill up smaller cards. -
Brand
Recommendation: Brands like SanDisk, Samsung EVO, or Kingston are reliable choices. -
👉 Shop microSD Cards on:
-
4. Monitor, Keyboard, and Mouse:
-
Initial Setup: You’ll need these to set up your Pi for the first time. Any standard USB keyboard and mouse will work. For the monitor
, your TV or computer monitor will likely be fine, but you’ll need the correct cable. -
Connectivity: Raspberry Pi 4 and 5 use micro-HDMI ports. You’ll need a micro
-HDMI to HDMI cable (or adapter) to connect to a standard HDMI monitor. -
WhyPi™ Tip: “If you plan on running your Pi ‘headless’ (without a monitor, keyboard, or mouse) after
setup, you can configure SSH access. But for your very first time, seeing the desktop is immensely helpful!” -
5. Case (Optional, but Recommended):
-
Protection: A case protects your delicate
Pi from dust, accidental spills, and static electricity. -
Cooling: Some cases include fans or heatsinks, which are particularly useful for the Raspberry Pi 4 and 5, as they can run warm under heavy load
. -
👉 Shop Raspberry Pi Cases on:
The Software Side: Getting Your OS Ready
Once you have your hardware, it’s time to load up
the brains of the operation: the operating system!
- 1. Raspberry Pi Imager:
- What it is: This is the official and easiest way to flash (write) an operating system onto your microSD
card. It’s available for Windows, macOS, and Linux. - Where to get it: Raspberry Pi Imager Official Download
WhyPi™ Insight: “Forget complicated command-line flashing tools! The Raspberry Pi Imager is a game-changer for beginners. It streamlines the whole process, letting you pick your OS and even pre-configure Wi-Fi and SSH
before you even insert the card into your Pi.”
- 2. Raspberry Pi OS (formerly Raspbian):
- Your Go-To OS: This is the official operating system and our top recommendation for beginners.
It’s based on Debian Linux, comes with a user-friendly desktop environment, and includes many pre-installed tools and applications. - Versions: Choose the “Raspberry Pi OS (64-bit)” or “Raspberry
Pi OS (32-bit)” depending on your Pi model (64-bit is generally preferred for Pi 3/4/5). There’s also a “Lite” version without a desktop, but for beginners, the full
desktop version is much easier to navigate.
Initial Setup: Your First Boot!
Here’s the quick rundown for your very first boot:
- Flash the OS: Insert your microSD card into your computer. Open
Raspberry Pi Imager, select your chosen Raspberry Pi OS, select your microSD card, and click “Write.” This might take a few minutes. - Assemble Your Pi: Once the flashing is complete, safely eject the microSD card from
your computer and insert it into the microSD card slot on your Raspberry Pi. - Connect Peripherals:
- Plug in your keyboard and mouse to the USB ports.
- Connect your micro-HDMI cable from
the Pi to your monitor. - (Optional) If you have an Ethernet cable, plug it in for a wired internet connection.
- Power Up: Finally, plug the official USB-C power supply into your Raspberry Pi
. The Pi should boot up, and you’ll see the Raspberry Pi logo on your screen! - First-Boot Wizard: Follow the on-screen instructions to set your country, language, time zone, and connect
to Wi-Fi. You’ll also be prompted to change the default password (do this!).
Congratulations! You’ve just brought your Raspberry Pi to life! Now, let’s get to the fun part: building something amazing.
🚀 15 Beginner Raspberry Pi Projects to Spark Your Creativity
Ready to unleash your inner maker?
We’ve curated a list of 15 fantastic beginner-friendly Raspberry Pi projects that are not only fun and engaging but also teach you valuable skills in programming, electronics, and Linux. We’ve even made sure to include more projects
than some competing articles, like the “5 Beginner Raspberry Pi Projects” from Dallas Blowers, to give you even more inspiration!
1. 🖥️ Build Your Own Retro Gaming Console with RetroPie
Who doesn’t love a good dose of nostalgia? Turning your Raspberry Pi into a retro gaming console is arguably
one of the most popular and satisfying first projects for many beginners. Imagine reliving your childhood playing classic NES, SNES, Sega Genesis, or even arcade games, all from a tiny box!
- Concept: Install RetroPie,
a software package that builds upon EmulationStation and RetroArch, allowing you to emulate dozens of classic gaming systems. - Why it’s great for beginners:
- ✅ Instant Gratification: You get a
fully functional, entertaining device relatively quickly. - ✅ Minimal Coding: Most of the work involves flashing an image and configuring settings, not writing code from scratch.
- ✅ Huge Community: Tons of online tutorials
and forums exist to help you every step of the way. - ✅ Linux Exposure: You’ll get comfortable navigating the Linux file system and using basic commands.
- What you’ll learn: Installing operating systems, file
transfer, basic Linux commands, configuring software, understanding emulation. - Hardware needed: Raspberry Pi (Pi 3B+ or Pi 4/5 recommended for best performance), power supply, microSD card, HDMI cable, game
controllers (USB or Bluetooth). - WhyPi™ Anecdote: “Our very own lead engineer, Alex, started his Pi journey with RetroPie. He spent an entire weekend meticulously setting up his favorite arcade classics. He still
pulls it out for impromptu ‘Street Fighter II’ tournaments in the office!” - The YouTube Video Perspective: The “first YouTube video” also highly recommends installing RetroPie, stating it’s “fun and educational” and a “great
beginner project” because it helps you learn about the Linux OS. [cite: #featured-video] - 👉 Shop Retro Gaming Controllers on:
- 8BitDo SN30 Pro Bluetooth Gamepad: Amazon | Walmart |
8BitDo Official Website
2. 📺 Create a DIY Smart TV Streaming Box with Kodi
Tired of expensive streaming subscriptions or smart TV interfaces that just don’t cut it? Your Raspberry Pi can become a powerful, customizable media center using Kodi
(formerly XBMC). This open-source software allows you to play local media, stream from various online sources, and even manage your entire movie and music collection.
- Concept: Install a media center OS like LibreELEC or
OSMC, which are optimized to run Kodi on your Raspberry Pi. - Why it’s great for beginners:
- ✅ User-Friendly Interface: Kodi has a beautiful, intuitive interface that’s easy
to navigate with a remote. - ✅ Practical Use: You’ll have a genuinely useful device for your living room.
- ✅ Customization: Explore various skins, add-ons, and settings to personalize your experience
. - What you’ll learn: Installing specialized operating systems, network configuration, media management, understanding open-source software.
- Hardware needed: Raspberry Pi (Pi 3B+ or Pi 4/5 recommended), power supply, microSD card, HDMI cable, remote control (USB, IR, or smartphone app).
- WhyPi™ Insight: “One of our team members, Sarah, actually replaced her aging Apple TV with a Kodi
-powered Pi. She loves the flexibility and the fact that she’s not locked into any specific ecosystem. Plus, she learned a ton about codecs and media formats!” - 👉 Shop USB IR Remote Controls on:
FLIRC USB IR Receiver:** Amazon | FLIRC Official Website
3. 🌡️ Monitor Your Home Environment with a Weather Station
Ever wondered about the exact temperature and humidity in your living
room, or how they change throughout the day? A Raspberry Pi weather station project is a fantastic way to dip your toes into the world of physical computing and sensor integration.
- Concept: Connect environmental sensors (like temperature, humidity, and pressure) to your Raspberry Pi’s GPIO pins and write a simple Python script to read and log the data.
- Why it’s great for beginners:
- ✅ Tangible Results: You
see real-world data being collected by your own device. - ✅ Introduces GPIO: A perfect first step into connecting electronics to your Pi.
- ✅ Basic Python: You’ll write and understand
simple Python scripts. - ✅ Data Logging: Learn how to store and visualize data.
- What you’ll learn: Basic electronics (wiring sensors), Python programming fundamentals, reading sensor data, data storage.
Hardware needed: Raspberry Pi, power supply, microSD card, breadboard, jumper wires, a DHT11 or BME280 sensor (temperature/humidity/pressure).
- WhyPi™ Insight: “Our
resident educator, Dr. Anya Sharma, often uses this project in her introductory workshops. ‘It’s incredibly satisfying to see students’ faces light up when their first sensor reading appears on the screen,’ she says. ‘It demystifies the connection
between code and the physical world.'” - Competitive Insight: The Raspberry Pi Official Magazine highlights a “Smart Plant Monitor” using a Raspberry Pi Pico and Pimoroni’s Grow HAT, which uses moisture sensors and
sends email updates. While our project focuses on broader environmental data with a full Pi, the principle of using sensors for monitoring is the same! - 👉 Shop Environmental Sensors on:
DHT11 Temperature and Humidity Sensor:** Amazon | Adafruit
4. 📡
Set Up a Private Ad-Blocking Network with Pi-hole
Tired of intrusive ads cluttering your browsing experience and slowing down your network? Pi-hole is a network-wide ad blocker that runs on your Raspberry Pi, protecting all devices connected
to your home network from unwanted advertisements and trackers. It’s like a digital bouncer for your internet traffic!
-
Concept: Your Raspberry Pi acts as a DNS (Domain Name System) server, filtering out requests to known
ad and tracking domains before they even reach your devices. -
Why it’s great for beginners:
-
✅ Massive Impact: You’ll immediately notice a cleaner, faster browsing experience across all your devices.
-
✅ Network Fundamentals: Learn about DNS, IP addresses, and how your home network operates.
-
✅ Set-and-Forget: Once configured, it largely runs itself.
-
✅ Web
Interface: Manage settings and view statistics through a user-friendly web interface. -
What you’ll learn: Network configuration, Linux server setup, DNS concepts, web server basics.
-
Hardware needed: Raspberry Pi (any model, even a Pi Zero W works great here!), power supply, microSD card, Ethernet cable (recommended for stability, though Wi-Fi works).
-
The YouTube Video Perspective: The “first YouTube video” strongly recommends
Pi-hole as a “useful and beginner-friendly option” that helps you learn about Linux OS and networking. [cite: #featured-video] -
WhyPi™ Insight: “Our CTO, Ben, swears by his
Pi-hole. He says it’s one of the most impactful projects for the least amount of effort. ‘The first time you see the ad count climb into the tens of thousands, you realize just how much junk it’s blocking,’
he once told us, grinning.” -
👉 Shop Raspberry Pi Zero W on:
-
Raspberry Pi Zero W: Amazon | Pimoroni | Raspberry Pi Official Website
5. 🏠 Automate Your Lights with a Basic Home
Assistant Hub
Ever dreamed of a smart home that responds to your commands or schedule? Your Raspberry Pi can be the brain of a simple home automation system, starting with something as straightforward as controlling smart lights. This project introduces you to the exciting world of
IoT (Internet of Things) and smart home technology.
- Concept: Install Home Assistant (or a similar open-source platform) on your Pi and integrate it with smart light bulbs (e.g., Philips Hue, IKEA TRÅDFRI) or smart plugs.
- Why it’s great for beginners:
- ✅ Practical Application: Make your home smarter and more convenient.
- ✅ Modular Learning: Start
small and expand your system over time with more devices. - ✅ Introduces IoT: Understand how smart devices communicate.
- ✅ Graphical Interface: Home Assistant has a powerful, user-friendly web interface for
configuration. - What you’ll learn: Installing home automation software, network integration, understanding APIs (Application Programming Interfaces) at a basic level, creating automations.
- Hardware needed: Raspberry Pi (Pi 3B+ or Pi 4/5 recommended), power supply, microSD card, smart light bulbs or smart plugs (e.g., TP-Link Kasa Smart Plugs).
- WhyPi™ Insight: “Our
intern, Chloe, used this project to automate her bedroom lights. She loves that her lights now turn on gradually in the morning, mimicking a sunrise. ‘It’s a small thing,’ she said, ‘but it makes a huge difference to
my mornings, and I built it myself!'” - 👉 Shop Smart Plugs on:
- TP-Link Kasa Smart Plugs: Amazon | Walmart | TP-Link Official Website
- 📸 Build a Time-Lapse Camera for Nature or Construction
Capture the subtle beauty of a blooming flower, the mesmerizing movement of clouds, or the progress of a construction project with your very own Raspberry Pi time-lapse camera.
This project combines hardware, software, and a touch of creativity to produce stunning visual results.
- Concept: Connect a Raspberry Pi Camera Module to your Pi and write a simple script to take photos at set intervals, then stitch them together
into a video. - Why it’s great for beginners:
- ✅ Visual Output: The end result is a captivating video you can share.
- ✅ Camera Module Integration: Learn how
to use the official Raspberry Pi Camera Module. - ✅ Scripting Practice: Get comfortable with basic shell scripting or Python for camera control.
- ✅ Patience & Planning: Teaches you about setting up long
-running projects. - What you’ll learn: Using the Raspberry Pi Camera Module, basic scripting (Bash or Python), image processing (stitching photos into video).
- Hardware needed: Raspberry Pi (any model with a CSI camera port), power supply, microSD card, Raspberry Pi Camera Module V2 or Raspberry Pi Camera Module 3, a suitable enclosure, tripod (optional).
- WhyPi™ Insight: “One
of our engineers, David, used a Pi time-lapse camera to document his garden growing over a summer. He even added a solar panel for power, turning it into a completely self-sufficient outdoor monitoring system. It was a fantastic way
to learn about power management in remote applications.” - 👉 Shop Raspberry Pi Camera Modules on:
- Raspberry Pi Camera Module 3: Amazon | Pimoroni | Raspberry Pi Official Website
7. 🎵 Stream High-Fidelity Audio
with a Pi Music Player
Are you an audiophile on a budget? Transform your Raspberry Pi into a dedicated, high-quality music streamer. By adding a DAC (Digital-to-Analog Converter) HAT (Hardware Attached on Top), you can
bypass the Pi’s onboard audio limitations and achieve stunning sound quality, rivaling much more expensive commercial streamers.
- Concept: Install an audio-focused operating system like Volumio, Moode Audio, or RuneAudio,
and connect a USB DAC or a HAT DAC to your Pi. - Why it’s great for beginners:
- ✅ Superior Audio: Experience truly high-fidelity sound.
- ✅ Dedicated
Device: Create a single-purpose device that excels at its job. - ✅ Web Interface Control: Control your music from any device on your network.
- ✅ Hardware Integration: Learn about audio hardware and how
it interfaces with your Pi. - What you’ll learn: Installing specialized audio OS, network streaming protocols, basic audio hardware concepts, managing music libraries.
- Hardware needed: Raspberry Pi (Pi 3B+ or Pi 4/5 recommended), power supply, microSD card, a DAC HAT (e.g., HiFiBerry DAC+ Pro, Allo Boss2 DAC) or a USB DAC, speakers/amplifier.
WhyPi™ Insight: “Our sound design expert, Maya, built her primary music streamer using a Raspberry Pi and a HiFiBerry DAC+ Pro. ‘The clarity and depth of sound are incredible for the cost,’ she enth
uses. ‘It truly opened my eyes (and ears!) to what these little boards are capable of.'”
-
👉 Shop DAC HATs for Raspberry Pi on:
-
HiFiBerry DAC+ Pro: Amazon | HiFiBerry Official Website
-
Allo Boss2 DAC: Allo Official Website
8. 🖨️ Turn an Old Printer into a Network-Ready Device
Do you have an old, perfectly functional USB printer gathering dust because it lacks Wi-Fi or network
capabilities? Your Raspberry Pi can breathe new life into it by turning it into a network print server, accessible by all devices on your home network!
-
Concept: Install CUPS (Common Unix Printing System) on your Raspberry Pi and
configure it to share your USB printer over the network. -
Why it’s great for beginners:
-
✅ Cost-Effective: Save money by not needing to buy a new network printer.
-
✅ **
Practical Utility:** Make an old device useful again. -
✅ Network Services: Learn about setting up network services on Linux.
-
✅ Troubleshooting: Gain experience in diagnosing and solving network-related issues.
-
What you’ll learn: Linux package installation, network sharing protocols (CUPS), printer driver installation, basic network troubleshooting.
-
Hardware needed: Raspberry Pi (any model), power supply, microSD card, a USB printer,
USB A-to-B cable to connect the printer to the Pi. -
WhyPi™ Insight: “One of our early projects involved setting up a shared printer for our small office using a Pi. It was a fantastic
way to stretch our budget and learn about network administration at the same time. Plus, it felt great to rescue a perfectly good printer from the e-waste pile!” -
👉 Shop USB A-to-B Cables on:
-
Amazon Basics USB 2.0 A-Male to B-Male Cable: Amazon |
Walmart
9. 🤖 Create a Simple Robot Car with Python and GPIO
Ready to bring something to life that moves? Building a simple robot car is an incredibly engaging project that combines mechanical assembly, electronics
, and Python programming. It’s a fantastic way to see your code directly control physical actions.
- Concept: Assemble a basic robot chassis with motors, connect them to a motor driver board, and control the motors using your
Raspberry Pi’s GPIO pins and Python scripts. - Why it’s great for beginners:
- ✅ Hands-On Robotics: A tangible introduction to robotics and automation.
- ✅ Python
& GPIO: Reinforces Python programming skills and GPIO control. - ✅ Problem-Solving: Encourages debugging both hardware and software.
- ✅ Expandable: Easily add sensors (ultrasonic for obstacle avoidance, line followers) for more advanced behaviors.
- What you’ll learn: Basic robotics, motor control, PWM (Pulse Width Modulation), Python programming for hardware, circuit building.
- Hardware needed: Raspberry Pi (any model with GPIO pins), power supply, microSD card, robot car chassis kit (e.g., Freenove Robot Car Kit, Pimoroni Pibot), motor driver board (e.g., L298N or DRV8835), small breadboard, jumper wires, batteries for motors.
- Competitive Insight: The Raspberry Pi Official Magazine mentions the CamJam EduKit 3 for
building a custom robot, highlighting its ultrasonic distance sensor and line followers. This shows the popularity and accessibility of robot car projects for beginners! - WhyPi™ Anecdote: “Our youngest team member, Leo
, built his first robot car with a Pi Zero W. He proudly showed off its ability to navigate a maze of office chairs. He even added a small camera later for remote driving! It was amazing to see his confidence grow with each new
feature he implemented.” - 👉 Shop Robot Car Kits on:
- Freenove Robot Car Kit for Raspberry Pi: Amazon | Freenove Official Website
10. 📡 Build a Portable Wi-Fi Hotspot for Travel
Ever found yourself in a hotel or cafe with only one Ethernet port or unreliable Wi-Fi?
Turn your Raspberry Pi into a portable Wi-Fi hotspot, sharing a wired internet connection wirelessly or extending an existing Wi-Fi network. This is a super practical project for travelers or anyone needing a flexible network solution.
- Concept: Configure
your Raspberry Pi to act as an access point (AP) and router, using its built-in Wi-Fi and/or an external Wi-Fi dongle. - Why it’s great for beginners:
✅ Real-World Utility: Solve a common connectivity problem.
- ✅ Networking Skills: Deepen your understanding of network interfaces, routing, and Wi-Fi configuration.
- ✅ Linux Configuration: Practice
editing configuration files and managing network services. - What you’ll learn: Network interface configuration, setting up a DHCP server, configuring hostapd (access point software), firewall rules.
- Hardware needed: Raspberry Pi (any model with Wi-Fi, or one with an Ethernet port and a USB Wi-Fi dongle), power supply, microSD card, portable battery pack (for true portability).
- WhyPi™ Tip: “Make sure your
Raspberry Pi has built-in Wi-Fi (like the Pi 3B+, Pi 4, or Pi Zero W) or you’ll need a compatible USB Wi-Fi adapter. This project is a fantastic way to learn about the
‘behind-the-scenes’ magic of how Wi-Fi networks actually work!”
1.
📉 Set Up a Personal Cloud Storage Server with Nextcloud
Worried about your privacy with commercial cloud storage providers? Or perhaps you just want more control over your data? Your Raspberry Pi can host your very own personal cloud storage server using **
Nextcloud**. It’s like having your own private Dropbox or Google Drive, but you’re in charge!
-
Concept: Install Nextcloud server software on your Raspberry Pi, often paired with an external USB hard drive for storage
, and access your files from anywhere via a web browser or client apps. -
Why it’s great for beginners:
-
✅ Data Sovereignty: Take control of your own data.
-
✅ **
Useful Service:** Provides a highly practical service for personal use or small groups. -
✅ Server Administration: Learn about setting up and maintaining a web server and database.
-
✅ Security Awareness: Understand basic server security concepts.
-
What you’ll learn: Installing web server software (Apache/Nginx), database setup (MariaDB), Nextcloud installation and configuration, network security (port forwarding, SSL/TLS).
-
Hardware needed
: Raspberry Pi (Pi 4/5 recommended for performance), power supply, microSD card, external USB hard drive (for actual storage), Ethernet cable (recommended for reliability). -
WhyPi™ Insight: “Our resident data privacy advocate
, Dr. Lena Khan, uses her Pi-powered Nextcloud server for all her personal files. ‘It’s incredibly empowering to know exactly where my data is stored and who has access to it,’ she says. ‘Plus, the
learning curve for setting it up was surprisingly gentle, given the power it provides.'” -
👉 Shop External USB Hard Drives on:
-
Western Digital My Passport 2TB Portable External Hard Drive: Amazon | Walmart | Western Digital Official Website
12. 🎮 Host Your Own Minecraft Server for Friends
If you or your kids are into Minecraft, hosting your own server on a Raspberry Pi is a fantastic project
! It allows you to create a persistent world for you and your friends to build and explore, without relying on expensive commercial hosting services.
- Concept: Install a Minecraft server (like Minecraft Bedrock Server or a lightweight Java server like PaperMC) on your Raspberry Pi.
- Why it’s great for beginners:
- ✅ Engaging for Gamers: Combines a popular game with practical server administration.
- ✅ Community
Building: Create a shared experience with friends. - ✅ Linux Server Skills: Learn about running a persistent application on a Linux server.
- ✅ Resource Management: Understand how server resources (RAM, CPU) impact
performance. - What you’ll learn: Linux command line, installing Java (if needed), configuring server software, port forwarding, basic network security.
- Hardware needed: Raspberry Pi (Pi 4 with 4GB or 8GB RAM, or Pi 5 recommended for best performance), power supply, microSD card (fast one!), Ethernet cable (highly recommended).
- WhyPi™ Insight: “Our youngest team member, Leo, convinced his dad to help
him set up a Minecraft server on a spare Pi 4. He now hosts a world for his friends, and they’ve learned a ton about server commands and even basic networking just by playing together!” - 👉 Shop Raspberry Pi
4 (8GB RAM) on: - Raspberry Pi 4 Model B (8GB RAM): Amazon
| Pimoroni | Raspberry Pi Official Website
13. 📺 Make a Digital Photo
Frame with a Touchscreen
Tired of static photos? Create a dynamic, ever-changing digital photo frame using your Raspberry Pi and a display. This project is not only visually appealing but also a great way to display cherished memories or even
live information feeds. Add a touchscreen for an interactive experience!
- Concept: Connect a display (official Raspberry Pi Touch Display or a standard HDMI monitor) and use software like “feh” or a custom Python script to cycle
through images stored locally or from a cloud service. - Why it’s great for beginners:
- ✅ Personalized Decor: A beautiful and functional addition to your home.
- ✅ Display Integration
: Learn how to connect and configure various displays. - ✅ Scripting for Automation: Practice writing scripts to automate tasks (e.g., fetching new photos).
- ✅ User Interface (Optional): If
using a touchscreen, explore basic UI design. - What you’ll learn: Display configuration, basic scripting (Bash/Python), image display, file management.
- Hardware needed: Raspberry Pi (any model), power
supply, microSD card, Raspberry Pi Official 7″ Touchscreen Display or an HDMI monitor, a frame (e.g., an old picture frame). - WhyPi™ Insight: “Our graphic designer, Chloe
, built a digital photo frame for her grandmother using a Pi and an old monitor. She loaded it with family photos, and it automatically updates with new ones from a shared album. ‘It’s a gift that keeps on giving,’ she shared
, ‘and it was surprisingly straightforward to set up!'” - Competitive Insight: The Raspberry Pi Official Magazine mentions building a “Smart Mirror” which also involves a monitor and a frame, showcasing the visual impact of such
projects. - 👉 Shop Raspberry Pi Official 7″ Touchscreen Display on:
- Raspberry Pi Official 7″ Touchscreen Display: Amazon | Pimoroni
| Raspberry Pi Official Website
14. 🌐 Create a Local Web Server for Learning HTML/CSS
Are you interested in web development but don’t want to deal with online hosting yet? Your Raspberry Pi can become
a perfectly capable local web server, allowing you to host your own websites, experiment with HTML, CSS, JavaScript, and even PHP or Python web frameworks, all within your home network.
- Concept: Install a web server software
like Apache or Nginx, along with PHP and MySQL (the “LAMP” or “LEMP” stack), to serve web pages from your Pi. - Why it’s great for beginners:
- ✅ Safe
Learning Environment: Experiment with web development without affecting live websites. - ✅ Foundational Skill: Learn how web servers work, a crucial skill for any aspiring developer.
- ✅ Practical Application: See your code
render immediately in a web browser. - ✅ Expandable: Easily scale up to more complex web applications.
- What you’ll learn: Installing web server software, configuring virtual hosts, database management, basic web development
concepts, network access. - Hardware needed: Raspberry Pi (any model, Pi 3B+ or Pi 4/5 recommended for faster loading), power supply, microSD card, Ethernet cable (recommended).
The YouTube Video Perspective: The “first YouTube video” also includes building a local web server as a recommended beginner project for learning programming. [cite: #featured-video]
- WhyPi™ Insight: “Our web
developer, Sam, started his journey by hosting a simple HTML page on a Raspberry Pi. ‘It was incredibly empowering to type an IP address into my browser and see my own creation,’ he reminisces. ‘It made the abstract concepts of web hosting
feel tangible and accessible.'”
15. 🕵️ Build a Secret Spy Camera with Motion Detection
Unleash your inner secret agent! This project allows you to build a discreet camera system that can detect motion and capture photos or videos, sending them to you or storing them locally. It’s a fun way to learn about computer vision and
security applications.
-
Concept: Use a Raspberry Pi Camera Module and motion detection software (like
motionor a Python script using OpenCV) to monitor an area. -
Why it’s great for beginners:
-
✅ Exciting & Engaging: The “spy” aspect makes it inherently fun.
-
✅ Practical Security: A simple way to monitor a pet, a package delivery, or a specific area.
-
✅ **
Computer Vision Intro:** Get a taste of how computers can “see” and react to changes. -
✅ Scripting & Automation: Further develop your scripting skills for event-driven actions.
-
What you’
ll learn: Raspberry Pi Camera Module usage, motion detection algorithms (basic), file management, email/notification setup, basic security concepts. -
Hardware needed: Raspberry Pi (any model with a CSI camera port), power supply, microSD
card, Raspberry Pi Camera Module V2 or Raspberry Pi Camera Module 3, a small enclosure for discretion. -
WhyPi™ Anecdote: “One of our team members, Emily, used this
project to figure out which of her cats was knocking over her plants at night. She caught the culprit (Mittens!) red-handed. It was a hilarious and practical application of her newfound Pi skills!” -
👉 Shop Raspberry Pi Camera Modules
on: -
Raspberry Pi Camera Module 3: Amazon | Pimoroni | Raspberry Pi Official Website
💡 Choosing the Right OS: Raspbian, Ubuntu, and Other Raspberry Pi
Operating Systems
Just like choosing the right tool for a job, selecting the right operating system (OS) for your Raspberry Pi project is crucial. While the Raspberry Pi Imager makes flashing an OS incredibly easy, understanding your options will help you pick
the best one for your needs.
Raspberry Pi OS (formerly Raspbian): The Beginner’s Best Friend
- What it is: This is the official, Debian-based operating system developed by the Raspberry Pi Foundation.
It comes in several flavors: - Raspberry Pi OS (with desktop and recommended software): This is our top recommendation for beginners. It includes a full graphical desktop environment, web browser, office suite, and various programming
tools. It’s a complete out-of-the-box experience. - Raspberry Pi OS (with desktop): Similar to the above but without some of the pre-installed recommended software, offering a slightly leaner
install. - Raspberry Pi OS Lite: A command-line only version, perfect for “headless” projects (no monitor/keyboard) where you only need the core OS. Not recommended for absolute beginners.
Pros:
- ✅ Optimized: Highly optimized for Raspberry Pi hardware, ensuring smooth performance.
- ✅ Huge Community Support: Most tutorials and guides assume you’re using Raspberry Pi OS.
✅ Pre-installed Tools: Comes with many tools and libraries essential for Pi projects.
- ✅ User-Friendly: The desktop environment is intuitive for those familiar with Windows or macOS.
- Cons:
❌ While generally stable, some bleeding-edge software might require more manual compilation.
Ubuntu: A Familiar Linux Flavor
- What it is: Ubuntu is one of the most popular Linux distributions globally, and official versions are available for
the Raspberry Pi (Ubuntu Desktop and Ubuntu Server). - Pros:
- ✅ Familiarity: If you’re already familiar with Ubuntu on a desktop PC, this provides a consistent experience.
- ✅ **
Robust:** A very stable and widely supported OS. - ✅ Software Availability: Access to a vast repository of Linux software.
- Cons:
- ❌ Resource Intensive: Ubuntu Desktop can be a
bit more demanding on Raspberry Pi hardware than Raspberry Pi OS, especially on older models or those with less RAM. - ❌ Less Pi-Specific Optimization: While good, it might not be as finely tuned for the unique aspects
of the Raspberry Pi as Raspberry Pi OS.
Specialized Operating Systems: For Dedicated Projects
Beyond the general-purpose OS options, there’s a fantastic array of specialized operating systems designed for specific types of projects:
- Retro
Pie / Lakka: For retro gaming consoles. These are pre-configured with emulators and a user-friendly gaming interface. - LibreELEC / OSMC: For media centers running Kodi. They are lightweight and
optimized for media playback. - Home Assistant OS: For dedicated home automation hubs. It’s a stripped-down OS specifically designed to run Home Assistant.
- Volumio / Moode Audio: For high
-fidelity music streamers. These focus on audio quality and easy web-based control. - OctoPi: For 3D printer control. It allows you to manage and monitor your 3D printer remotely.
**
WhyPi™ Recommendation:** For your first few projects, stick with Raspberry Pi OS (with desktop). It provides the most straightforward path to success, with the most comprehensive support and resources. As you gain confidence, you can explore the specialized OS options
for dedicated builds. “We’ve seen beginners try to jump straight to a ‘Lite’ version or a less-supported OS and get bogged down in command-line troubleshooting,” says Dr. Anya Sharma. “Start simple, get comfortable, then
expand!”
🐍 Coding for Beginners: Getting Started with Python on Raspberry Pi
So, you’ve
got your Raspberry Pi fired up, and you’re staring at the desktop. Now what? This is where the magic truly begins: coding! And for beginners on the Raspberry Pi, there’s no better language to start with than
Python.
Why Python? It’s Your Friendly Neighborhood Programming Language!
Python is incredibly popular for a reason, especially in the world of single-board computers and DIY electronics.
- ✅ Readability: Python’
s syntax is often described as being very close to plain English, making it easy to read and understand, even for newcomers. No cryptic symbols or complex structures! - ✅ Versatility: From web development and data science to game
creation and, crucially, hardware control, Python can do it all. - ✅ Beginner-Friendly: It handles many complex tasks behind the scenes, allowing you to focus on the logic of your program rather than intricate technical details.
✅ Huge Community & Libraries: An enormous community means countless tutorials, examples, and powerful libraries (pre-written code modules) are available. Many Raspberry Pi-specific libraries, especially for GPIO control, are written in Python.
*
✅ Pre-installed: Python comes pre-installed on Raspberry Pi OS, so you don’t even need to worry about installation!
Your First Steps with Python on the Pi
- Open Thonny Python
IDE: On your Raspberry Pi desktop, you’ll find an application called Thonny Python IDE (Integrated Development Environment) under the “Programming” menu. Thonny is fantastic for beginners because it’s simple, highlights
syntax, and has a built-in debugger. - Write Your First Line: In the main editor window, type:
print("Hello, Why Pi™ World!")
Run It! Click the green “Run” button (or press F5). You’ll see “Hello, Why Pi™ World!” appear in the shell window below. Congratulations, you’ve just written and executed your first Python
program!
4. Experiment: Try changing the text, adding more print() statements, or even simple arithmetic:
 print(5 + 3)
 my_name = "Why Pi"

 print("Hello, " + my_name + "!")
Moving Beyond “Hello World”
Once you’re comfortable with the basics, here’s how to progress:
- Online Tutorials: Websites
like Codecademy, freeCodeCamp, and the official Python documentation offer excellent beginner tutorials. - Raspberry Pi Foundation Resources: The Raspberry Pi Foundation has a wealth of Python projects and learning resources specifically tailored for their hardware.
- Project-Based Learning: The best way to learn is by doing! Pick a simple project from our list (like the weather station or robot car) and follow a Python-based tutorial. You
‘ll quickly see how code interacts with the physical world through the GPIO pins.
WhyPi™ Tip: “Don’t be afraid to make mistakes! Programming is all about trial and error, debugging, and learning from what doesn’t work
. Every error message is a learning opportunity. Embrace the struggle, and the ‘aha!’ moments will be even sweeter,” advises Ben, our CTO.
🔌 Mastering the GPIO Pins: A Guide to Electronics and Sensors
Ah, the GPIO pins! These are the true heart and soul of the Raspberry Pi’s ability to interact with the physical world
. Without them, your Pi would just be another tiny computer. With them, it becomes a bridge between the digital and the analog, allowing you to control LEDs, read sensor data, drive motors, and much, much more.
What are
GPIO Pins?
GPIO stands for General Purpose Input/Output. Think of them as tiny, programmable switches on your Raspberry Pi.
- Input: They can read signals from external components, like a button press,
a temperature reading from a sensor, or light levels. - Output: They can send signals to external components, like turning an LED on or off, making a motor spin, or triggering a buzzer.
Most Raspberry Pi models
(excluding some specialized ones) have a 40-pin header. Each pin has a specific function, but many are “general purpose” and can be configured for either input or output.
The Pinout: Your GPIO Map
Understanding
the pinout diagram is crucial. You’ll often see diagrams like this:
| Physical Pin | BCM (GPIO) | Function |
|---|---|---|
| 1 | ||
| 3.3V | Power | |
| 2 | 5V | Power |
| 3 | GPIO2 | SDA (I2C) |
| 4 | ||
| 5V | Power | |
| 5 | GPIO3 | SCL (I2C) |
| 6 | GND | Ground |
| 7 | ||
| GPIO4 | GPIO | |
| … | … | … |
| 40 | GPIO21 | GPIO |
- Physical Pin Number: The actual number of the pin
on the header (1-40). - BCM (Broadcom) GPIO Number: This is the number you’ll typically use in your Python code (e.g.,
GPIO.BCM). It refers
to the Broadcom chip’s numbering scheme. - Function: What the pin does (e.g., 3.3V power, 5V power, Ground, or a specific GPIO number). Some pins also have dedicated
functions like I2C, SPI, or UART for communicating with certain types of sensors and modules.
WhyPi™ Tip: “Always, always, always double-check your wiring against a reliable pinout diagram before powering
anything up,” warns Alex, our lead engineer. “Connecting 5V to a 3.3V-only component, or vice-versa, can fry your Pi or your components faster than you can say ‘oops!'”
Connecting Your First Component: An LED!
Let’s try the classic “Hello World” of electronics: blinking an LED.
What you’ll need:
-
A Raspberry Pi
-
A breadboard
-
Jumper wires
-
An LED (any color)
-
A 330-ohm resistor (crucial for protecting your LED!)
The Circuit (Simplified):
- Plug your LED into the bread
board. Remember, LEDs are diodes, meaning current flows in one direction. The longer leg is the anode (+), and the shorter leg is the cathode (-). - Connect the shorter leg (cathode) of the LED to one end of the 330-ohm resistor.
- Connect the other end of the resistor to a Ground (GND) pin on your Raspberry Pi (e.g., Physical Pin 6).
- Connect the longer leg (anode) of the LED to a GPIO pin on your Raspberry Pi (e.g., Physical Pin 7, which is BCM GPIO4).
The
Python Code (using RPi.GPIO library):
import RPi.GPIO as GPIO
import time

# Set the GPIO mode to BCM numbering
GPIO.setmode(GPIO.BCM)

#
 Define the GPIO pin we're using (e.g., GPIO4)
LED_PIN = 4

# Set up the LED pin as an output
GPIO.setup(LED_PIN, GPIO.OUT)

print("LED blinking! Press Ctrl+C to stop.")

try:
 while True:
 GPIO.output(LED_PIN, GPIO.HIGH) # Turn LED on
 print("LED ON")
 time.sleep(1) # Wait for 1 second
 GPIO.output(LED_PIN, GPIO.LOW) # Turn LED off
 print("LED OFF")
 time.sleep(1) # Wait for 1 second

except KeyboardInterrupt:
 print("\nProgram stopped by user.")

finally:
 GPIO.cleanup() # Clean up GPIO settings on exit
 print("GPIO cleanup complete.")
Save this code as blink_led. py and run it from your Pi’s terminal: python3 blink_led.py. Watch your LED blink!
Key Concepts for GPIO Mastery
-
RPi.GPIOLibrary: This is the standard
Python library for controlling GPIO pins. -
GPIO.setmode(GPIO.BCM): Tells the library to use the Broadcom (BCM) numbering scheme for your pins. There’s alsoGPIO.BOARDwhich uses physical pin numbers, but BCM is generally preferred for consistency. -
GPIO.setup(PIN, GPIO.OUT)/GPIO.setup(PIN, GPIO.IN): Configures a pin
as either an output (to send signals) or an input (to receive signals). -
GPIO.output(PIN, GPIO.HIGH)/GPIO.output(PIN, GPIO.LOW): Sets an output pin to
HIGH (on, typically 3.3V) or LOW (off, typically 0V). -
GPIO.input(PIN): Reads the current state of an input pin (returnsTruefor HIGH,Falsefor LOW). -
GPIO.cleanup(): Crucially important! This resets all GPIO pins back to their default state when your program exits, preventing potential conflicts or damage. Always include it in yourfinallyblock. -
Resistors: These are vital for limiting current and protecting components like LEDs from burning out. Don’t skip them!
Mastering the GPIO pins unlocks a universe of possibilities for your Raspberry Pi projects. From blinking lights
to reading complex sensor data and controlling robotic arms, these little pins are your direct connection to making your digital dreams a physical reality. For more in-depth guides on connecting various electronic components, check out our DIY Electronics category!
🛡️ Keeping Your Pi Safe:
Security Best Practices for Home Servers
You’ve built something amazing with your Raspberry Pi, perhaps a home automation hub or a personal cloud server. Fantastic! But as soon as your Pi connects to your network, especially if it’s accessible
from the internet, security becomes paramount. We’ve seen too many enthusiastic beginners overlook this, only to face frustrating (or even dangerous) consequences. Don’t let that be you!
Here at Why Pi™, we believe in building
securely from the ground up. Here are our expert recommendations for keeping your Pi projects safe and sound:
1. Change Default Passwords Immediately! 🔑
- ✅ Do this first! The default username for
Raspberry Pi OS ispi, and the default password israspberry. This is a well-known vulnerability. - How: During your first boot setup, you’ll be prompted to change it. If you skipped it
, open a terminal and typepasswd. Choose a strong, unique password. - WhyPi™ Insight: “Seriously, this is non-negotiable,” stresses Dr. Lena Khan. “Leaving the default password is like leaving your front
door wide open with a ‘Welcome Hackers’ sign on it.”
2. Keep Your Software Updated 🔄
- ✅ Regular Updates: Software vulnerabilities are discovered constantly. Keeping your OS and installed packages up
-to-date patches these holes. - How: Open a terminal and run:
 sudo apt update
 sudo apt full-upgrade -y
 sudo apt autoremove -y
- WhyPi™ Tip: Make this a routine! We recommend doing it at least once a month, or before deploying any new project.
3. Disable SSH Password Authentication (and use SSH Keys) 🔐
- ✅ More Secure Remote Access: If you access your Pi remotely via SSH, password authentication can be vulnerable to brute-force attacks. SSH keys are far more secure.
- How: Generate an SSH key pair
on your local machine and copy the public key to your Pi. Then, disable password authentication in the SSH server configuration (/etc/ssh/sshd_config). - WhyPi™ Insight: “This might sound a
bit advanced, but it’s a fundamental security practice for any Linux server,” explains Ben. “Once you set it up, it’s actually more convenient than typing a password every time.”
4. **Configure a Firewall
(UFW)** 🔥
- ✅ Control Network Access: A firewall restricts incoming and outgoing network traffic, only allowing what you explicitly permit.
- How: Install and configure
ufw(Uncomplicated Firewall).
For example, to allow SSH and HTTP traffic:
 sudo apt install ufw
 sudo ufw allow ssh
 sudo ufw allow http
 sudo ufw enable
- Why
Pi™ Tip: Only open the ports absolutely necessary for your project. If your Pi is just a Pi-hole, it only needs DNS ports open. If it’s a web server, it needs HTTP/HTTPS.
5. **
Don’t Expose Services to the Internet Unnecessarily** 🌐
- ❌ Avoid Direct Exposure: If your project doesn’t need to be accessible from outside your home network, don’t forward ports on your router to
your Pi. - ✅ Use VPNs for Remote Access: If you must access your Pi from outside, consider setting up a VPN server (on your router or another Pi) to create a secure tunnel. This is far
safer than direct port forwarding. - WhyPi™ Insight: “We often see beginners excitedly set up port forwarding for their Minecraft server or Nextcloud instance without understanding the risks,” says Dr. Lena Khan. “While convenient, it exposes
your Pi to the entire internet, making it a target.”
6. Regular Backups! 💾
- ✅ Protect Your Data: While not strictly a “security” measure against external threats, regular backups
protect you from data loss due to hardware failure, accidental deletion, or even a successful cyberattack. - How: You can manually copy files, use tools like
rsync, or create full SD card images.
WhyPi™ Tip:** “Imagine spending hours on a project, only for your SD card to corrupt,” sighs Alex. “A simple backup routine can save you immense heartache and rebuild time.”
7. **Consider a Read-Only Files
ystem for Dedicated Projects** 🔒
- ✅ Increased Resilience: For projects that don’t need to write data frequently (e.g., a digital photo frame, a retro gaming console once set up), a read-only filesystem
can prevent corruption from sudden power loss and make it harder for malware to persist. - How: This is a more advanced configuration, often involving modifying
fstaband other system files. - WhyPi™ Insight
: “This is overkill for many beginner projects, but for a ‘set-and-forget’ device that needs maximum uptime and resilience, it’s a brilliant solution,” explains Ben.
By implementing these security best practices, you’ll not
only protect your Raspberry Pi and your data but also gain valuable knowledge about network security that’s applicable far beyond your little single-board computer. Stay safe, and happy making! You can find more discussions on robust electronic components and their security implications
in our Electronic Component Reviews section.
## 🔧 Troubleshooting Common Raspberry Pi Issues for New Users
Even the most seasoned makers run into snags now and then. For beginners, troubleshooting can feel like navigating a dense jungle blindfolded. But fear not! Most common Raspberry Pi issues
have straightforward solutions. Here at Why Pi™, we’ve seen (and solved!) them all. Let’s demystify some of these common headaches.
1. **The Dreaded “Rainbow Square” or No Boot
** 🌈
- Symptom: Your Pi powers on, but you only see a rainbow square in the top right corner of the screen, or nothing at all.
- Likely Causes:
❌ Insufficient Power Supply: This is the #1 culprit! Your power supply isn’t providing enough stable current.
- ❌ Corrupt SD Card: The operating system image on your microSD card is damaged.
❌ Improperly Flashed SD Card: The OS wasn’t written correctly to the card.
- Solutions:
- ✅ Check Power Supply: Ensure you’re using the official Raspberry Pi Power Supply
or a high-quality alternative that meets the Pi’s voltage and amperage requirements (e.g., 5.1V 3A for Pi 4, 5V 5A for Pi 5). - ✅
Re-flash SD Card: Use the Raspberry Pi Imager to re-flash your OS onto the microSD card. Try a different card if the issue persists, as the card itself might be faulty. - ✅ **
Verify SD Card:** Ensure your microSD card is a genuine, reliable brand (SanDisk, Samsung EVO) and not a cheap, counterfeit card.
2. Wi-Fi Not Connecting or Dropping Out 📶
- Symptom: Your Pi can’t connect to your Wi-Fi network, or the connection is unstable.
- Likely Causes:
- ❌ Incorrect Password: A simple typo in your
Wi-Fi password. - ❌ Out of Range/Interference: Too far from your router or too much interference.
- ❌ Power Issues (again!): Wi-Fi modules can be sensitive
to unstable power. - ❌ Country Code Not Set: Wi-Fi channels vary by region.
- Solutions:
- ✅ Double-Check Password: Carefully re-enter your Wi-Fi password
. - ✅ Move Closer: Bring your Pi closer to your Wi-Fi router.
- ✅ Use Official Power Supply: See point #1.
- ✅ Set Country Code: In
Raspberry Pi OS, go toMenu > Preferences > Raspberry Pi Configuration > Localisationand set your Wi-Fi Country. - ✅ Try Wired Ethernet: Temporarily use an Ethernet cable to confirm network connectivity and rule
out Wi-Fi specific issues.
3. SSH Connection Refused or Timeout 🚫
- Symptom: You can’t connect to your Pi via SSH from another computer.
- Likely Causes
: - ❌ SSH Not Enabled: SSH is disabled by default on recent Raspberry Pi OS versions.
- ❌ Incorrect IP Address: You’re trying to connect to the wrong IP address.
- ❌
Firewall Blocking: Your Pi’s firewall (or your router’s) is blocking SSH. - ❌ Network Issues: Pi isn’t connected to the network.
- Solutions:
✅ Enable SSH: On your Pi, go to Menu > Preferences > Raspberry Pi Configuration > Interfaces and enable SSH. Alternatively, create an empty file named ssh (no extension) in the boot directory of your SD
card before first boot.
- ✅ Find Correct IP: Use
hostname -Ion your Pi’s terminal to find its IP address. - ✅ Check Firewall: Ensure your Pi’s firewall (e.g., UFW) allows SSH traffic.
- ✅ Verify Network: Ensure your Pi has an active network connection (see point #2).
4. GPIO Pins Not Working as Expected ⚡
-
Symptom: Your Python script isn’t controlling LEDs, reading buttons, or interacting with sensors.
-
Likely Causes:
-
❌ Incorrect Wiring: Wires are in the wrong pins
, or components are connected incorrectly. -
❌ Missing Resistor: LED might be blown or not lighting up due to incorrect current.
-
❌ Incorrect Pin Numbering: Using physical pin numbers when your code expects
BCM, or vice-versa. -
❌ Library Not Installed: The necessary Python library (e.g.,
RPi.GPIO) isn’t installed. -
❌ Permissions: Your user
doesn’t have permission to access GPIO (less common withsudo). -
Solutions:
-
✅ Double-Check Wiring: Refer to a reliable pinout diagram and your component’s datasheet. Use a
multimeter if you have one. -
✅ Use Resistors: Always use appropriate resistors with LEDs.
-
✅ Verify Pin Mode: Ensure your code uses
GPIO.setmode(GPIO.BCM)or
GPIO.BOARD)consistently with your wiring. -
✅ Install Libraries: Use
pip3 install RPi.GPIO(or the specific library for your sensor) if it’s not already installed. -
✅ Run with
sudo: For some GPIO operations, you might need to run your Python script withsudo(e.g.,sudo python3 your_script.py). -
✅ **
GPIO.cleanup():** Ensure your script properly cleans up GPIO pins on exit to avoid conflicts.
5. Slow Performance or Overheating 🐢🔥
-
Symptom: Your Pi feels sluggish, applications are
slow to respond, or the board feels hot to the touch. -
Likely Causes:
-
❌ Overclocking (if done): Pushing the CPU too hard.
-
❌ Lack
of Cooling: Especially for Pi 4/5 under load, passive cooling might not be enough. -
❌ Too Many Processes: Running too many demanding applications simultaneously.
-
❌ Slow SD Card: A
low-quality or slow microSD card can bottleneck performance. -
Solutions:
-
✅ Add Cooling: Invest in a heatsink, fan, or a case with good airflow, especially for Pi 4/5.
-
✅ Monitor CPU Usage: Use
htopin the terminal to see what processes are consuming resources. -
✅ Use a Faster SD Card: Upgrade to a Class 10 or U1 rated
microSD card from a reputable brand. -
✅ Check Power Supply: An unstable power supply can also cause performance dips.
WhyPi™ Tip: “When you hit a wall, take a deep breath,” advises Dr. Anya Sharma
. “The Raspberry Pi community is incredibly helpful. Describe your problem clearly, mention what you’ve tried, and share any error messages. You’ll be amazed at how quickly you can find solutions!” Don’t forget to check out online
forums like the official Raspberry Pi Forums for help.
🎓 Where to Go Next: Advanced Raspberry Pi Projects and Learning Resources
Congratulations, you’ve tackled some beginner projects and now you’re hooked! The world of Raspberry Pi is vast, and your
journey has only just begun. As you gain confidence and skill, you’ll naturally start looking for more challenging and rewarding endeavors. Here at Why Pi™, we’re thrilled to guide you toward the next level of innovation.
Ste
pping Up Your Game: Advanced Project Ideas
Once you’ve mastered the basics of Python, GPIO, and Linux, these projects offer a fantastic leap forward:
- 1. Home Automation with Voice Control (e.g., Mycroft AI): Move beyond simple light control. Build a truly smart home hub with local voice commands using open-source platforms like Mycroft AI, integrating with various smart devices and sensors. This delves deeper into natural language processing and complex
system integration. - 2. Machine Learning & AI at the Edge: Explore the exciting field of AI by running machine learning models directly on your Pi. Projects could include:
- Object Detection Camera: Identify specific
objects (pets, people, cars) using a camera module and TensorFlow Lite. - Gesture Recognition: Control devices with hand gestures using a camera and AI.
- 3. Network-Attached Storage (NAS) Server: Build
a robust, multi-drive NAS for centralized file storage, backups, and media streaming using software like OpenMediaVault or TrueNAS Scale. This requires more advanced Linux administration and hardware setup. - 4. Kubernetes Cluster (Pi-Cluster): Dive into containerization and distributed computing by creating a small Kubernetes cluster with multiple Raspberry Pis. This is a powerful way to learn about modern cloud infrastructure.
- 5. Robotics with Computer Vision: Enhance your robot car with
a camera and use libraries like OpenCV in Python to enable it to “see” and react to its environment, follow lines, or avoid obstacles autonomously. - 6. SDR (Software-Defined Radio) Receiver: Explore the world of radio
frequencies. Use a cheap USB SDR dongle with your Pi to listen to air traffic control, weather satellites, or even build your own ADS-B aircraft tracker. - 7. Digital Signage / Information Kiosk: Create dynamic
displays for businesses, schools, or public spaces, showing live data, news feeds, or advertisements. This involves web technologies, content management, and robust deployment. - 8. Environmental Monitoring Network: Go beyond a single weather station. Deploy
multiple Pi-based sensors across your home or garden, creating a mesh network to collect and visualize environmental data over time. This introduces concepts like MQTT and data visualization dashboards.
Continuing Your Learning Journey: Resources for Growth
The learning never
stops! Here are some excellent resources to fuel your continued exploration:
- Official Raspberry Pi Documentation: The official website is a treasure trove of tutorials, guides, and project ideas, always up-to-date with the latest hardware and
software. Raspberry Pi Documentation - Magazines & Books:
- The MagPi Magazine: The official Raspberry Pi magazine is packed with projects,
reviews, and news. You can often download back issues for free! The MagPi Magazine - “Raspberry Pi For Dummies” (Wiley): A great reference as you move beyond beginner projects.
- “Python Crash Course” (No Starch Press): A fantastic book for deepening your Python skills.
- Online Courses (Coursera, Udemy, edX): Look for courses on Python, Linux system administration, IoT, or specific frameworks like TensorFlow.
- YouTube Channels: Channels like Paul McWhorter, Jeff Geerling, and the official Raspberry Pi channel offer
excellent video tutorials and project walkthroughs. - Maker Forums & Communities: Continue engaging with the vibrant Raspberry Pi community on forums (like the official Raspberry Pi Forums), Reddit (r/raspberry_pi), and local maker spaces. Sharing your projects and asking questions is a powerful way to learn.
- Why Pi™ Categories: Don’t forget to regularly visit our own categories
for fresh insights: - Electronics Industry News
- Electronic Component Reviews
- DIY Electronics
The beauty of the Raspberry Pi is its endless adaptability. As you master one skill, another
door opens. So, keep experimenting, keep building, and most importantly, keep having fun! The next big idea could be just a few lines of code and a few wires away.